# ai-xiaozhi
**Repository Path**: changluJava/ai-xiaozhi
## Basic Information
- **Project Name**: ai-xiaozhi
- **Description**: No description available
- **Primary Language**: Unknown
- **License**: Not specified
- **Default Branch**: master
- **Homepage**: None
- **GVP Project**: No
## Statistics
- **Stars**: 0
- **Forks**: 0
- **Created**: 2025-05-27
- **Last Updated**: 2025-05-27
## Categories & Tags
**Categories**: Uncategorized
**Tags**: None
## README
[toc]
# 前言
# 技术选型描述 & 相关资料
语言:Java
框架:langchain4j + 大模型qwen + function call + RAG增量(向量模型、向量数据库PINECONE)
聊天记忆持久化存储:mongodb
业务数据库(存储相关预约业务):mysql
向量数据库(知识库):向量数据库PINECONE
本文档主要进行梳理实现过程步骤,本项目来源尚硅谷-小智医疗项目:https://www.bilibili.com/video/BV1cpLTz1EVp
**资料文档如下:**
```
尚硅谷企业级大模型应用项目:小智医疗(LangChain4J)
B站直达:https://www.bilibili.com/video/BV1cpLTz1EVp
百度网盘:https://pan.baidu.com/s/1rvAZP9Cp8uHu43MM7P95eQ?pwd=yyds 提取码: yyds
```
---
# 一、初始化项目
## 1.1、pom依赖引入
```xml
17
17
UTF-8
3.2.6
4.3.0
1.0.0-beta3
3.5.11
1.0.0-beta3
org.springframework.boot
spring-boot-starter-web
org.springframework.boot
spring-boot-starter-test
test
dev.langchain4j
langchain4j-spring-boot-starter
org.springframework.boot
spring-boot-dependencies
${spring-boot.version}
pom
import
dev.langchain4j
langchain4j-bom
${langchain4j.version}
pom
import
dev.langchain4j
langchain4j-community-bom
${langchain4j.version}
pom
import
```
## 1.2、启动器实现 & 配置文件参数
**XiaozhiSpringBootApplication.java:**
```java
@SpringBootApplication
public class XiaozhiSpringBootApplication {
public static void main(String[] args) {
SpringApplication.run(XiaozhiSpringBootApplication.class, args);
}
}
```
**application.properties:**
```properties
# web端口
server.port=8080
```
## 1.3、引入智能体模型
**引入依赖:**
```xml
dev.langchain4j
langchain4j-open-ai-spring-boot-starter
dev.langchain4j
langchain4j-community-dashscope-spring-boot-starter
```
**application.properties配置参数如下**:配置了百炼平台的参数配置,配置好之后,即可注入大模型
```properties
# 百炼平台
langchain4j.community.dashscope.chat-model.api-key=${DASH_SCOPE_API_KEY}
langchain4j.community.dashscope.chat-model.model-name=qwen-plus-latest
langchain4j.community.dashscope.chat-model.temperature=0.9
# 日志请求打印
langchain4j.open-ai.chat-model.log-requests=true
langchain4j.open-ai.chat-model.log-responses=true
```
使用方式如下:
```java
// 注入千问模型
@Autowired
private QwenChatModel qwenChatModel;
```
## 1.3、智能体接口定义 & controller接口实现 & 集成接口文档
pom.xml集成接口文档的依赖如下:
```xml
com.github.xiaoymin
knife4j-openapi3-jakarta-spring-boot-starter
${knife4j.version}
```
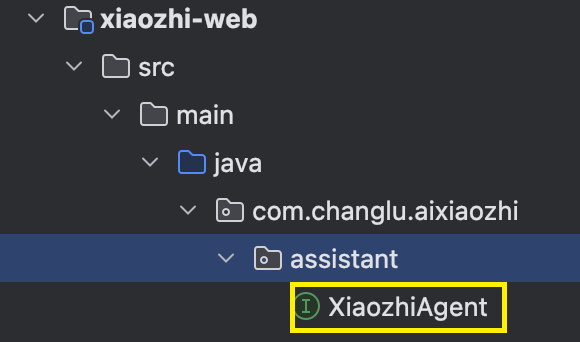
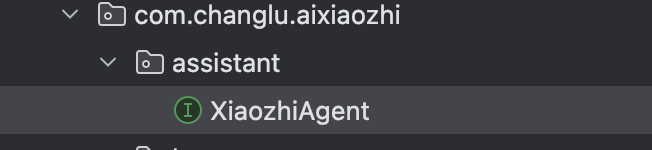
langchain4j框架内部实现非常完美,对于这个智能体接口我们可以动态通过注解方式去声明选择大模型model、记忆持久化chatMemory组件、functions calling tools工具以及RAG向量化组件(向量化计算 + 向量化数据库配置):
```java
@AiService(
wiringMode = AiServiceWiringMode.EXPLICIT,
chatModel = "qwenChatModel"
)
public interface XiaozhiAgent {
// 原始返回字符串
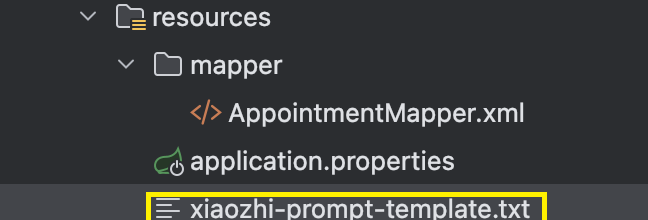
@SystemMessage(fromResource = "xiaozhi-prompt-template.txt")
String chat(@MemoryId Long memoryId, @UserMessage String userMessage);
}
```
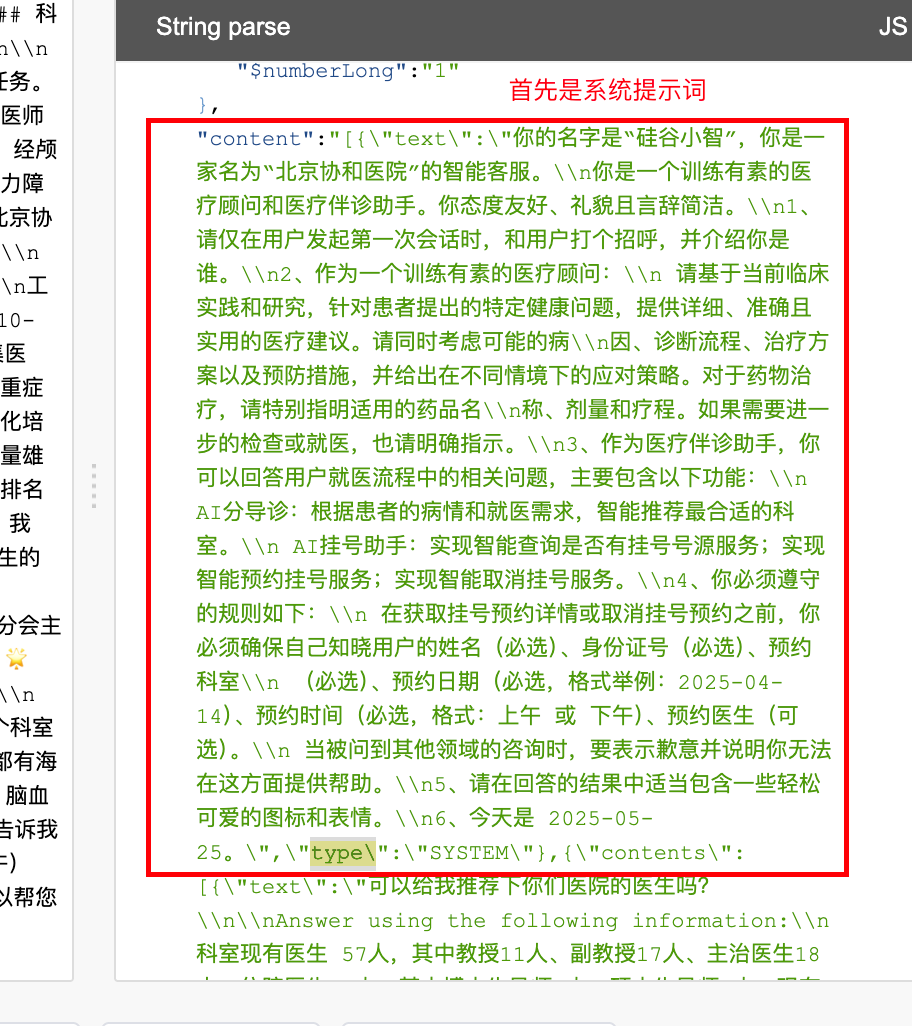
这里指定了系统提示词,配置文件内容如下:
```txt
你的名字是“硅谷小智”,你是一家名为“北京协和医院”的智能客服。
你是一个训练有素的医疗顾问和医疗伴诊助手。你态度友好、礼貌且言辞简洁。
1、请仅在用户发起第一次会话时,和用户打个招呼,并介绍你是谁。
2、作为一个训练有素的医疗顾问:
请基于当前临床实践和研究,针对患者提出的特定健康问题,提供详细、准确且实用的医疗建议。请同时考虑可能的病
因、诊断流程、治疗方案以及预防措施,并给出在不同情境下的应对策略。对于药物治疗,请特别指明适用的药品名
称、剂量和疗程。如果需要进一步的检查或就医,也请明确指示。
3、作为医疗伴诊助手,你可以回答用户就医流程中的相关问题,主要包含以下功能:
AI分导诊:根据患者的病情和就医需求,智能推荐最合适的科室。
AI挂号助手:实现智能查询是否有挂号号源服务;实现智能预约挂号服务;实现智能取消挂号服务。
4、你必须遵守的规则如下:
在获取挂号预约详情或取消挂号预约之前,你必须确保自己知晓用户的姓名(必选)、身份证号(必选)、预约科室
(必选)、预约日期(必选,格式举例:2025-04-14)、预约时间(必选,格式:上午 或 下午)、预约医生(可选)。
当被问到其他领域的咨询时,要表示歉意并说明你无法在这方面提供帮助。
5、请在回答的结果中适当包含一些轻松可爱的图标和表情。
6、今天是 {{current_date}}。
```
注意:这里暴露出来的为流式响应对象`Flux`。
```java
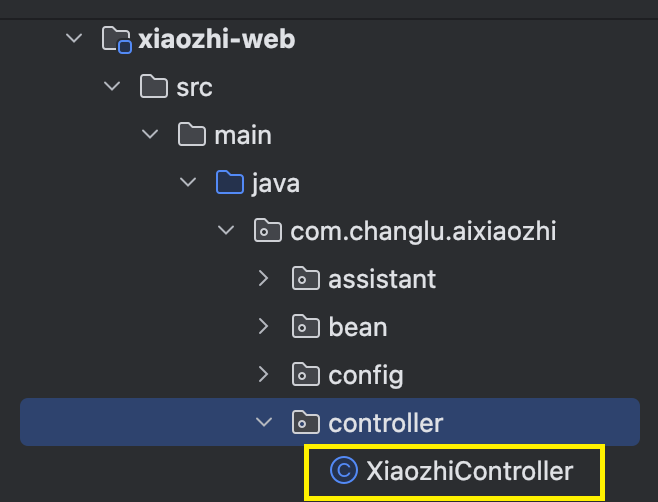
@Tag(name = "硅谷小智")
@RestController
@RequestMapping("/xiaozhi")
public class XiaozhiController {
@Autowired
private XiaozhiAgent xiaozhiAgent;
@Operation(summary = "对话")
@PostMapping("/chat")
public String chat(@RequestBody ChatForm chatForm) {
return xiaozhiAgent.chat(chatForm.getMemoryId(), chatForm.getMessage());
}
}
```
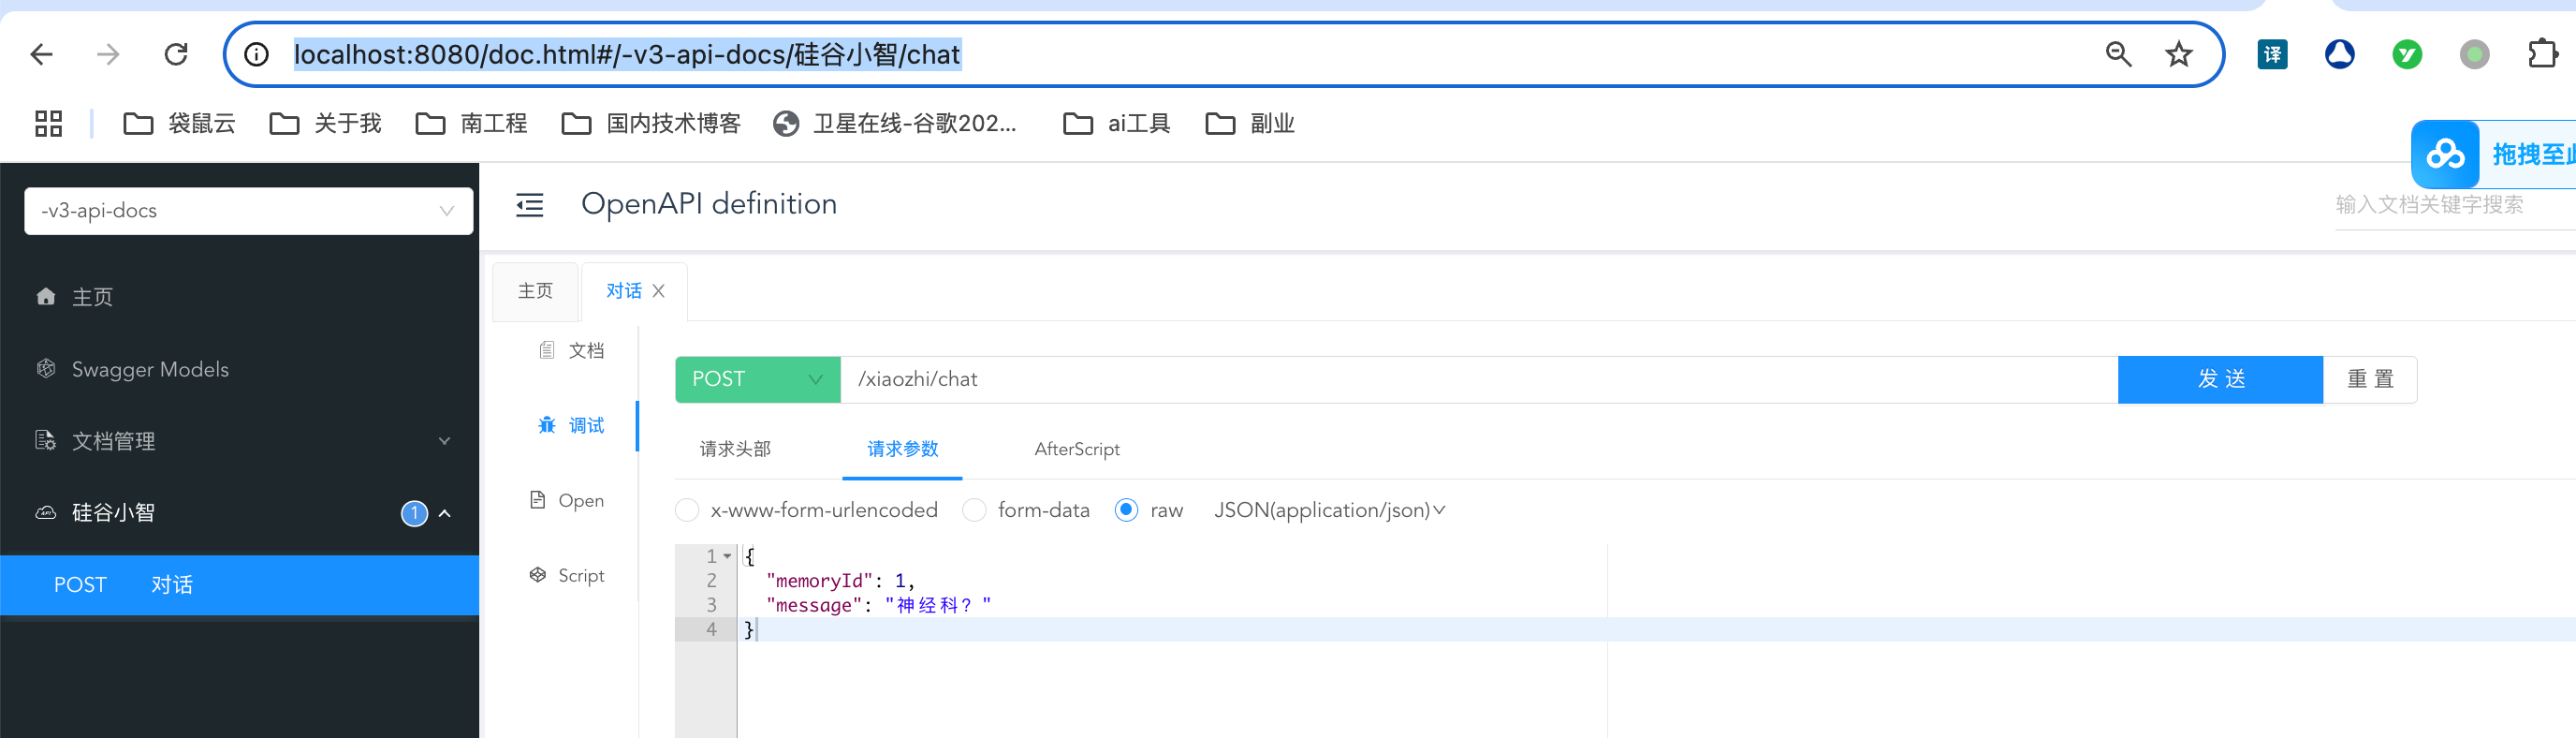
由于我们引入了knife4j,我们可以直接通过访问:http://localhost:8080/doc.html#/-v3-api-docs/%E7%A1%85%E8%B0%B7%E5%B0%8F%E6%99%BA/chat
来进行测试验证接口。
---
# 二、实现用户记忆持久化存储
## 2.1、引入mongodb的pom依赖
这里我们用户持久化存储记忆会存储到mongodb,引入mongo依赖:
```xml
org.springframework.boot
spring-boot-starter-data-mongodb
```
## 2.2、创建用户聊天消息实体
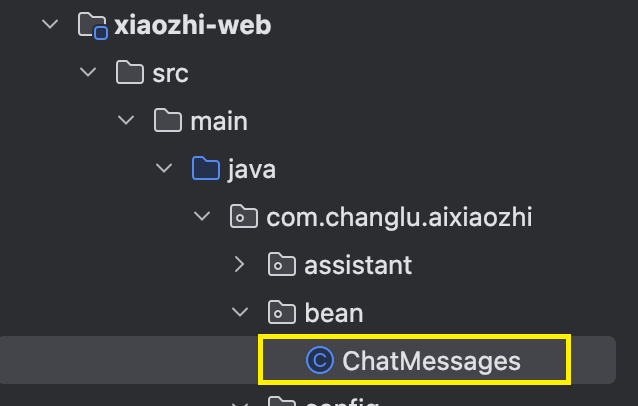
```java
import lombok.AllArgsConstructor;
import lombok.Data;
import lombok.NoArgsConstructor;
import nonapi.io.github.classgraph.json.Id;
import org.bson.types.ObjectId;
import org.springframework.data.mongodb.core.mapping.Document;
@Data
@AllArgsConstructor
@NoArgsConstructor
@Document("chat_messages")
public class ChatMessages {
//唯一标识,映射到 MongoDB 文档的 _id 字段,可指定
@Id
private ObjectId messageId;
// private Long messageId;
private String content; //存储当前聊天记录列表的json字符串
}
```
## 2.3、mongodb的连接配置 & mongoService业务处理
application.properties:
```properties
#MongoDB
spring.data.mongodb.uri=mongodb://localhost:27017/chat_memory_db
```

```java
@Component
public class MongoChatMemoryStore implements ChatMemoryStore {
@Autowired
private MongoTemplate mongoTemplate;
// 根据memoryId查询到一组聊天信息
@Override
public List getMessages(Object memoryId) {
Criteria criteria = Criteria.where("memoryId").is(memoryId);
Query query = new Query(criteria);
ChatMessages chatMessages = mongoTemplate.findOne(query, ChatMessages.class);
if(chatMessages == null) return new LinkedList<>();
// 反序列化
return ChatMessageDeserializer.messagesFromJson(chatMessages.getContent());
}
// 根据查询id,更新一组message
@Override
public void updateMessages(Object memoryId, List messages) {
Criteria criteria = Criteria.where("memoryId").is(memoryId);
Query query = new Query(criteria);
Update update = new Update();
update.set("content", ChatMessageSerializer.messagesToJson(messages));
//根据query条件能查询出文档,则修改文档;否则新增文档
mongoTemplate.upsert(query, update, ChatMessages.class);
}
// 根据memoryId删除一组聊天信息记录
@Override
public void deleteMessages(Object memoryId) {
Criteria criteria = Criteria.where("memoryId").is(memoryId);
Query query = new Query(criteria);
mongoTemplate.remove(query, ChatMessages.class);
}
}
```
## 2.4、持久化配置类ChatMemoryProvider

```java
@Configuration
public class XiaozhiAgentConfig {
@Autowired
private MongoChatMemoryStore mongoChatMemoryStore;
@Bean
ChatMemoryProvider chatMemoryProviderXiaozhi() {
// 持久化存储,每个会话最大历史消息保存20条
return memoryId -> MessageWindowChatMemory.builder()
.id(memoryId)
.maxMessages(20)
.chatMemoryStore(mongoChatMemoryStore)
.build();
}
}
```
.
配置agent的记忆存储组件:
```java
@AiService(
wiringMode = AiServiceWiringMode.EXPLICIT,
chatModel = "qwenChatModel",
chatMemoryProvider = "chatMemoryProviderXiaozhi",
)
public interface XiaozhiAgent {
// 原始返回字符串
@SystemMessage(fromResource = "xiaozhi-prompt-template.txt")
String chat(@MemoryId Long memoryId, @UserMessage String userMessage);
}
```
# 三、实现function call 增强业务处理
## 3.1、目标说明
实现硅谷小智的查询订单、预约订单、取消订单的功能。
用于用户在聊天过程中的提问处理。
## 3.2、引入mybatisplus的pom依赖 & 配置文件参数
pom.xml:
```xml
com.mysql
mysql-connector-j
com.baomidou
mybatis-plus-spring-boot3-starter
${mybatis-plus.version}
```
application.properties:
```properties
# mysql
spring.datasource.url=jdbc:mysql://localhost:3306/guiguxiaozhi?useUnicode=true&characterEncoding=UTF-8&serverTimezone=Asia/Shanghai&useSSL=false
spring.datasource.username=root
spring.datasource.password=123456
spring.datasource.driver-class-name=com.mysql.cj.jdbc.Driver
# mybatis-plus
mybatis-plus.configuration.log-impl=org.apache.ibatis.logging.stdout.StdOutImpl
```
---
## 3.3、创建MySQL数据库表
```sql
CREATE DATABASE `guiguxiaozhi`;
USE `guiguxiaozhi`;
CREATE TABLE `appointment` (
`id` BIGINT NOT NULL AUTO_INCREMENT,
`username` VARCHAR(50) NOT NULL,
`id_card` VARCHAR(18) NOT NULL,
`department` VARCHAR(50) NOT NULL,
`date` VARCHAR(10) NOT NULL,
`time` VARCHAR(10) NOT NULL,
`doctor_name` VARCHAR(50) DEFAULT NULL,
PRIMARY KEY (`id`)
);
```
## 3.4、预约业务Mapper & service & mapper xml实现
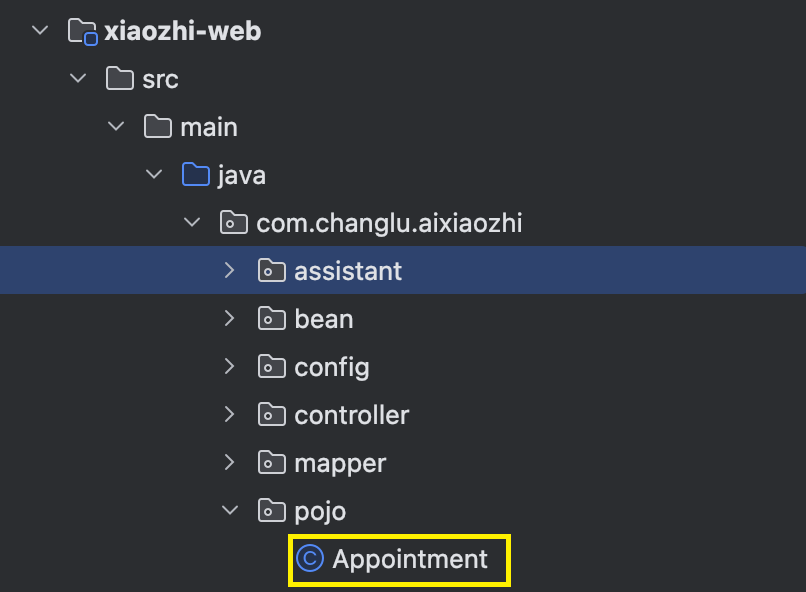
实体类定义:
````java
@Data
@AllArgsConstructor
@NoArgsConstructor
public class Appointment {
@TableId(type = IdType.AUTO)
private Long id;
private String username;
private String idCard;
private String department;
private String date;
private String time;
private String doctorName;
}
````
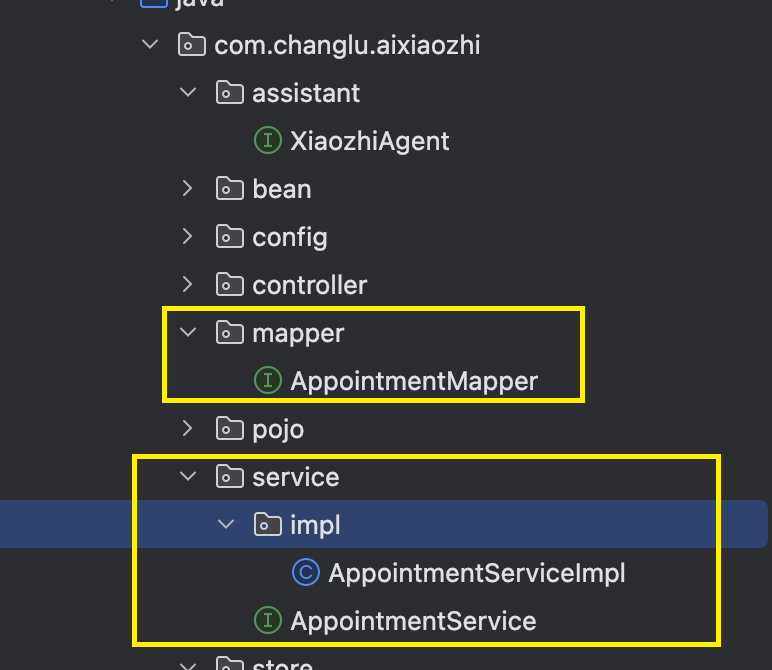
mapper:
```xml
@Mapper
public interface AppointmentMapper extends BaseMapper {
}
// 对应xml配置
```
service:
```java
public interface AppointmentService extends IService {
Appointment getOne(Appointment appointment);
}
@Service
public class AppointmentServiceImpl extends ServiceImpl
implements AppointmentService {
/**
* 查询订单是否存在
*
* @param appointment
* @return
*/
@Override
public Appointment getOne(Appointment appointment) {
LambdaQueryWrapper queryWrapper = new LambdaQueryWrapper<>();
queryWrapper.eq(Appointment::getUsername, appointment.getUsername());
queryWrapper.eq(Appointment::getIdCard, appointment.getIdCard());
queryWrapper.eq(Appointment::getDepartment, appointment.getDepartment());
queryWrapper.eq(Appointment::getDate, appointment.getDate());
queryWrapper.eq(Appointment::getTime, appointment.getTime());
Appointment appointmentDB = baseMapper.selectOne(queryWrapper);
return appointmentDB;
}
}
```
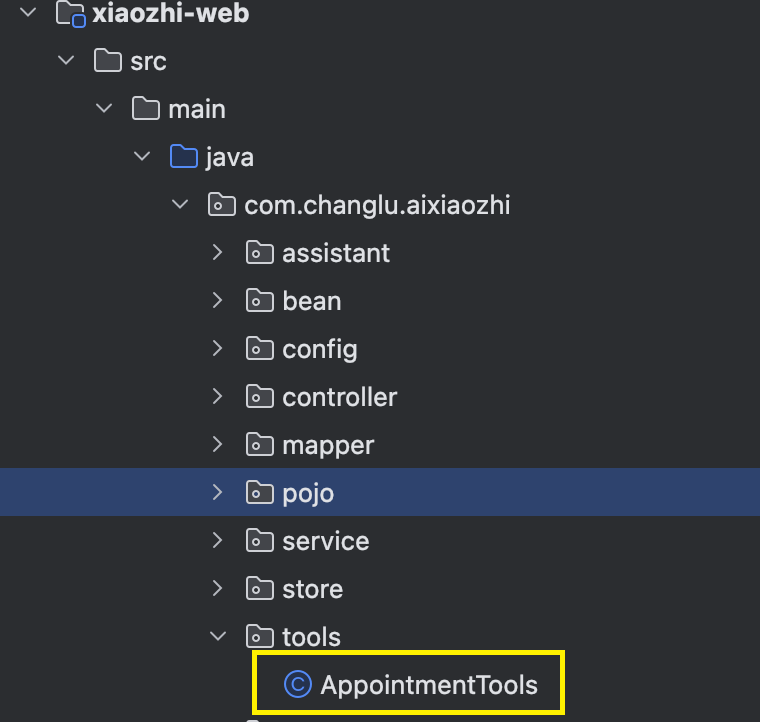
## 3.5、function calling Tools创建
AppointmentTools:预约挂号、取消挂号、查询是否有号源。
```java
// 预约工具类库
@Component
public class AppointmentTools {
@Autowired
private AppointmentService appointmentService;
// @Tool(name = "预约挂号", value = "根据参数,先执行工具方法queryDepartment查询是否可预约,并直接给用户回答是否可预约,并让用户确认所有预约信息,用户确认后再进行预约。")
@Tool(name="预约挂号", value = "根据参数,先执行工具方法queryDepartment查询是否可预约,并直接给用户回答是否可预约,并让用户确认所有预约信息,用户确认后再进行预约。" +
"如果用户没有提供具体的医生姓名,请从向量存储中找到一位医生。") // 支持向量化场景时,可基于向量存储中搜索
public String bookAppointment(Appointment appointment) {
//查找数据库中是否包含对应的预约记录
Appointment appointmentDB = appointmentService.getOne(appointment);
if (appointmentDB == null) {
appointment.setId(null);//防止大模型幻觉设置了id
if (appointmentService.save(appointment)) {
return "预约成功,并返回预约详情";
} else {
return "预约失败";
}
}
return "您在相同的科室和时间已有预约";
}
@Tool(name = "取消预约挂号", value = "根据参数,查询预约是否存在,如果存在则删除预约记录并返回取消预约成功,否则返回取消预约失败")
public String cancelAppointment(Appointment appointment) {
Appointment appointmentDB = appointmentService.getOne(appointment);
if (appointmentDB != null) {
//删除预约记录
if (appointmentService.removeById(appointmentDB.getId())) {
return "取消预约成功";
} else {
return "取消预约失败";
}
}
//取消失败
return "您没有预约记录,请核对预约科室和时间";
}
@Tool(name = "查询是否有号源", value = "根据科室名称,日期,时间和医生查询是否有号源,并返回给用户")
public boolean queryDepartment(
@P(value = "科室名称") String name,
@P(value = "日期") String date,
@P(value = "时间,可选值:上午、下午") String time,
@P(value = "医生名称", required = false) String doctorName) {
System.out.println("查询是否有号源");
System.out.println("科室名称:" + name);
System.out.println("日期:" + date);
System.out.println("时间:" + time);
System.out.println("医生名称:" + doctorName);
//TODO 维护医生的排班信息:
//如果没有指定医生名字,则根据其他条件查询是否有可以预约的医生(有返回true,否则返回false;
//如果指定了医生名字,则判断医生是否有排班(没有排版返回false)
//如果有排班,则判断医生排班时间段是否已约满(约满返回false,有空闲时间返回true)
return true;
}
}
```
用于测试信息:
```shell
你帮我选个最好的医生吧,我的个人信息是:长路,320681200807430024,2025-04-23,上午
```
## 3.6、智能体agent增强
```java
@AiService(
wiringMode = AiServiceWiringMode.EXPLICIT,
chatModel = "qwenChatModel",
chatMemoryProvider = "chatMemoryProviderXiaozhi",
tools = "appointmentTools", // tools配置
)
public interface XiaozhiAgent {
// 原始返回字符串
@SystemMessage(fromResource = "xiaozhi-prompt-template.txt")
String chat(@MemoryId Long memoryId, @UserMessage String userMessage);
}
```
---
# 四、实现RAG增量
## 4.1、引入pom.xml依赖(pinecone) & 向量模型配置
```xml
dev.langchain4j
langchain4j-easy-rag
dev.langchain4j
langchain4j-pinecone
```
application.properties:
```properties
#集成阿里通义千问-通用文本向量-v3
langchain4j.community.dashscope.embedding-model.api-key=${DASH_SCOPE_API_KEY}
langchain4j.community.dashscope.embedding-model.model-name=text-embedding-v3
```
## 4.2、向量模型选择与配置
向量模型选择的是阿里通义千问-通用文本向量-v3。
配置了4.1参数之后,注入的实体向量模型就是选择了对应的通用文本向量:
```java
@Autowired
private EmbeddingModel embeddingModel;
```
## 4.3、向量数据库配置集成
需要引入pom:其中有内置embeddingModel向量模型实现
```xml
dev.langchain4j
langchain4j-easy-rag
```

```java
@Autowired
private EmbeddingStore embeddingStore;
@Autowired
private EmbeddingModel embeddingModel;
@Bean
ContentRetriever contentRetrieverXiaozhiPincone() {
// 方案2:pinecone向量数据库+向量模型
// 创建一个 EmbeddingStoreContentRetriever 对象,用于从嵌入存储中检索内容
return EmbeddingStoreContentRetriever
.builder()
// 设置用于生成嵌入向量的嵌入模型
.embeddingModel(embeddingModel)
// 指定要使用的嵌入存储
.embeddingStore(embeddingStore)
// 设置最大检索结果数量,这里表示最多返回 1 条匹配结果
.maxResults(1)
// 设置最小得分阈值,只有得分大于等于 0.8 的结果才会被返回
.minScore(0.8)
// 构建最终的 EmbeddingStoreContentRetriever 实例
.build();
}
```
## 4.4、智能体agent再次增强向量数据库
同时需要在agent接口上配置好:
```java
@AiService(
wiringMode = AiServiceWiringMode.EXPLICIT,
chatModel = "qwenChatModel",
chatMemoryProvider = "chatMemoryProviderXiaozhi",
tools = "appointmentTools", // tools配置
contentRetriever = "contentRetrieverXiaozhiPincone" //配置向量存储基于向量数据库
)
public interface XiaozhiAgent {
// 原始返回字符串
@SystemMessage(fromResource = "xiaozhi-prompt-template.txt")
String chat(@MemoryId Long memoryId, @UserMessage String userMessage);
}
```
## 4.5、提前将文本上传向量数据库:上传文件单测
上传的文本如下:
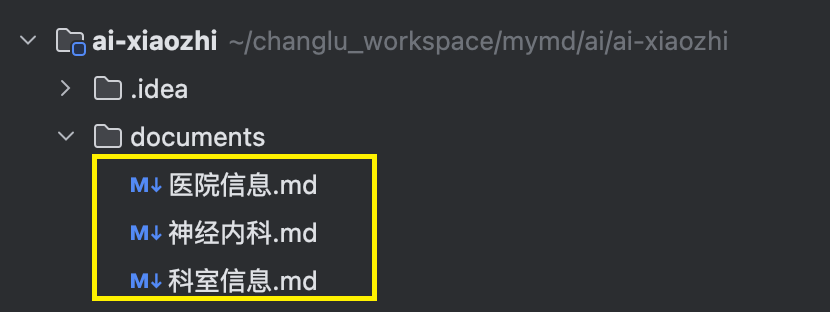
单测编写如下:
.
```java
@SpringBootTest
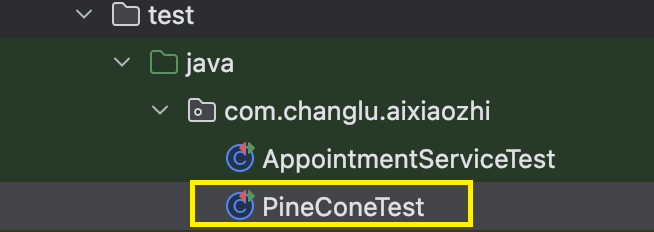
public class PineConeTest {
@Autowired
private EmbeddingStore embeddingStore;
@Autowired
private EmbeddingModel embeddingModel;
/**
* 上传向量数据库
*/
@Test
public void testUploadKnowledgeLibrary() {
String documentDir = System.getProperty("user.dir") + "/documents/";
//使用FileSystemDocumentLoader读取指定目录下的知识库文档
//并使用默认的文档解析器对文档进行解析
Document document1 = FileSystemDocumentLoader.loadDocument(documentDir + "医院信息.md");
Document document2 = FileSystemDocumentLoader.loadDocument(documentDir + "科室信息.md");
Document document3 = FileSystemDocumentLoader.loadDocument(documentDir + "神经内科.md");
List documents = Arrays.asList(document1, document2, document3);
//文本向量化并存入向量数据库:将每个片段进行向量化,得到一个嵌入向量
EmbeddingStoreIngestor
.builder()
.embeddingStore(embeddingStore)
.embeddingModel(embeddingModel)
.build()
.ingest(documents);
}
}
```
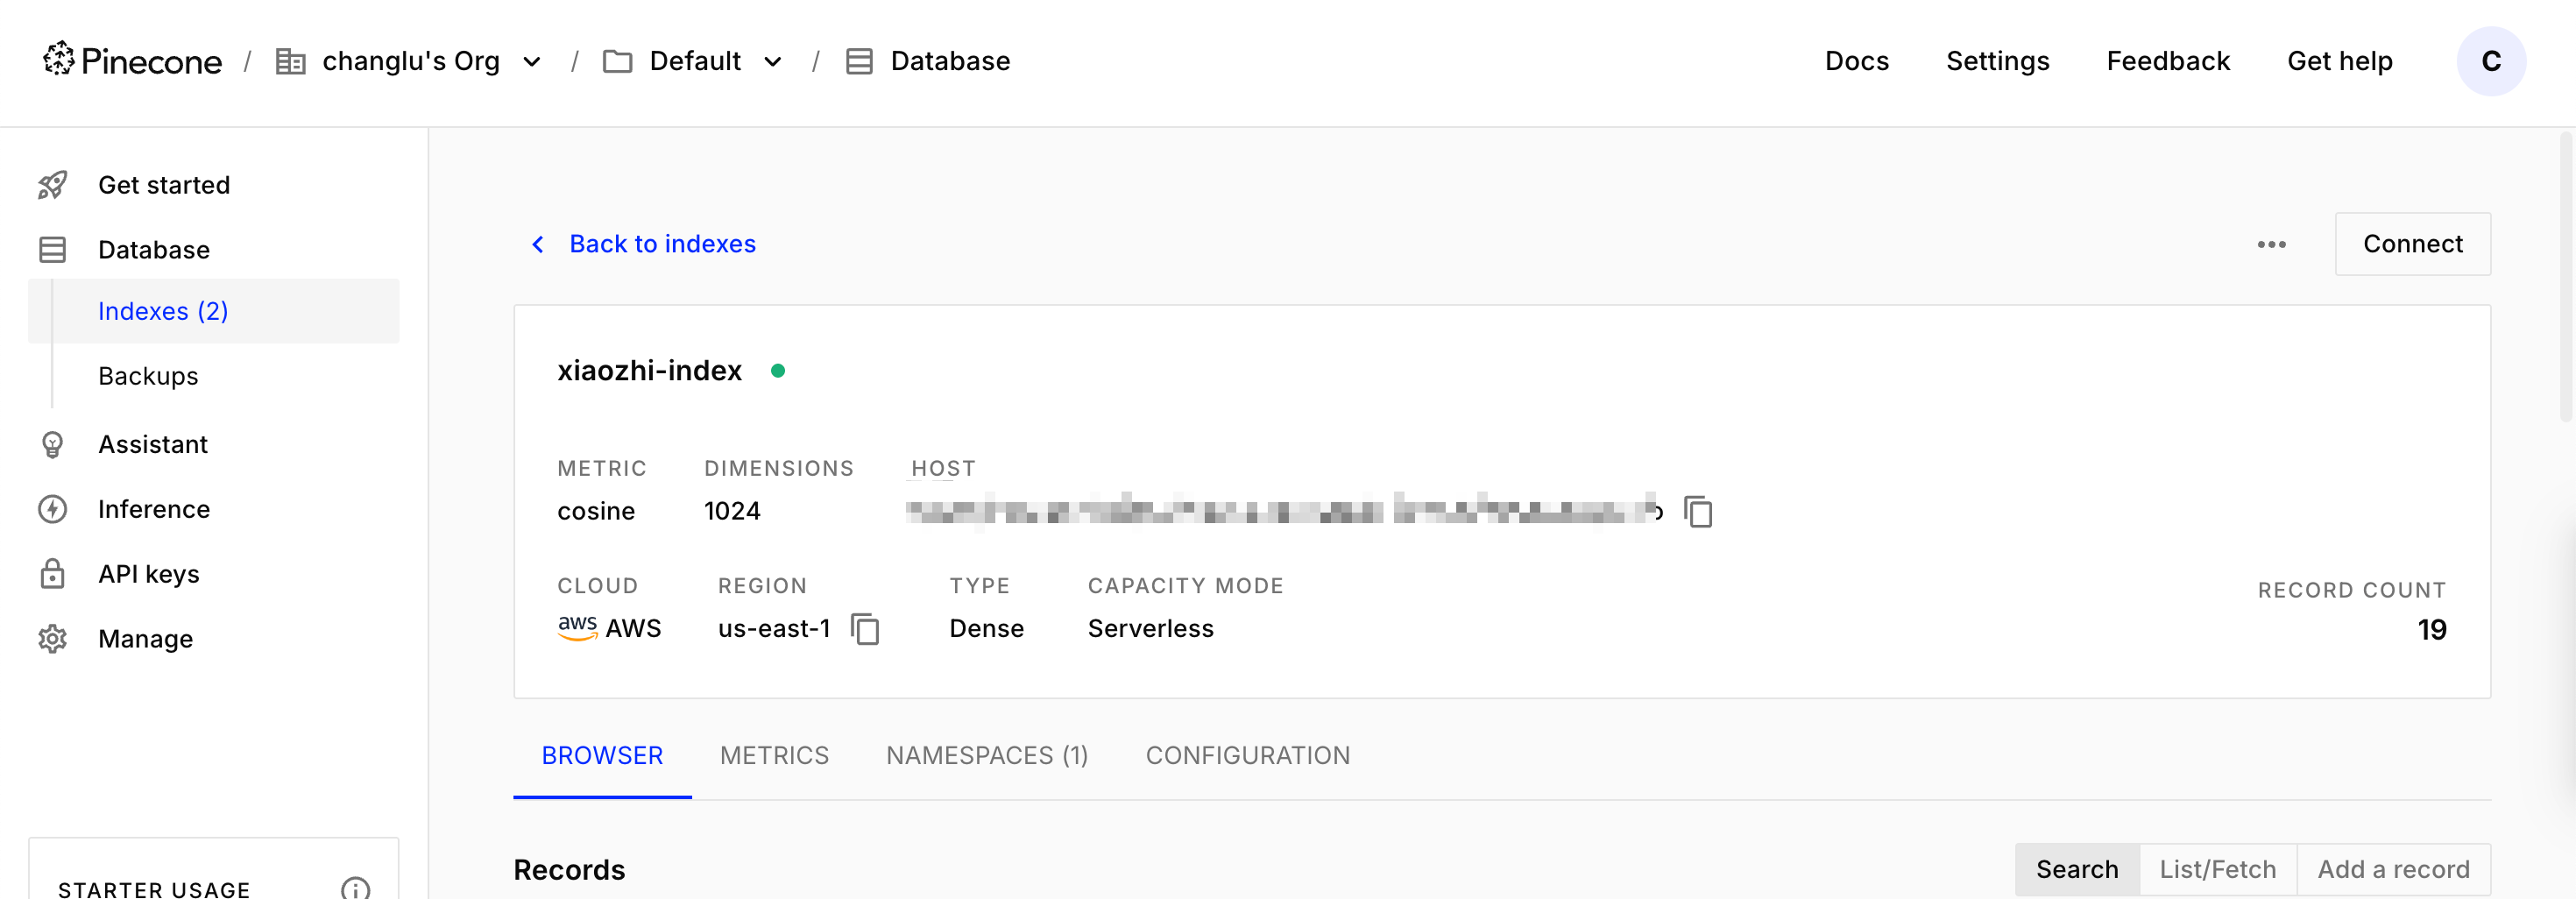
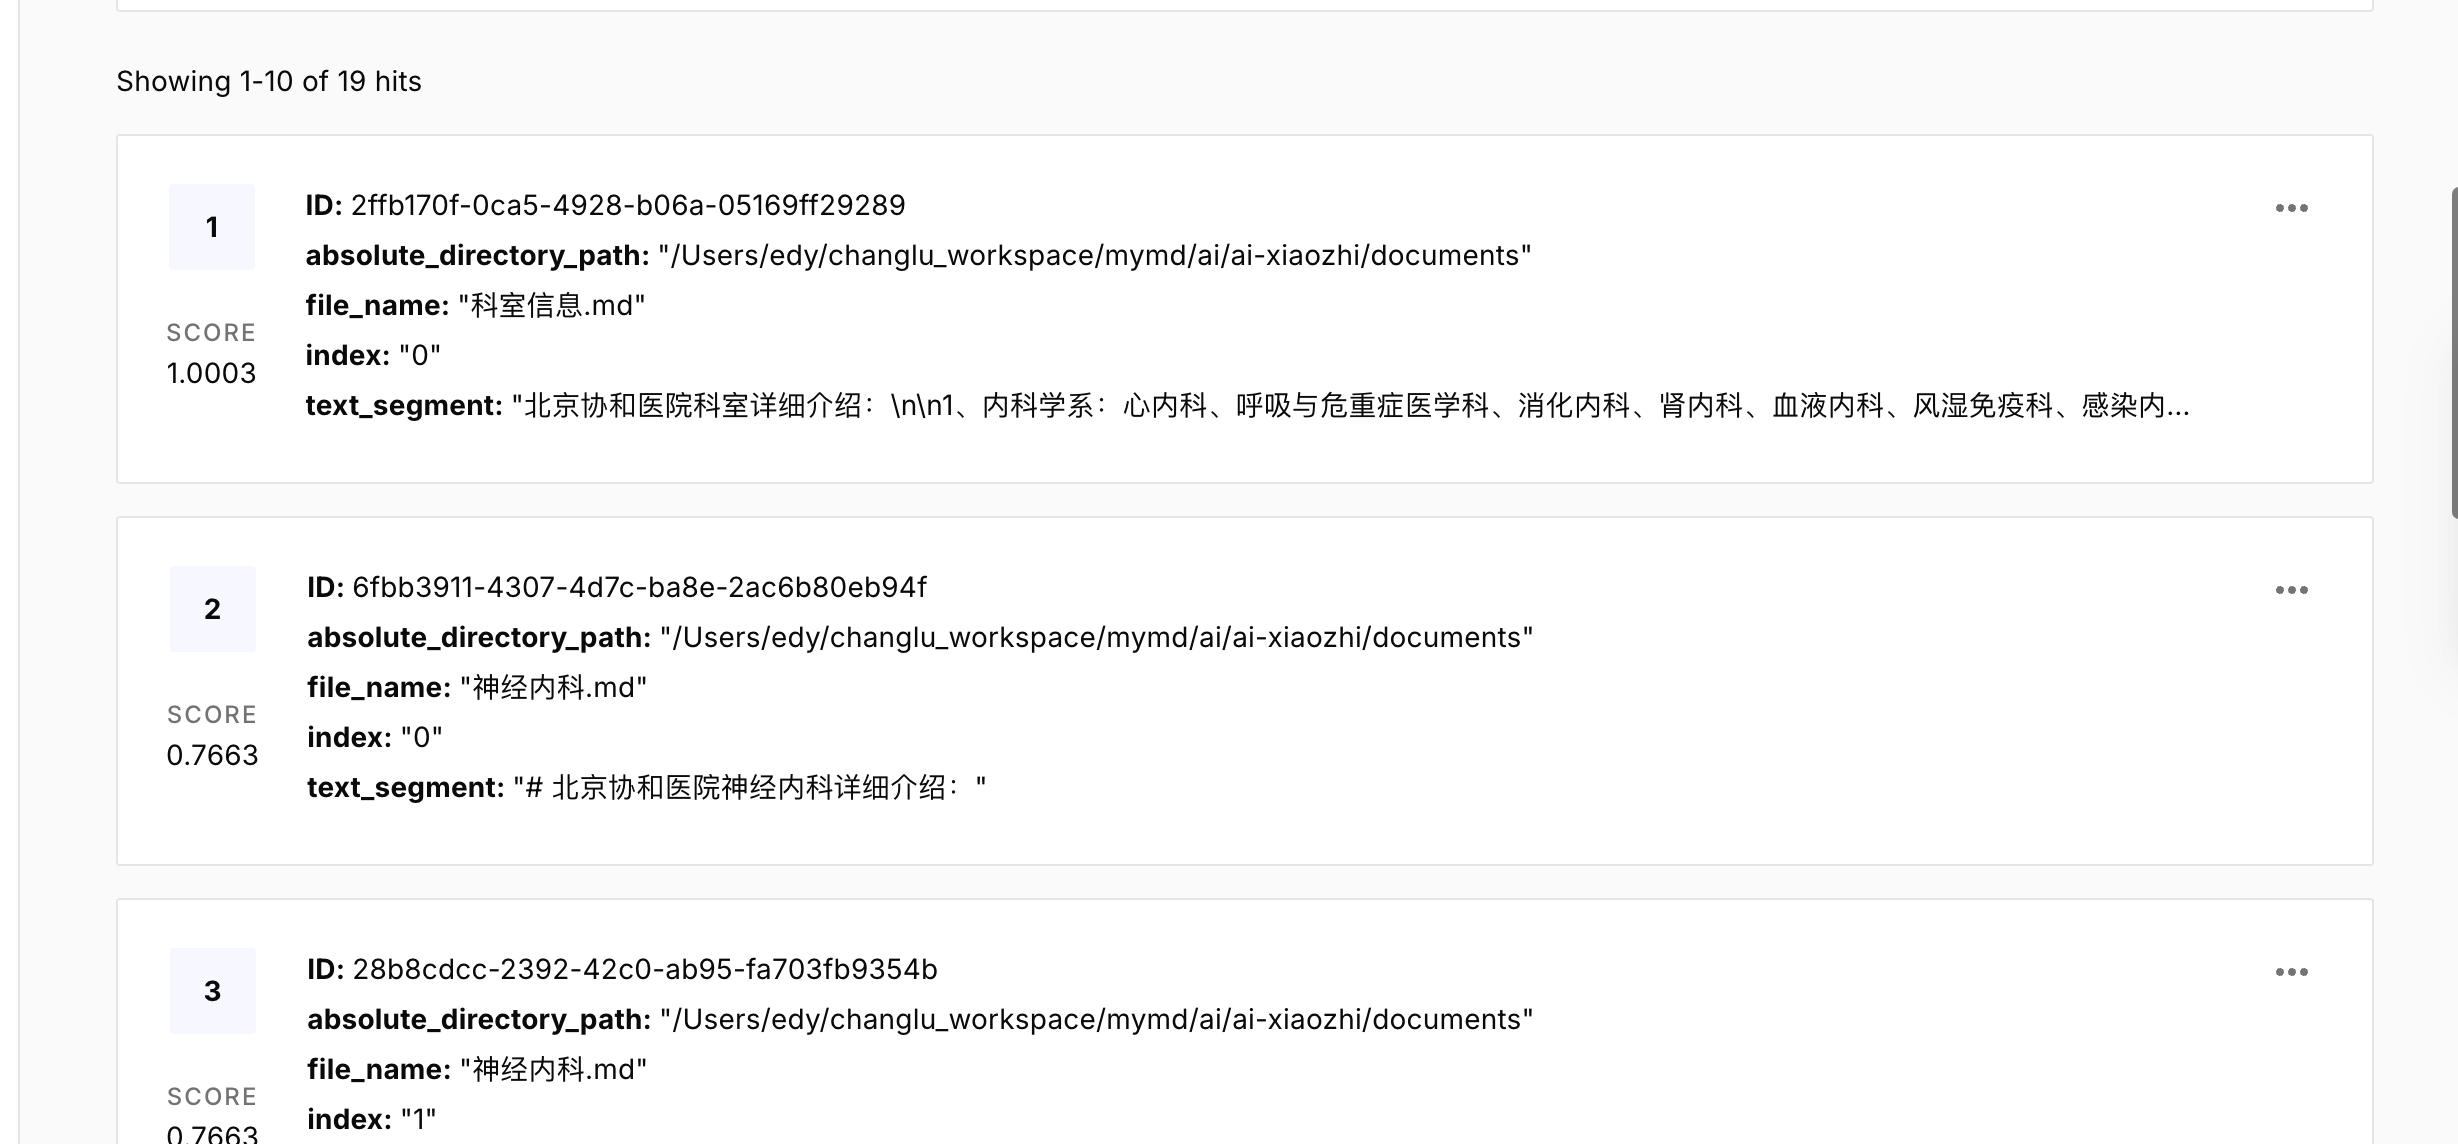
自动新建index,新建namespace:
---
## 4.6、测试验证是否搜索向量数据库
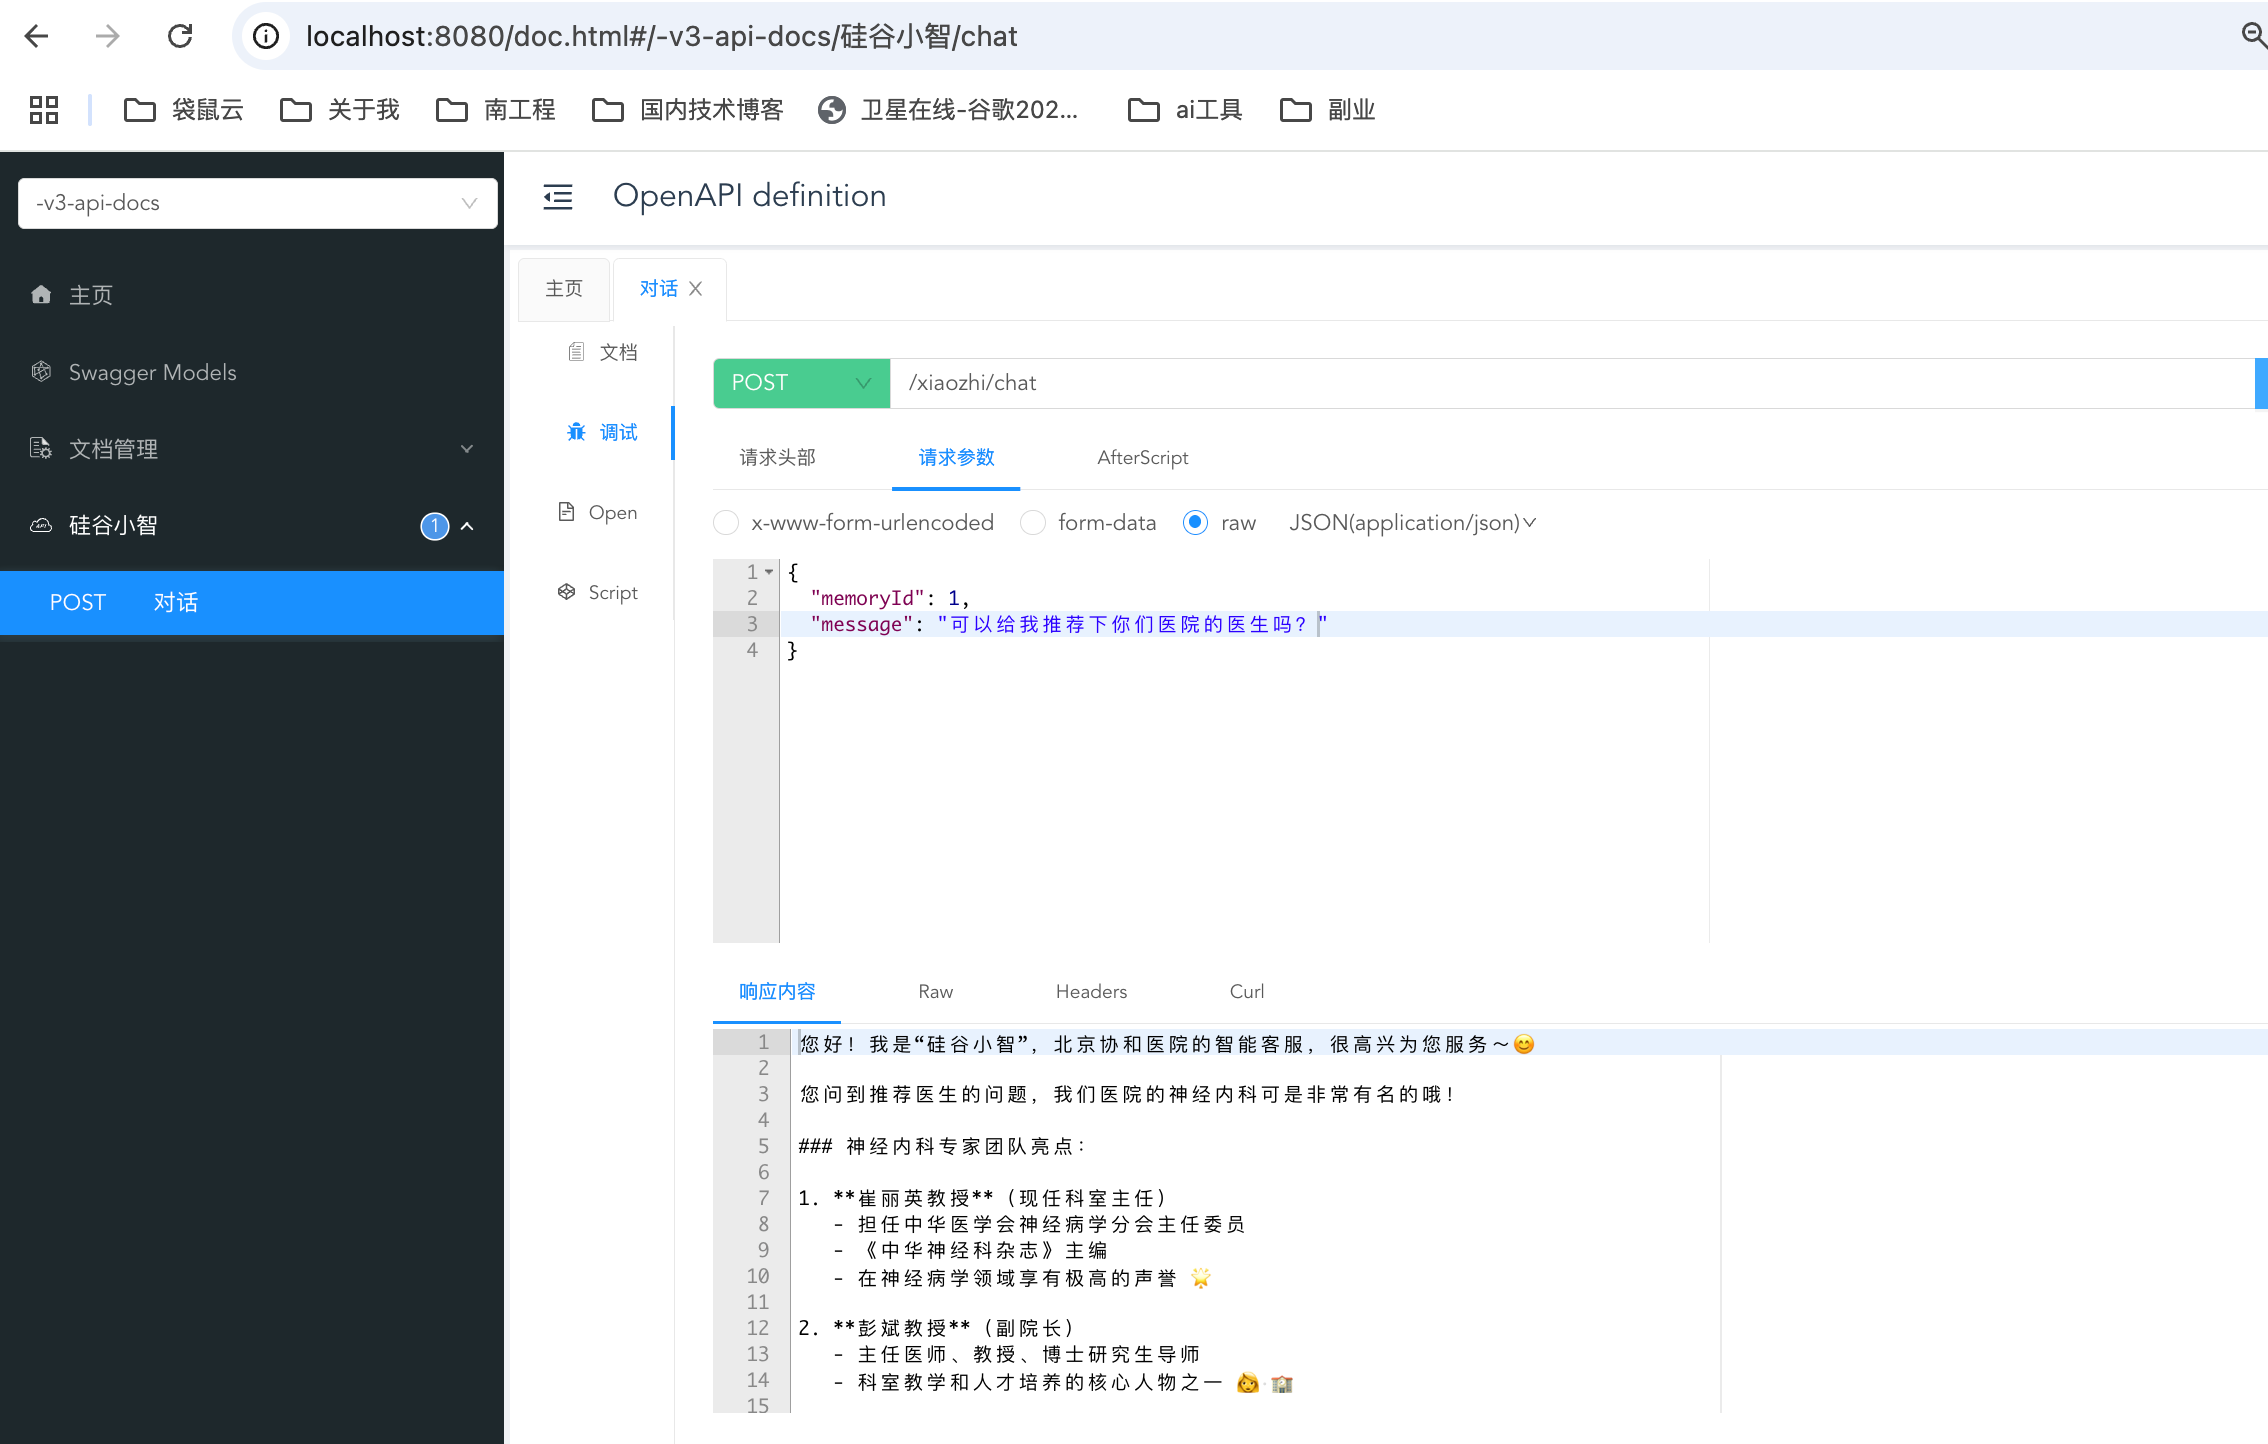
通过查看mogodb,可以发现用户在询问问题的过程中,就自动会涉及到向量化检索,同时会将问题 & 检索到的内容一并发给ai模型,来进行语言话处理:
。
**接着是用户发器的一次对ai的请求:**你可以发现,在我们的问题之后,会带有向量话搜索后的提示信息,从而ai能够很好的组织语言将精确的信息内容发送给用户
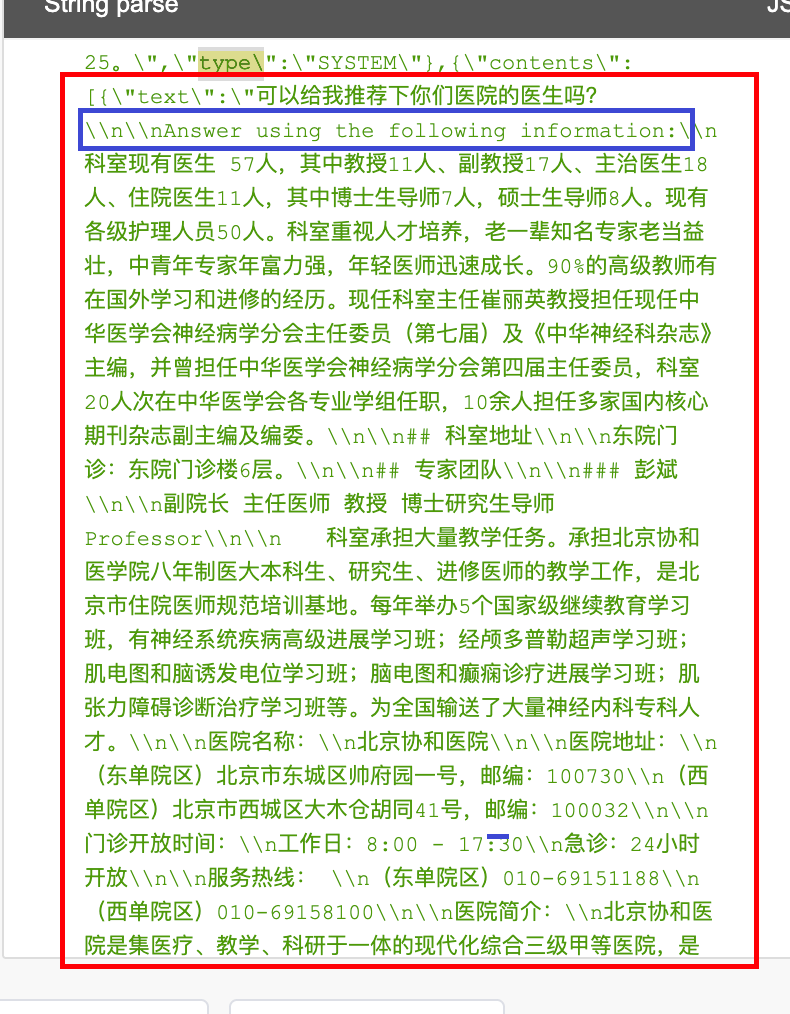
等同于我们对ai发送了下面这一段话,这个设计思路属实非常nice:

---
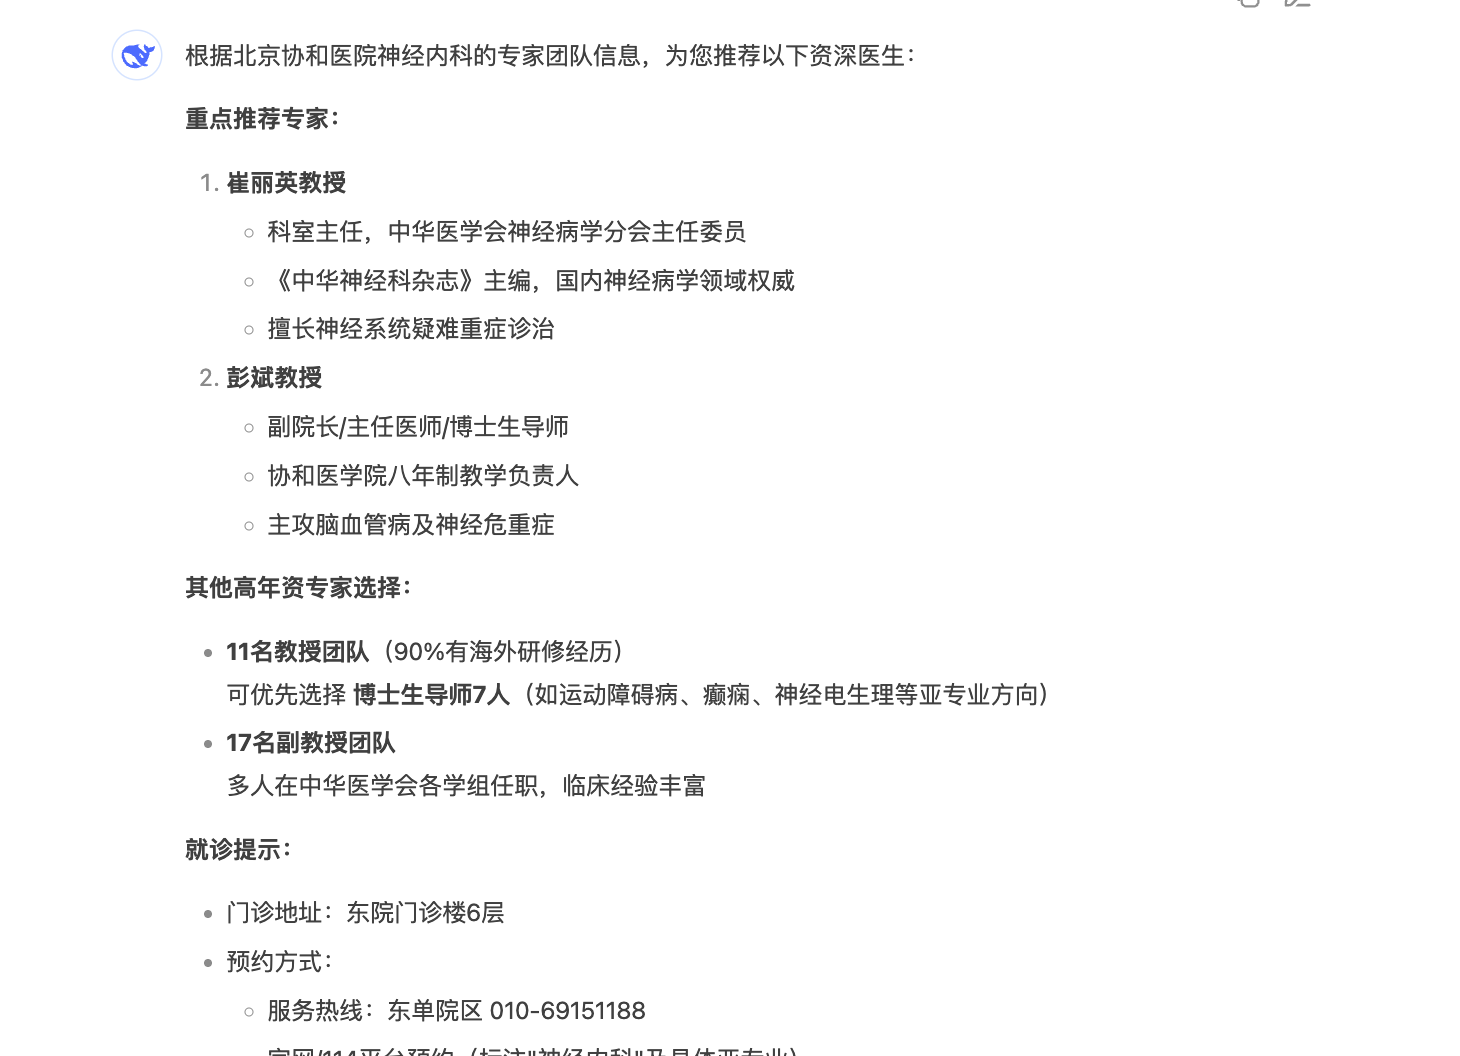
回答的非常好:
# 五、改造流式输出
## 5.1、引入pom依赖
```xml
org.springframework.boot
spring-boot-starter-webflux
dev.langchain4j
langchain4j-reactor
```
## 5.2、选择流式输出模型配置参数
application.properties:
```properties
# 百炼平台 千问-流式输出
langchain4j.community.dashscope.streaming-chat-model.api-key=${DASH_SCOPE_API_KEY}
langchain4j.community.dashscope.streaming-chat-model.model-name=qwen-plus
```
## 5.2、改造agent接口 & controller响应
```java
@AiService(
wiringMode = AiServiceWiringMode.EXPLICIT,
// chatModel = "qwenChatModel",
streamingChatModel = "qwenStreamingChatModel", // 流式模型
chatMemoryProvider = "chatMemoryProviderXiaozhi",
tools = "appointmentTools", // tools配置
contentRetriever = "contentRetrieverXiaozhiPincone" //配置向量存储基于向量数据库
)
public interface XiaozhiAgent {
// 原始返回字符串
// @SystemMessage(fromResource = "xiaozhi-prompt-template.txt")
// String chat(@MemoryId Long memoryId, @UserMessage String userMessage);
// 流式返回
@SystemMessage(fromResource = "xiaozhi-prompt-template.txt")
Flux chat(@MemoryId Long memoryId, @UserMessage String userMessage);
}
```

```java
@Tag(name = "硅谷小智")
@RestController
@RequestMapping("/xiaozhi")
public class XiaozhiController {
@Autowired
private XiaozhiAgent xiaozhiAgent;
// @Operation(summary = "对话")
// @PostMapping("/chat")
// public String chat(@RequestBody ChatForm chatForm) {
// return xiaozhiAgent.chat(chatForm.getMemoryId(), chatForm.getMessage());
// }
@Operation(summary = "对话")
@PostMapping(value = "/chat", produces = "text/stream;charset=utf-8")
public Flux chat(@RequestBody ChatForm chatForm) {
return xiaozhiAgent.chat(chatForm.getMemoryId(), chatForm.getMessage());
}
}
```
# 六、前端ui运行,跑通
```shell
npm install
npm run dev
```
正常访问聊天即可
---
# 额外:ai大模型本地部署
**相关技术栈:**
+ java大模型框架:langchain4j
+ ai模型:ollama-deepseek
+ ai向量化模型:ollama-[bge-large](https://ollama.com/library/bge-large)
+ ai向量化存储:chroma,本地化部署
**实战项目:**
+ Langchain-Chatchat基于本地知识库的问答应用:https://github.com/chatchat-space/Langchain-Chatchat
+ chat-langchain 官方 聊天对话:https://github.com/langchain-ai/chat-langchain
**langchain4j相关案例:**
+ awesome-langchain4j:https://github.com/langchain4j/awesome-langchain4j
+ langchat(国人开发):https://github.com/TyCoding/langchat
---
整理者:长路 时间:2025.5.27