# taro3-react-ts
**Repository Path**: daiwenqi/taro3-react-ts
## Basic Information
- **Project Name**: taro3-react-ts
- **Description**: taro3-react-ts
- **Primary Language**: JavaScript
- **License**: MIT
- **Default Branch**: master
- **Homepage**: None
- **GVP Project**: No
## Statistics
- **Stars**: 0
- **Forks**: 3
- **Created**: 2023-02-07
- **Last Updated**: 2023-02-07
## Categories & Tags
**Categories**: Uncategorized
**Tags**: None
## README
#### 目录
```
├─ dist // 编辑结果目录
├─ config // taro编译配置目录
│ ├─ dev.js // 开发环境配置
│ ├─ index.js // 默认配置
│ └─ prod.js // 生产环境配置
├─ src // 源码目录
│ ├─ apis // 全局接口
│ ├─ assets // 需要打包的静态资源
│ │ └─ iconfont // 字体图标
│ │ └─ style // style/css
│ │ └─ img // 图片
│ ├─ components // 全局通用组件
│ ├─ constants // 全局常量
│ ├─ pages // 页面文件目录
│ │ └─ tab // tab-bar页面模块,后面小程序分包会讲到
│ │ │ ├─ apis // tab-bar页面下的接口
│ │ │ ├─ home // home页面
│ │ │ │ ├─ index.config.ts // 页面配置
│ │ │ │ ├─ index.less // 页面样式
│ │ │ └─ └─ index.tsx // 页面逻辑
│ │ ├─ user // 个人中心页面模块
│ │ │ ├─ apis // 个人中心下的接口
│ │ │ ├─ settings // 个人信息设置页
│ │ │ └─ address // 个人收获地址信息页
│ │ ├─ order // 订单页面模块
│ │ │ ├─ apis // 订单下的接口
│ │ │ ├─ list // 订单列表页
│ │ │ └─ detail // 订单详情页
│ ├─ types // ts类型文件
│ ├─ utils // 工具文件目录
│ │ ├─ cookie.ts // cookie模块
│ │ ├─ https.ts // 网络请求模块
│ │ └─ index.ts // 基础模块
│ ├─ app.config.ts // taro项目入口配置
│ ├─ app.less // 项目总样式
│ ├─ app.ts // 项目入口文件
│ ├─ index.html //
├─ .editorconfig
├─ .env // 开发环境环境变量
├─ .env.pre // 预发环境环境变量
├─ .env.prod // 生产环境环境变量
├─ .env.test // 测试环境环境变量
├─ .eslintrc.js // esLint规则配置
├─ .gitignore // git忽略文件
├─ babel.config.js // Babel配置
├─ tsconfig.json // ts配置文件
├─ global.d.ts
├─ iconfont.json // 图片处理配置文件
├─ package.json
├─ project.config.json
├─ project.tt.json
└─ tsconfig.json
```
#### CLI 工具安装
```
# 使用 npm 安装 CLI
$ npm/pnpm install -g @tarojs/cli
# OR 使用 yarn 安装 CLI
$ yarn global add @tarojs/cli
# OR 安装了 cnpm,使用 cnpm 安装 CLI
$ cnpm install -g @tarojs/cli
```
#### 查看 Taro 全部版本信息
```
pnpm info @tarojs/cli
```
#### 项目初始化
使用命令创建模板项目:
```
$ taro init myApp
```
> npm 5.2+ 也可在不全局安装的情况下使用 npx 创建模板项目:
```
$ npx @tarojs/cli init myApp
```
> 在创建完项目之后,Taro 会默认开始安装项目所需要的依赖,安装使用的工具按照 yarn > cnpm > npm 顺序进行检测。一般来说,依赖安装会比较顺利,但某些情况下可能会安装失败,这时候你可以在项目目录下自己使用安装命令进行安装:
```
# 进入项目根目录
$ cd myApp
# 使用 yarn 安装依赖
$ yarn
# OR 使用 npm 安装依赖
$ npm install
# OR 使用 pnpm 安装依赖
$ pnpm install
# OR 使用 cnpm 安装依赖
$ cnpm install
```
#### 设置代码规范的 Eslint Prettier CommitLint
- 代码规范 ESlint
- 代码格式化 Prettier
- 提交规范 CommitLint
1.安装 eslint prettier stylelint 相关插件
```
pnpm add prettier li
nt-staged -D
```
> .eslintrc 配置
```
{
"extends": ["taro/react"],
"rules": {
"react/jsx-uses-react": 2,
"react/react-in-jsx-scope": "off",
// allow async-await
"generator-star-spacing": "off",
// allow debugger during development
"no-console": "off",
"no-debugger": "off",
// 强制在 function的左括号之前使用一致的空格
"space-before-function-paren": 0,
// 引号类型
// 禁止出现未使用过的变量
"no-unused-vars": 0,
// 严格的检查缩进问题
"indent": 0,
//引入模块没有放入顶部
"import/first": 0,
//后面没有空位,There should be no space after this paren
"space-in-parens": 0,
//已定义但是没有使用,"scope" is defined but never used
"vue/no-unused-vars": 0,
"@typescript-eslint/no-non-null-assertion": "off", // 允许使用非空操作符
/**
* 最佳实践
*/
"eqeqeq": 2, // 强制使用 === 和 !==
"default-case": 1, // 要求 switch 语句中有 default 分支
"no-else-return": 1, // 禁止 if 语句中 return 语句之后有 else 块
"no-empty-function": 0, // 禁止出现空函数
"no-multi-spaces": 1, // 禁止使用多个空格
"radix": 1, // 强制在parseInt()使用基数参数
"@typescript-eslint/no-unused-vars": ["error"], // 把该条提示信息转换成警告信息
/**
* 变量声明
*/
"init-declarations": ["error", "always"], // 声明变量必须赋值
// "array-bracket-spacing": ["error", "always"], // 数组方括号内必须空格
"array-bracket-spacing": 0, // 数组方括号内必须空格
// 双峰驼命名格式
"camelcase": 2,
// 数组和对象键值对最后一个逗号, never参数:不能带末尾的逗号, always参数:必须带末尾的逗号,
// always-multiline:多行模式必须带逗号,单行模式不能带逗号
"comma-dangle": [2, "never"],
// 控制逗号前后的空格
"comma-spacing": [2, { "before": false, "after": true }],
"comma-style": [2, "last"], // 逗号风格,换行时在行首还是行尾
"eol-last": 2, // 要求文件末尾存在空行
// 对象冒号前禁止空格,冒号后必须空格
"key-spacing": ["error", { "beforeColon": false, "afterColon": true }],
// 关键字(if、else等)前后必须有空格
"keyword-spacing": ["error", { "before": true, "after": true }],
// 禁止出现多行空行
"no-multiple-empty-lines": ["error", { "max": 1 }],
"semi": ["error", "never"], // 禁止末尾分号
"quotes": ["error", "single"], // 单引号
"space-infix-ops": 2, // 操作符周围必须有空格
"spaced-comment": ["error", "always"], // 注释后面必须跟随至少一个空白
/**
* ECMAScript6
*/
"arrow-spacing": ["error", { "before": true, "after": true }], // 强制箭头函数的箭头前后使用空格
"no-var": 2, // 禁止使用 var 声明变量
"object-shorthand": 2, // 要求使用对象方法名和属性名简写
"prefer-arrow-callback": 2, // 要求回调函数使用箭头函数
"prefer-const": 2, // 使用 const 声明那些声明后不再被修改的变量
"prefer-rest-params": 2, // 要求使用剩余参数而不是 arguments
/**
* vue
*/
"vue/valid-v-model": 0
},
"settings": {
// 让eslint自己检测react版本
"react": {
"version": "detect"
}
}
}
```
用 TypeScript 的项目,如若配置完 ESLint,对于不规范的代码编译器没有正常给出提示。有可能是 ESLint 跳过了对 ts 文件的检查,可以对全局 settings.json 文件加上如下配置:
```
"eslint.validate": [
"javascript",
"javascriptreact",
"html",
"typescriptreact"
]
```
此时,尝试编写一些不规范的代码,可以看到编译器是会正常给出提示信息的:
当然,我们也可以在 package.json 文件中的 scripts 配置项新增一条 lint 命令,用命令来检查所有不规范的代码:
```
"lint": "eslint --ext .tsx,.ts,.js,.jsx src --fix",
```
再在终端运行 npm run lint 命令,终端中也会给出相应的报错信息,以及报错信息所在的文件
如果需要保存时自动修复 ESLint 错误
vscode 首先需要下载 ESLint 插件。
下载完成之后,再在全局的 settings.json 文件中加入如下配置:
```
"editor.codeActionsOnSave": {
"source.fixAll.eslint": true
}
```
> .prettierrc 配置
```
// 具体配置可以参考 https://prettier.io/docs/en/options.html
module.exports = {
printWidth: 100, // 一行的字符数,如果超过会进行换行
tabWidth: 2, // 一个tab代表几个空格数,默认就是2
useTabs: false, // 是否启用tab取代空格符缩进,.editorconfig设置空格缩进,所以设置为false
semi: false, // 行尾是否使用分号,默认为true
singleQuote: true, // 字符串是否使用单引号
trailingComma: 'none', // 对象或数组末尾是否添加逗号 none| es5| all
jsxSingleQuote: true, // 在jsx里是否使用单引号,你看着办
bracketSpacing: true, // 对象大括号直接是否有空格,默认为true,效果:{ foo: bar }
arrowParens: "avoid", // 箭头函数如果只有一个参数则省略括号
// jsx 标签的反尖括号需要换行
jsxBracketSameLine: true,
quoteProps: 'as-needed',
htmlWhitespaceSensitivity: 'ignore', // strict, ignore
vueIndentScriptAndStyle: true,
endOfLine: 'lf',
rangeStart: 0,
proseWrap: 'never',
};
```
2.在 package.json 中 script 添加命令
```
"lint": "eslint --ext .tsx,.ts,.js,.jsx src --fix"
```
3.添加 husky 触发 Git 钩子来保证代码提交时 Ts 检查和 Eslint 检查都符合规范
- Git Hooks 提交时自动校验 husky 属于 git hooks 工具,可配置让其在 git 的不同生命周期,执行不同的命令,来约束我们的开发。
```
# https://github.com/typicode/husky
# https://typicode.github.io/husky/#/?id=articles
yarn add husky -D
# 初始化 husky
npx husky install
安装完成之后项目根目录下面会多出一个 .husky 文件,用来存放后续我们添加的 git hooks。
如果想让别人安装我们的项目依赖后,自动启用 git hooks,可以在 package.json 添加 prepare 命令:
```
"prepare": "husky install"
```
prepare 是 npm 操作生命周期中的一环,在执行 install 的时候会按生命周期顺序执行相应钩子。
```
npm7 生命周期钩子: preinstall -> install -> postinstall -> prepublish -> preprepare -> prepare -> postprepare。
```
# 写入命令
# 添加 pre-commit 钩子。
npx husky add .husky/pre-commit "npx lint-staged"
```
这里的 npx lint-staged 为校验文件的命令,会在提交代码之前自动执行,可自行修改命令
package.json 添加如下:
```
"lint-staged": {
"*.{vue, js, ts, jsx, tsx}": "eslint --fix",
"*.{css, less}": "stylelint --fix"
},
```
4. 配置 commitlint 提高提交时的规范
```
pnpm add @commitlint/cli @commitlint/config-conventional commitizen cz-customizable -D
# commitlint.config.js
```
```
module.exports = {
// 继承的规则
extends: ['@commitlint/config-conventional'],
// 定义规则类型
rules: {
// type 类型定义,表示 git 提交的 type 必须在以下类型范围内
'type-enum': [
2,
'always',
[
'feat', // 新功能 feature
'fix', // 修复 bug
'docs', // 文档注释
'style', // 代码格式(不影响代码运行的变动)
'refactor', // 重构(既不增加新功能,也不是修复bug)
'perf', // 性能优化
'test', // 增加测试
'chore', // 构建过程或辅助工具的变动
'revert', // 回退
'build', // 打包
],
],
// subject 大小写不做校验
'subject-case': [0],
},
}
# 添加 commit-msg 钩子。
commit-msg 钩子用来规范提交代码时的提交信息
```
npx husky add .husky/commit-msg "npx --no -- commitlint --edit '$1'"
npx husky add .husky/commit-msg 'npx --no-install commitlint --edit "$1"'
```
# 首次安装不起作用可以运行 npx husky install
```
# .cz-config.js
```
module.exports = {
// type 类型
types: [
{ value: 'feat', name: '✨ 新增产品功能' },
{ value: 'fix', name: '🐛 修复 bug' },
{ value: 'docs', name: '📝 文档的变更' },
{
value: 'style',
name: '💄 不改变代码功能的变动(如删除空格、格式化、去掉末尾分号等)'
},
{
value: 'refactor',
name: '♻ 重构代码。不包括 bug 修复、功能新增'
},
{
value: 'perf',
name: '⚡ 性能优化'
},
{ value: 'test', name: '✅ 添加、修改测试用例' },
{
value: 'build',
name: '👷 构建流程、外部依赖变更,比如升级 npm 包、修改 webpack 配置'
},
{ value: 'ci', name: '🔧 修改了 CI 配置、脚本', emoji: '🔧' },
{
value: 'chore',
name: '对构建过程或辅助工具和库的更改,不影响源文件、测试用例的其他操作'
},
{ value: 'revert', name: '⏪ 回滚 commit' }
],
// scope 类型,针对 React 项目
// scopes: [
// ['components'],
// ['deps', '项目依赖修改']
// // 如果选择 custom ,后面会让你再输入一个自定义的 scope , 也可以不设置此项, 把后面的 allowCustomScopes 设置为 true
// ].map(([value, description]) => {
// return {
// value,
// name: `${value.padEnd(30)} (${description})`
// }
// }),
// allowTicketNumber: false,
// isTicketNumberRequired: false,
// ticketNumberPrefix: 'TICKET-',
// ticketNumberRegExp: '\\d{1,5}',
// 可以设置 scope 的类型跟 type 的类型匹配项,例如: 'fix'
/*
scopeOverrides: {
fix: [
{ name: 'merge' },
{ name: 'style' },
{ name: 'e2eTest' },
{ name: 'unitTest' }
]
},
*/
// 覆写提示的信息
messages: {
type: '请确保你的提交遵循了原子提交规范!\n选择你要提交的类型:',
scope: '\n 选择一个 scope (可选):',
// 选择 scope: custom 时会出下面的提示
customScope: '请输入自定义的 scope:',
subject: '填写一个简短精炼的描述语句:\n',
body:
'添加一个更加详细的描述,可以附上新增功能的描述或 bug 链接、截图链接 (可选)。使用 "|" 换行:\n',
breaking: '列举非兼容性重大的变更 (可选):\n',
footer: '列举出所有变更的 ISSUES CLOSED (可选)。 例如.: #31, #34:\n',
confirmCommit: '确认提交?'
},
// 是否允许自定义填写 scope ,设置为 true ,会自动添加两个 scope 类型 [{ name: 'empty', value: false },{ name: 'custom', value: 'custom' }]
allowCustomScopes: false,
allowBreakingChanges: ['feat', 'fix'],
// skip any questions you want
// skipQuestions: [],
// subject 限制长度
subjectLimit: 100
// breaklineChar: '|', // 支持 body 和 footer
// footerPrefix : 'ISSUES CLOSED:'
// askForBreakingChangeFirst : true,
}
```
如果新建的文件提示 import/no-commonjs 报错,禁用 CommonJS 语法。可以禁用该 ESLint 规则。
```
"import/no-commonjs": "off"
```
## 二、环境变量
在开发中,通常有**多套环境**去配置不同的环境变量
> 方案:将变量写在 `.env.{NODE_ENV}` 文件中,利用 [cross-env](https://www.npmjs.com/package/cross-env) 注入环境标识,[dotenv-flow](https://www.npmjs.com/package/dotenv-flow) 将 `.env.{NODE_ENV}` 文件加载到 `process.env`,最后将 `process.env` 写入 `taro` 配置文件,环境变量统一用 `APP_` 开头
### 1、将变量写在 `.env.{NODE_ENV}` 文件
模版仓库里面,以有`开发-dev`、`预发-pre`、`生产-prod`、`测试-test`为例,分别对应文件`.env`、`.env.pre`、`.env.prod`、`.env.test` 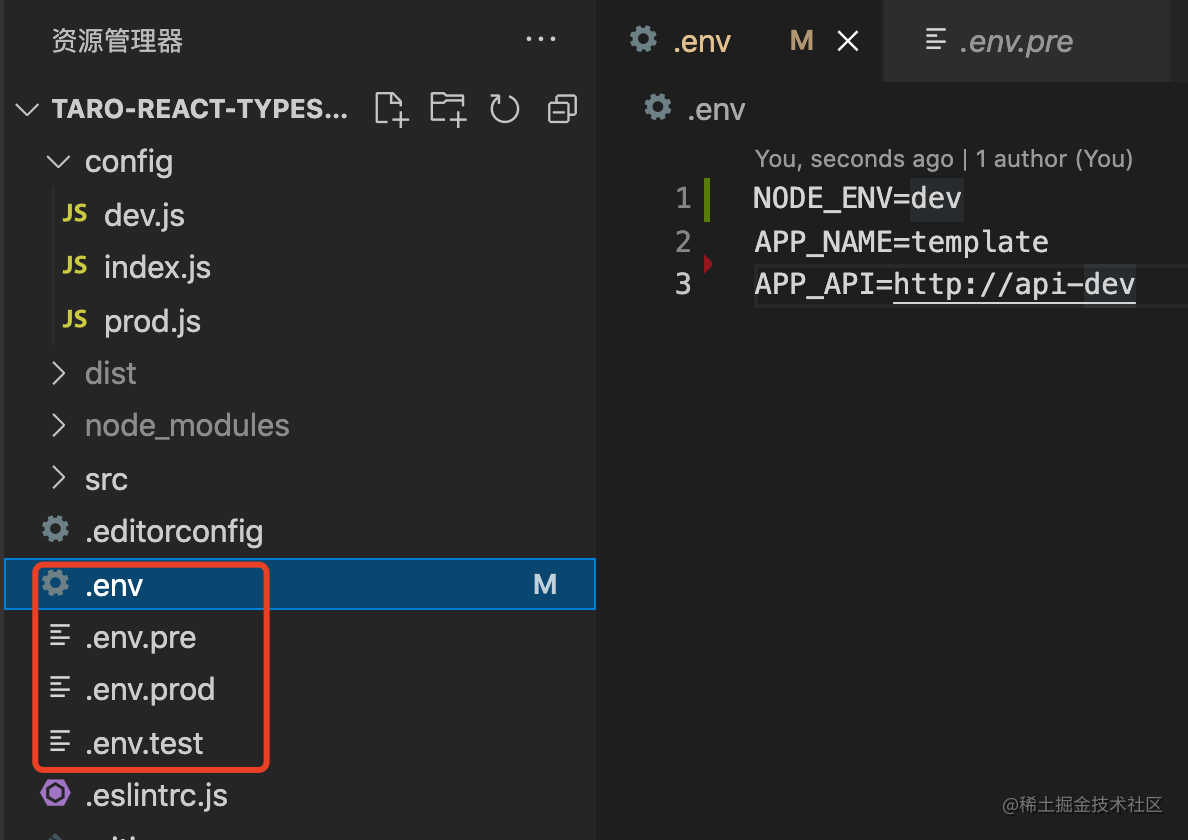
### 2、利用 [cross-env](https://www.npmjs.com/package/cross-env) 注入环境标识
组合`环境(dev/pre/prod/test) * 类型(dev/build) * 平台(小程序/H5)` 比较多...但是比手动在命令行输入变量强
```json
// package.json
"scripts": {
"build:weapp": "taro build --type weapp",
"build:h5": "taro build --type h5",
"dev:weapp": "npm run build:weapp -- --watch",
"dev:h5": "npm run build:h5 -- --watch",
"build-pre:weapp": "cross-env APP_ENV=pre taro build --type weapp",
"build-pre:h5": "cross-env APP_ENV=pre taro build --type h5",
"dev-pre:weapp": "cross-env APP_ENV=pre npm run build:weapp -- --watch",
"dev-pre:h5": "cross-env APP_ENV=pre npm run build:h5 -- --watch",
"build-test:weapp": "cross-env APP_ENV=test taro build --type weapp",
"build-test:h5": "cross-env APP_ENV=test taro build --type h5",
"dev-test:weapp": "cross-env APP_ENV=test npm run build:weapp -- --watch",
"dev-test:h5": "cross-env APP_ENV=test npm run build:h5 -- --watch",
"build-prod:weapp": "cross-env APP_ENV=prod taro build --type weapp",
"build-prod:h5": "cross-env APP_ENV=prod taro build --type h5",
"dev-prod:weapp": "cross-env APP_ENV=prod npm run build:weapp -- --watch",
"dev-prod:h5": "cross-env APP_ENV=prod npm run build:h5 -- --watch"
}
```
### 3、利用[dotenv-flow](https://www.npmjs.com/package/dotenv-flow) 将 `.env.{NODE_ENV}` 文件加载到 `process.env`并写入 taro 配置文件
默认注入`dev`标识,起 h5 dev 服务执行`yarn dev:h5`即可
```js
// config/dev.js | config/prod.js
process.env.APP_ENV = process.env.APP_ENV || 'dev'
require('dotenv-flow').config({
// node_dev表示.env.{node_env}文件
node_env: process.env.APP_ENV
})
module.exports = {
env: {
NODE_ENV: '"development"',
APP_VERSION: `"${process.env.npm_package_version}"`,
APP_ENV: `"${process.env.APP_ENV}"`,
APP_API: `"${process.env.APP_API}"`
}
}
```
```
pnpm add cross-env dotenv-flow -D
```
## 三、图片处理
> 方案,小图标用 `iconfont`,借助 [taro-iconfont-cli](https://www.npmjs.com/package/taro-iconfont-cli) 这个包将图片处理成 `svg`;大图标用`CDN`
### 1、小图标
(1)安装 taro-iconfont-cli
```bash
npm i taro-iconfont-cli -D
```
(2)初始化配置文件
```bash
npx iconfont-init
```
可以看到根目录生成了配置文件`iconfont.json`,具体参数说明可查看[taro-iconfont-cli](https://www.npmjs.com/package/taro-iconfont-cli)官网
```json
{
// 直接复制[iconfont](http://iconfont.cn/)官网提供的项目链接
"symbol_url": "http://at.alicdn.com/t/font_1373348_kk9y3jk2omq.js",
// 根据iconfont图标生成的组件存放的位置。每次生成组件之前,该文件夹都会被清空。
"save_dir": "./src/assets/iconfont",
// 如果您的项目使用Typescript编写,请设置为true。这个选项将决定生成的图标组件是`.tsx`还是`.js`后缀。
"use_typescript": true,
// 选择需要支持的平台,默认是`*`,意味着所有平台都需要支持(如果有)。如果你只想支持部分平台,也可以设置成数组:
"platforms": ["weapp", "h5"],
// 是否使用[尺寸单位rpx]还是普通的像素单位`px`。默认值为true,与Taro保持一致的缩放。您也可以设置为false,强制使用`px`
"use_rpx": true,
"trim_icon_prefix": "icon",
"default_icon_size": 18,
"design_width": 750
}
```
(3)生成 Taro 标准组件执行`yarn icon`
```json
// package.json
"scripts": {
"icon": "npx iconfont-taro"
}
```
(4)使用图标
```js
//xx.tsx
import { resolve } from 'path'
;
```
> 图标多了,会出现图片体积增大的问题,如果你的项目体积非常紧张(小程序体积有要求),没有多余的体积给图标,可以考虑 `字体图标`,直接使用字体图标的话可能会对首屏时间有一点影响,如果关注这个的话,可以直接使用 `CDN`
### 2、大图标
就比较简单了,将 CDN 前缀抽离为常量 `CDN_IMG` 写在 `constants` 文件夹下,使用时,拼接图片地址
```js
// src/constants/index.ts
export const CDN_IMG = 'https://www.baidu.com/img/'
```
```js
// xx.tsx
import { Image } from '@tarojs/components'
import { CDN_IMG } from '@/constants'
;
```
## 五、样式(适配)处理
#### 1、确定设计稿尺寸
- Taro 默认以 `750px` 作为换算尺寸标准;如果设计搞的尺寸不是 750,可通过 `designWidth`配置
- 默认支持 `750`、 `640` 、 `828` 三种尺寸设计稿;如果需要支持自定义设计稿,可通过 `deviceRatio `自定义;比如`'375':2/1`
```js
// config/index.js
const config = {
...
// 设计稿尺寸
designWidth: 750,
// 设计稿尺寸换算规则
deviceRatio: {
640: 2.34 / 2,
750: 1,
828: 1.81 / 2,
350: 2 / 1
},
...
}
```
#### 2、外联样式写法
- 根据设计搞 `1:1` 直接写`px`、或者`%`即可,Taro 默认会对所有的单位进行转换;当转成`微信小程序`的时候,尺寸将默认转换为 `rpx`,当转成 `H5` 时将默认转换为以 `rem` 为单位的值
- 不希望被转换的单位,在 px 单位中增加一个大写字母,例如 `Px` 或者 `PX` ,还有一些其他方案,不过不常用,具体可见[官网](https://taro-docs.jd.com/taro/docs/size)
- 配置 `1px` 不转换,通过配置 `onePxTransform` 字段为 `false`,如下
```js
// config/index.js
const config = {
...
h5: {
publicPath: '/',
staticDirectory: 'static',
postcss: {
autoprefixer: {
enable: true
},
pxtransform: {
enable: true,
config: {
onePxTransform: false // H5配置 1px 不需要被转换
}
}
}
},
...
}
```
#### 3、内联样式写法
在编译时,Taro 会帮你对样式做尺寸转换操作,但是如果是在 JS 中书写了行内样式,那么编译时就无法做替换了,针对这种情况,Taro 提供了 `Taro.pxTransform` 来做运行时的尺寸转换
建议统一抽离到 `utils` 里面
#### 4、1px 问题
产生原因
### 小程序分包
1、解释什么是分包官方文档说明如下,简而言之就说分包是一个优化项,可以优化小程序首次启动的下载时间
2、怎么做分包
配置文件如下
```
export default {
// 主包
pages: [
"pages/tab/home/index", // 首页
"pages/tab/mine/index" // 我的
],
// 子包
subpakages: [ // 子包:user,个人中心
{
root: 'pages/user/',
pages: [
"address/index", // 个人地址信息页
"settings/index" // 个人信息设置页
]
},
{
root: 'pages/order/', // 子包:order,订单中心
pages: [
"list/index", // 订单列表
"detail/index" // 订单详情
]
}
],
window: {
backgroundTextStyle: "light",
navigationBarBackgroundColor: "#fff",
navigationBarTitleText: "WeChat",
navigationBarTextStyle: "black",
},
};
```
#### 集成reduxjs/toolkit
```
// redux及工具包
pnpm add @reduxjs/toolkit react-redux
pnpm add @types/react-redux -D
pnpm add @types/redux-logger redux-logger -D //日志包
pnpm add redux-persist //数据缓存
```
4.3 生命周期函数
```
//1.使用taro自带的
import {useDidShow} from "@tarojs/taro";
useDidShow (() => {
console.log('页面展示时的回调 ')
})
//2.使用react的hooks
import {useEffect} from 'react'
useEffect(() => {
console.log('页面加载、更新、卸载的回调 ')
})
```
4.4 路由导航
```
Taro.switchTab //跳转到 tabBar 页面,并关闭其他所有非 tabBar 页面
Taro.reLaunch //关闭所有页面,打开到应用内的某个页面
Taro.redirectTo //关闭当前页面,跳转到应用内的某个页面。但是不允许跳转到 tabbar 页面。
Taro.navigateTo //保留当前页面,跳转到应用内的某个页面。但是不能跳到 tabbar 页面。
Taro.navigateBack //关闭当前页面,返回上一页面或多级页面。可通过 getCurrentPages 获取当前的页面栈,决定需要返回几层。
EventChannel //触发一个事件
```
4.4.1 路由跳转
```
//1.在app.config.ts中配置页面路由
pages: [
'pages/demo/demo'
],
//2.在组件中实现跳转
Taro.navigateTo({
url:"/pages/demo/demo",
success(){
console.log('跳转成功')
}
})
```
4.4.2 路由传参
```
Taro.navigateTo({
url:"/pages/demo/demo?id=2&age=18",
success(){
console.log('跳转成功')
}
})
//接受传过来的参数
const Param: any = getCurrentInstance()?.router?.params;
useDidShow(() => {
console.log(Param)
})
```
4.6 常用api
```
useReachBottom //上拉触底加载
usePullDownRefresh //下拉刷新
usePullDownRefresh(() => {
console.log('usePullDownRefresh')
})
```
4.6.1 界面交互
```
Taro.showToast({
title: '成功',
icon: 'success',
})
```
#### Taro-ui使用
Taro 3 只能配合使用 taro-ui@next 版本
```
npm i taro-ui@next
```
在 taro 项目的 config/index.js 中新增如下配置项:
```
h5: {
esnextModules: ['taro-ui']
}
```
组件中使用
```
import { AtButton } from 'taro-ui'
import 'taro-ui/dist/style/index.scss'
render () {
return (
按钮
)
}
```
Icon
```
import "taro-ui/dist/style/components/icon.scss";
```