# vue3-vite-vant-h5-template
**Repository Path**: littleduo/vue3-vite-vant-h5-template
## Basic Information
- **Project Name**: vue3-vite-vant-h5-template
- **Description**: Vue 3 + TypeScript + Vite + Vant + Pinia 移动端开发模板
- **Primary Language**: Unknown
- **License**: Not specified
- **Default Branch**: main
- **Homepage**: None
- **GVP Project**: No
## Statistics
- **Stars**: 1
- **Forks**: 5
- **Created**: 2024-10-29
- **Last Updated**: 2024-10-29
## Categories & Tags
**Categories**: Uncategorized
**Tags**: None
## README
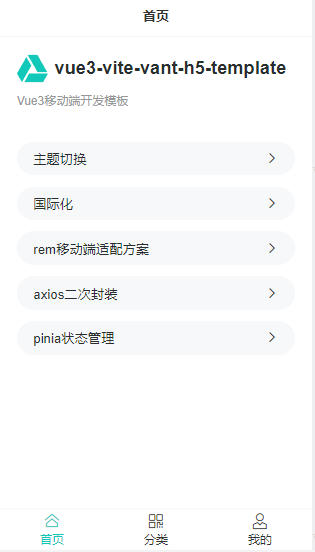
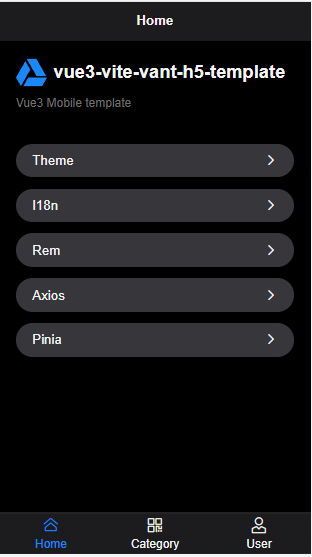
# vue3-vite-vant-h5-template 最新版vue移动端开发模板
开箱即用的 Vue3 + Vant4 移动端模板
- 使用技术 Vue 3 + TypeScript + Vite + Vant + pinia + vue-router + axios + vuei18n
- 支持rem移动端适配方案
- axios二次封装
- 主题切换
- 支持国际化
- 项目使用 pnpm 包管理工具,用法和 npm 没有什么区别,官方地址:https://www.pnpm.cn/
## 预览
[在线预览](https://vangleer.github.io/vue3-vite-vant-h5-template/#/home)


## 项目搭建
- 参考vite官网:https://vitejs.cn
## 代码规范
### 集成 editorconfig 配置
- EditorConfig 有助于为不同 IDE 编辑器上处理同一项目的多个开发人员维护一致的编码风格。
```yaml
# http://editorconfig.org
root = true
[*] # 表示所有文件适用
charset = utf-8 # 设置文件字符集为 utf-8
indent_style = space # 缩进风格(tab | space)
indent_size = 2 # 缩进大小
end_of_line = lf # 控制换行类型(lf | cr | crlf)
trim_trailing_whitespace = true # 去除行首的任意空白字符
insert_final_newline = true # 始终在文件末尾插入一个新行
[*.md] # 表示仅 md 文件适用以下规则
max_line_length = off
trim_trailing_whitespace = false
```
- VSCode 需要安装一个插件:EditorConfig for VS Code

### 配置 eslint、prettier
```
pnpm i eslint prettier eslint-config-prettier eslint-plugin-prettier eslint-plugin-vue @typescript-eslint/parser @typescript-eslint/eslint-plugin vue-global-api -D
```
- 在根目录下建立 eslint 配置文件: .eslintrc.js
```js
module.exports = {
root: true,
env: {
browser: true,
node: true
},
globals: {
Message: true,
env: true,
useRoute: true,
useRouter: true,
useStore: true
},
/* 指定如何解析语法。可以为空,但若不为空,只能配该值,原因见下文。*/
parser: 'vue-eslint-parser',
/* 优先级低于parse的语法解析配置 */
parserOptions: {
parser: '@typescript-eslint/parser', // Specifies the ESLint parser
ecmaVersion: 2020, // Allows for the parsing of modern ECMAScript features
sourceType: 'module', // Allows for the use of imports
ecmaFeatures: {
jsx: true
}
},
extends: [
'vue-global-api',
'eslint:recommended',
'plugin:vue/vue3-recommended',
'plugin:@typescript-eslint/recommended',
'prettier',
'plugin:prettier/recommended'
],
plugins: ['vue'],
rules: {
'no-console': process.env.NODE_ENV === 'production' ? 1 : 0,
'no-debugger': process.env.NODE_ENV === 'production' ? 1 : 0,
'no-useless-concat': 1, // 禁止不必要的字符串字面量或模板字面量的连接
'no-useless-escape': 0, // 禁止不必要的转义字符
'consistent-return': 0, // 要求 return 语句要么总是指定返回的值,要么不指定
'camelcase': 0, // 强制使用骆驼拼写法命名约定
'no-redeclare': 1, // 禁止多次声明同一变量
'array-callback-return': 1, // 强制数组方法的回调函数中有 return 语句,Array有几种过滤,映射和折叠的方法。如果我们忘记return在这些回调中写入语句,那可能是一个错误。
'default-case': 1, // 要求 switch 语句中有 default 分支
'no-fallthrough': 1, // 禁止 case 语句落空
'no-lonely-if': 1, // 禁止 if 作为唯一的语句出现在 else 语句中.如果一个if陈述是该else块中唯一的陈述,那么使用一个else if表格通常会更清晰。
'no-irregular-whitespace': 1, // 禁止在字符串和注释之外不规则的空白
'prefer-const': 0, // 要求使用 const 声明那些声明后不再被修改的变量.如果一个变量从不重新分配,使用const声明更好。const 声明告诉读者,“这个变量永远不会被重新分配,”减少认知负荷并提高可维护性。
'no-use-before-define': 1, // 禁止在变量定义之前使用它们
'vue/attributes-order': 2, // vue api使用顺序
'vue/no-multiple-template-root': 0,
'@typescript-eslint/explicit-module-boundary-types': 0,
'@typescript-eslint/no-var-requires': 0,
'@typescript-eslint/no-unused-vars': 0,
'@typescript-eslint/ban-ts-comment': 0,
'@typescript-eslint/no-explicit-any': 0,
'@typescript-eslint/no-empty-function': 0,
'vue/multi-word-component-names': 0
},
overrides: [
{
files: ['**/__tests__/*.{j,t}s?(x)'],
env: {
mocha: true
}
}
]
}
```
- 在根目录下建立 prettier 配置文件: .prettierrc.js
```js
module.exports = {
printWidth: 100, // 单行输出(不折行)的(最大)长度
tabWidth: 2, // 每个缩进级别的空格数
tabs: false, // 使用制表符 (tab) 缩进行而不是空格 (space)。
semi: false, // 是否在语句末尾打印分号
singleQuote: true, // 是否使用单引号
quoteProps: "as-needed", // 仅在需要时在对象属性周围添加引号
jsxSingleQuote: false, // jsx 不使用单引号,而使用双引号
trailingComma: "none", // 去除对象最末尾元素跟随的逗号
bracketSpacing: true, // 是否在对象属性添加空格
jsxBracketSameLine: true, // 将 > 多行 JSX 元素放在最后一行的末尾,而不是单独放在下一行(不适用于自闭元素),默认false,这里选择>不另起一行
arrowParens: "always", // 箭头函数,只有一个参数的时候,也需要括号
proseWrap: "always", // 当超出print width(上面有这个参数)时就折行
htmlWhitespaceSensitivity: "ignore", // 指定 HTML 文件的全局空白区域敏感度, "ignore" - 空格被认为是不敏感的
vueIndentScriptAndStyle: false, // 在VUE文件中不要缩进脚本和样式标记
stylelintIntegration: true,
endOfLine: "auto"
}
```
### Husky 和 Lint-staged 配置 Pre-commit 检查
```
npx mrm@2 lint-staged
```
- 运行上面这条命令后会在package.json中添加一条脚本和lint-staged配置
```json
{
"scripts": {
"lint": "eslint ./src/**/*{.js,.jsx,.ts,.tsx,.vue} --fix", // 这条除外
"prepare": "husky install"
},
"devDependencies": {
"husky": "^7.0.4",
"lint-staged": "^12.4.1",
},
"lint-staged": {
"*.{js,jsx,vue,ts,tsx}": "npm run lint"
}
}
```
- 安装 lint-staged 和 husky 相关的依赖
- 然后会在更目录创建一个.husky目录,这一步在windows上可能会出错,执行 npx husky install 创建,该目录下有一个pre-commit文件在每次提交代码的时候会执行,可以修改里面的运行脚本,自定义提交需要做的工作
```shell
#!/bin/sh
. "$(dirname "$0")/_/husky.sh"
# npx lint-staged
npm run lint
```
注意:由于我们使用的是pnpm,在执行npx mrm@2 lint-staged的时候,使用的是npm去安装依赖,而且在package.json中没有相关的版本记录,我的解决方法是再使用pnpm i husky lint-staged -D安装一次
## 第三方库集成
### 路由 vue-router
安装依赖
```
pnpm install vue-router@4
```
src 目录创建 router/index.ts
```ts
import { createRouter, createWebHashHistory, RouteRecordRaw } from 'vue-router'
import Login from '/@/views/login.vue'
const routes: Array = [
{
path: '/login',
component: Login
}
]
const router = createRouter({
history: createWebHashHistory(),
routes
})
export default router
```
在 main.ts 中注册路由
```ts
import { createApp } from 'vue'
import router from './router'
import App from './App.vue'
const app = createApp(App)
app.use(router).mount('#app')
```
App.vue 中使用路由占位符
```html
```
### 状态管理 pinia
```shell
pnpm install pinia
```
src 目录创建 store/index.ts
```ts
import { App } from 'vue'
import { createPinia } from 'pinia'
export const setupStore = (app: App) => {
app.use(createPinia())
}
```
在 main.ts 中注册
```ts
import { setupStore } from './store'
setupStore(app)
```
### 引入Vant 推荐[官方文档](https://vant-contrib.gitee.io/vant/#/zh-CN/quickstart)
```
pnpm add vant
```
1. 在 vite 项目中按需引入组件(推荐)
```
pnpm add vite-plugin-style-import@1.4.1 -D
```
2. 配置插件 安装完成后,在 vite.config.ts 文件中配置插件:
```ts
import { defineConfig } from 'vite'
import vue from '@vitejs/plugin-vue'
import styleImport, { VantResolve } from 'vite-plugin-style-import'
import { resolve } from 'path'
// 路径查找
const pathResolve = (dir: string): string => {
return resolve(__dirname, '.', dir)
}
// 设置别名
const alias: Record = {
'/@': pathResolve('src'),
'@': pathResolve('src'),
'@build': pathResolve('build')
}
// https://vitejs.dev/config/
export default defineConfig({
resolve: { alias },
plugins: [
vue(),
styleImport({
resolves: [VantResolve()]
})
]
})
```
3. 引入组件 完成以上两步,就可以直接使用 Vant 组件了:
```ts
import { createApp } from 'vue'
import { Button } from 'vant'
const app = createApp()
app.use(Button)
```
### rem适配
```
pnpm add postcss postcss-import postcss-pxtorem autoprefixer -D
pnpm add amfe-flexible -S
```
新建 postcss.config.js
```js
module.exports = {
plugins: {
'postcss-pxtorem': {
rootValue: 37.5,
propList: ['*']
},
'postcss-import': require('postcss-import'),
autoprefixer: require('autoprefixer')
}
}
```
在main.ts中引入 amfe-flexible
```ts
// main.ts
import 'amfe-flexible'
```