# android-video-chat-demo
**Repository Path**: mirrors_AgoraIO-Community/android-video-chat-demo
## Basic Information
- **Project Name**: android-video-chat-demo
- **Description**: simple android demo using the Agora.io SDK
- **Primary Language**: Unknown
- **License**: Not specified
- **Default Branch**: master
- **Homepage**: None
- **GVP Project**: No
## Statistics
- **Stars**: 0
- **Forks**: 0
- **Created**: 2021-10-22
- **Last Updated**: 2026-03-08
## Categories & Tags
**Categories**: Uncategorized
**Tags**: None
## README
# How to: Build a Video Chat App on Android
In this repo, we’ll build a basic video chat app in 10 easy steps, using the [Agora.io Video SDK](https://docs.agora.io/en/Video/product_video?platform=All%20Platforms) for Android.
## Prerequisites ##
* [Android Studio](https://developer.android.com/studio)
* [Basic knowledge of Java and the Android SDK](https://developer.android.com/training/basics/firstapp)
* An [Agora.io Developer Account](http://console.agora.io)
## Step 1: Agora.io Account ##
Once you finish the sign-up process, you will be redirected to the Dashboard. Open the Projects tab on the left-hand nav to see your default project’s App ID.

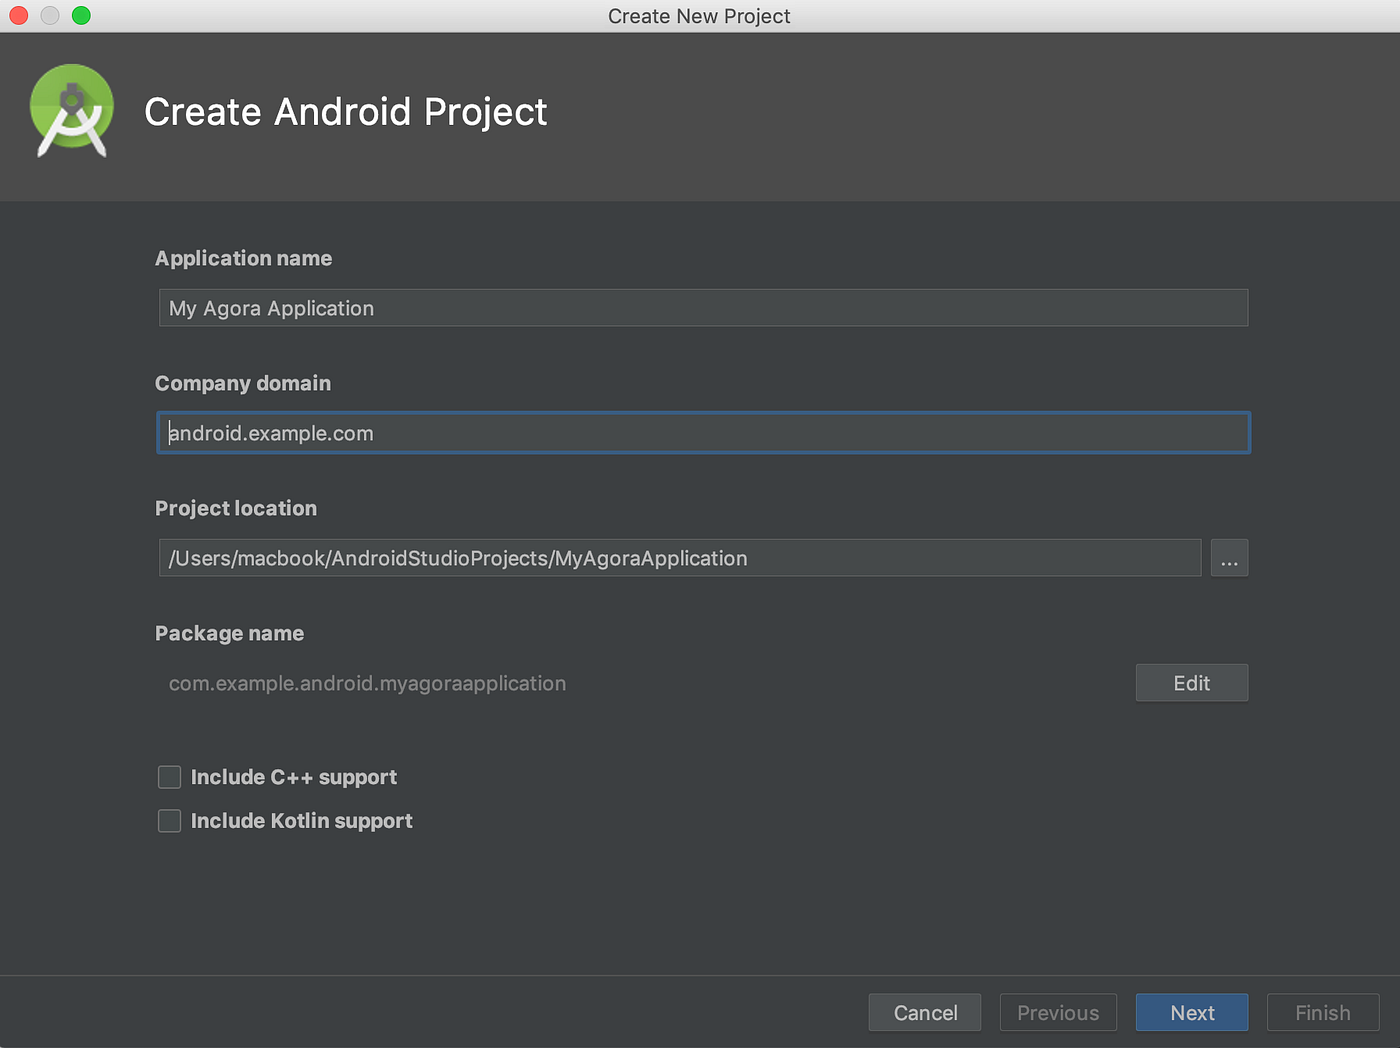
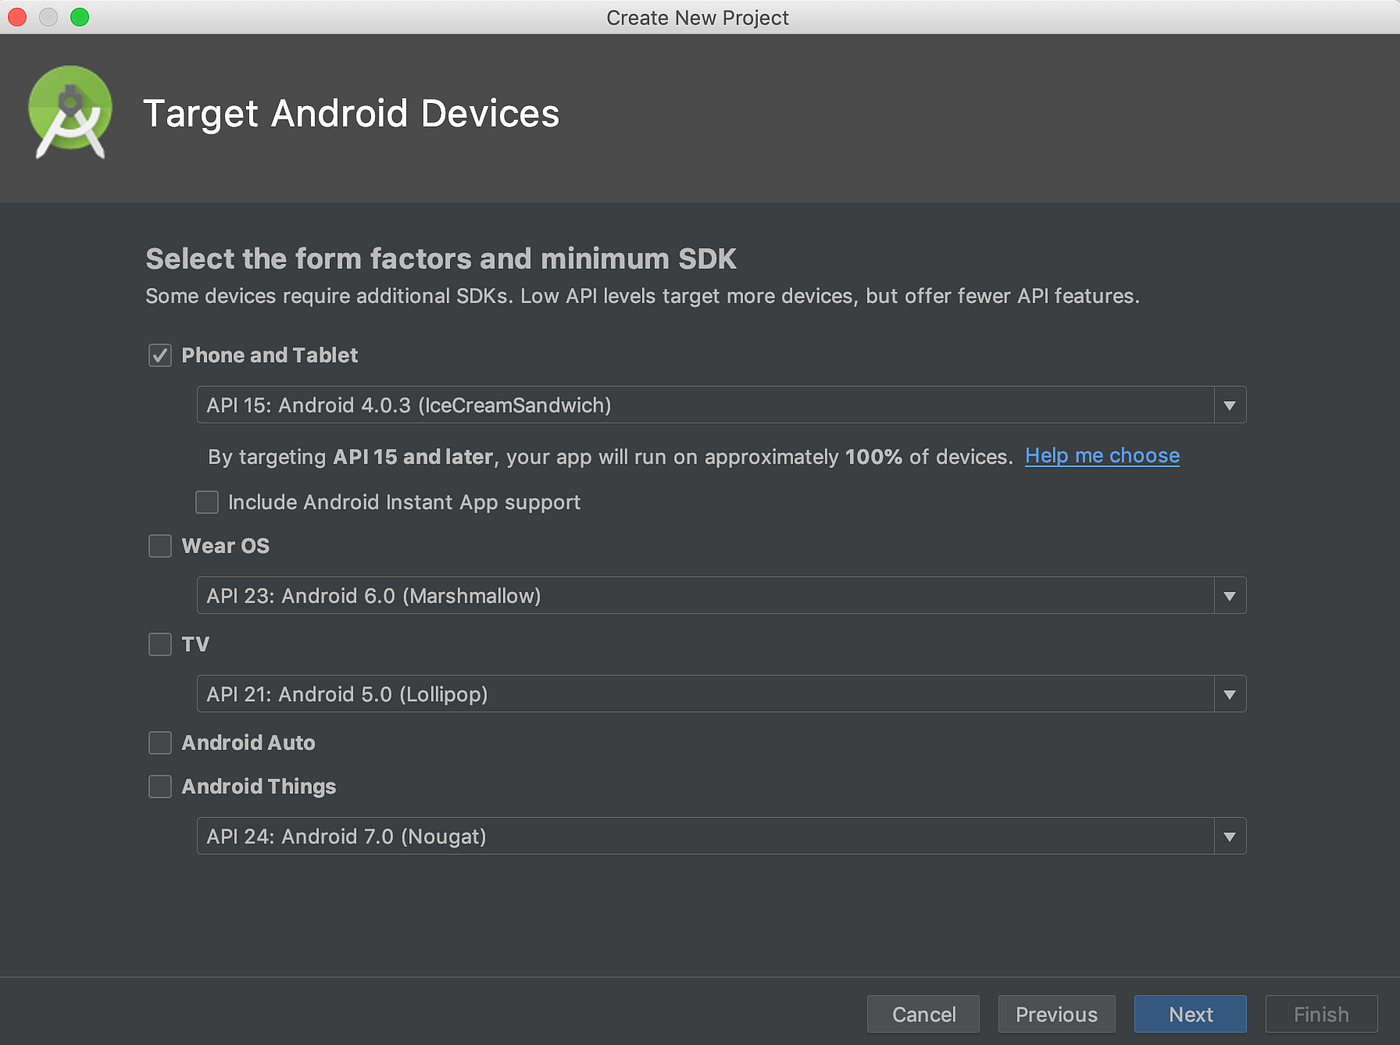
## Step 2: Create an Android App ##
Within Android Studio, create a new Single Activity app.
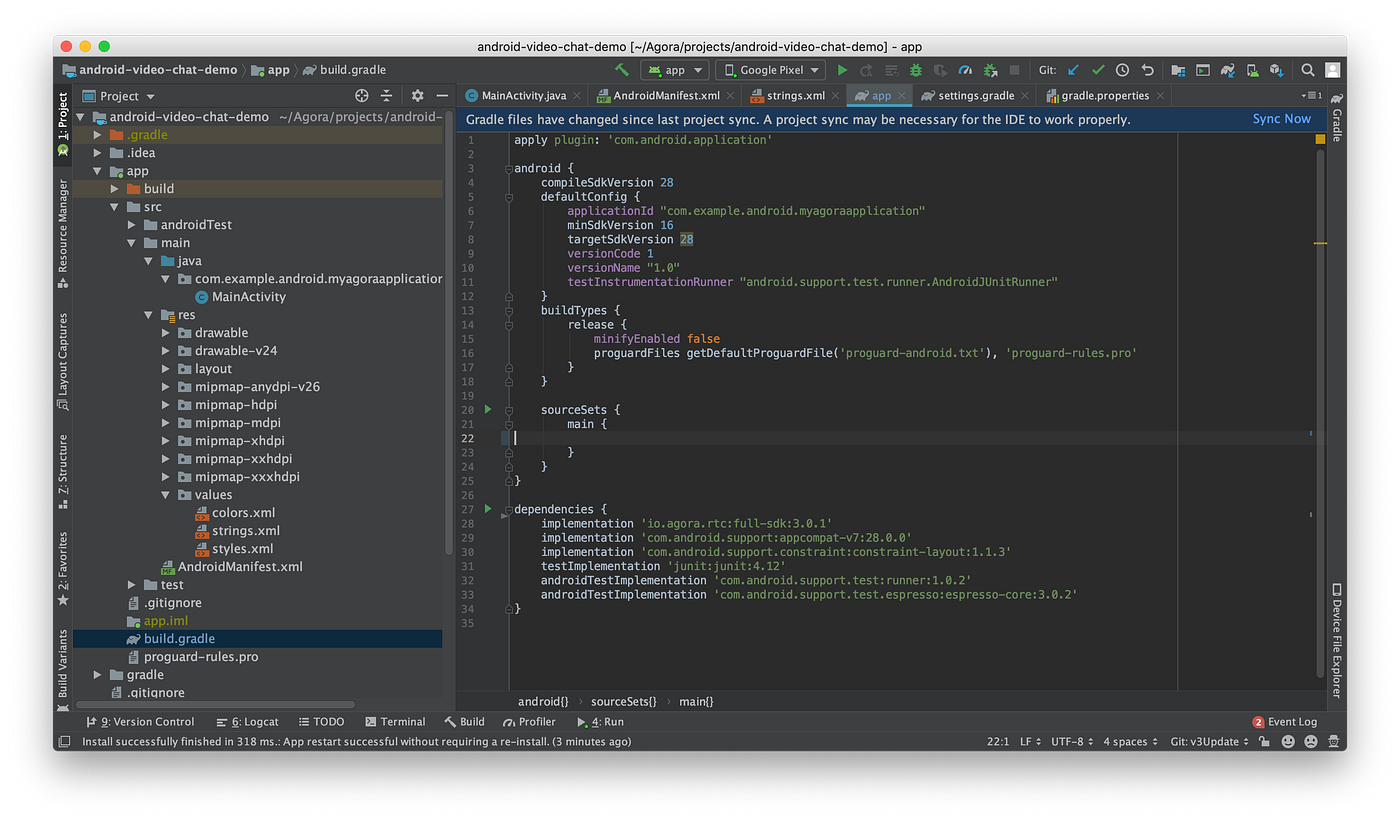
## Step 3: Integrate the Agora SDK ##
There are two ways to add the Agora Video SDK into your project. You can use [JCenter](https://mvnrepository.com/repos/jcenter) or you can manually add the SDK. For this project we'll add the project using JCenter.
Add the following line in the `/app/build.gradle` file of your project:
```
dependencies {
...
//Agora RTC SDK for video call
implementation 'io.agora.rtc:full-sdk:3.0.1'
}
```
## Set up Agora APP ID ###
Next, its time to add your Agora.io App ID (see Step-1) to the Android project’s `Strings.xml` _(app/src/main/res/values/Strings.xml)_.
```XML
Agora-Android-Video-Tutorial
<#YOUR APP ID#>
```

The next step is to add the appropriate permissions within `Manifest.xml`
```XML
```
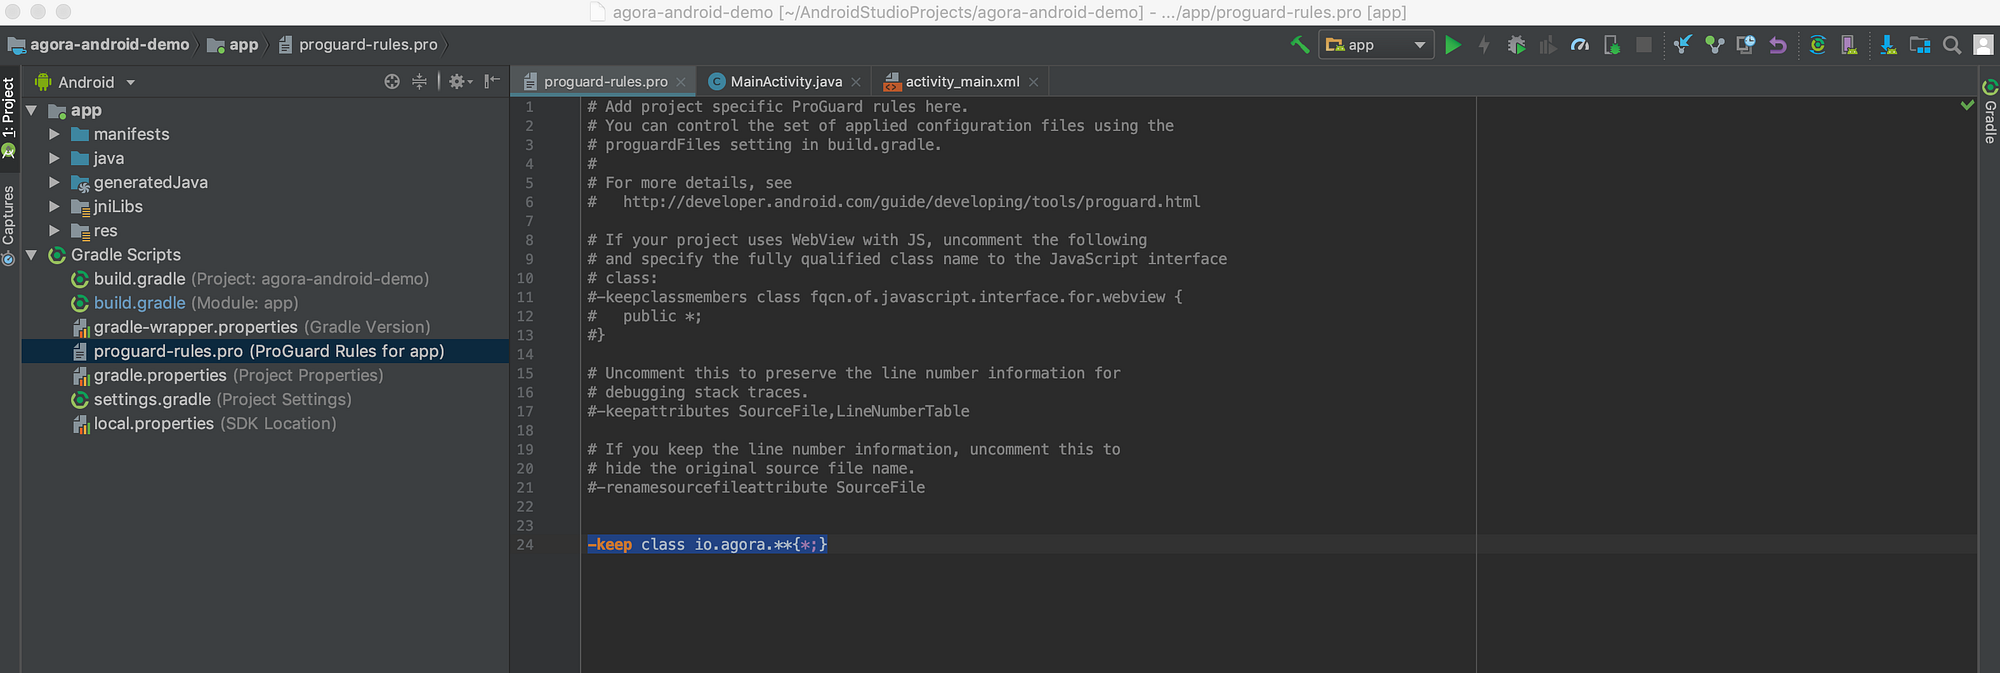
The final step is to prevent obfuscation of the Agora classes, while this might sound complex it’s really simple. In the `proguard-rules.pro` file, add:
```
-keep class io.agora.**{*;}
```
> NOTE: Ensure that the Android NDK plugin is installed and setup for this project
## Step 4: Setup views ##
Now that we have the Agora.io SDK integrated, let’s set up our UI. I will breeze through this portion as we will be using standard UI elements.
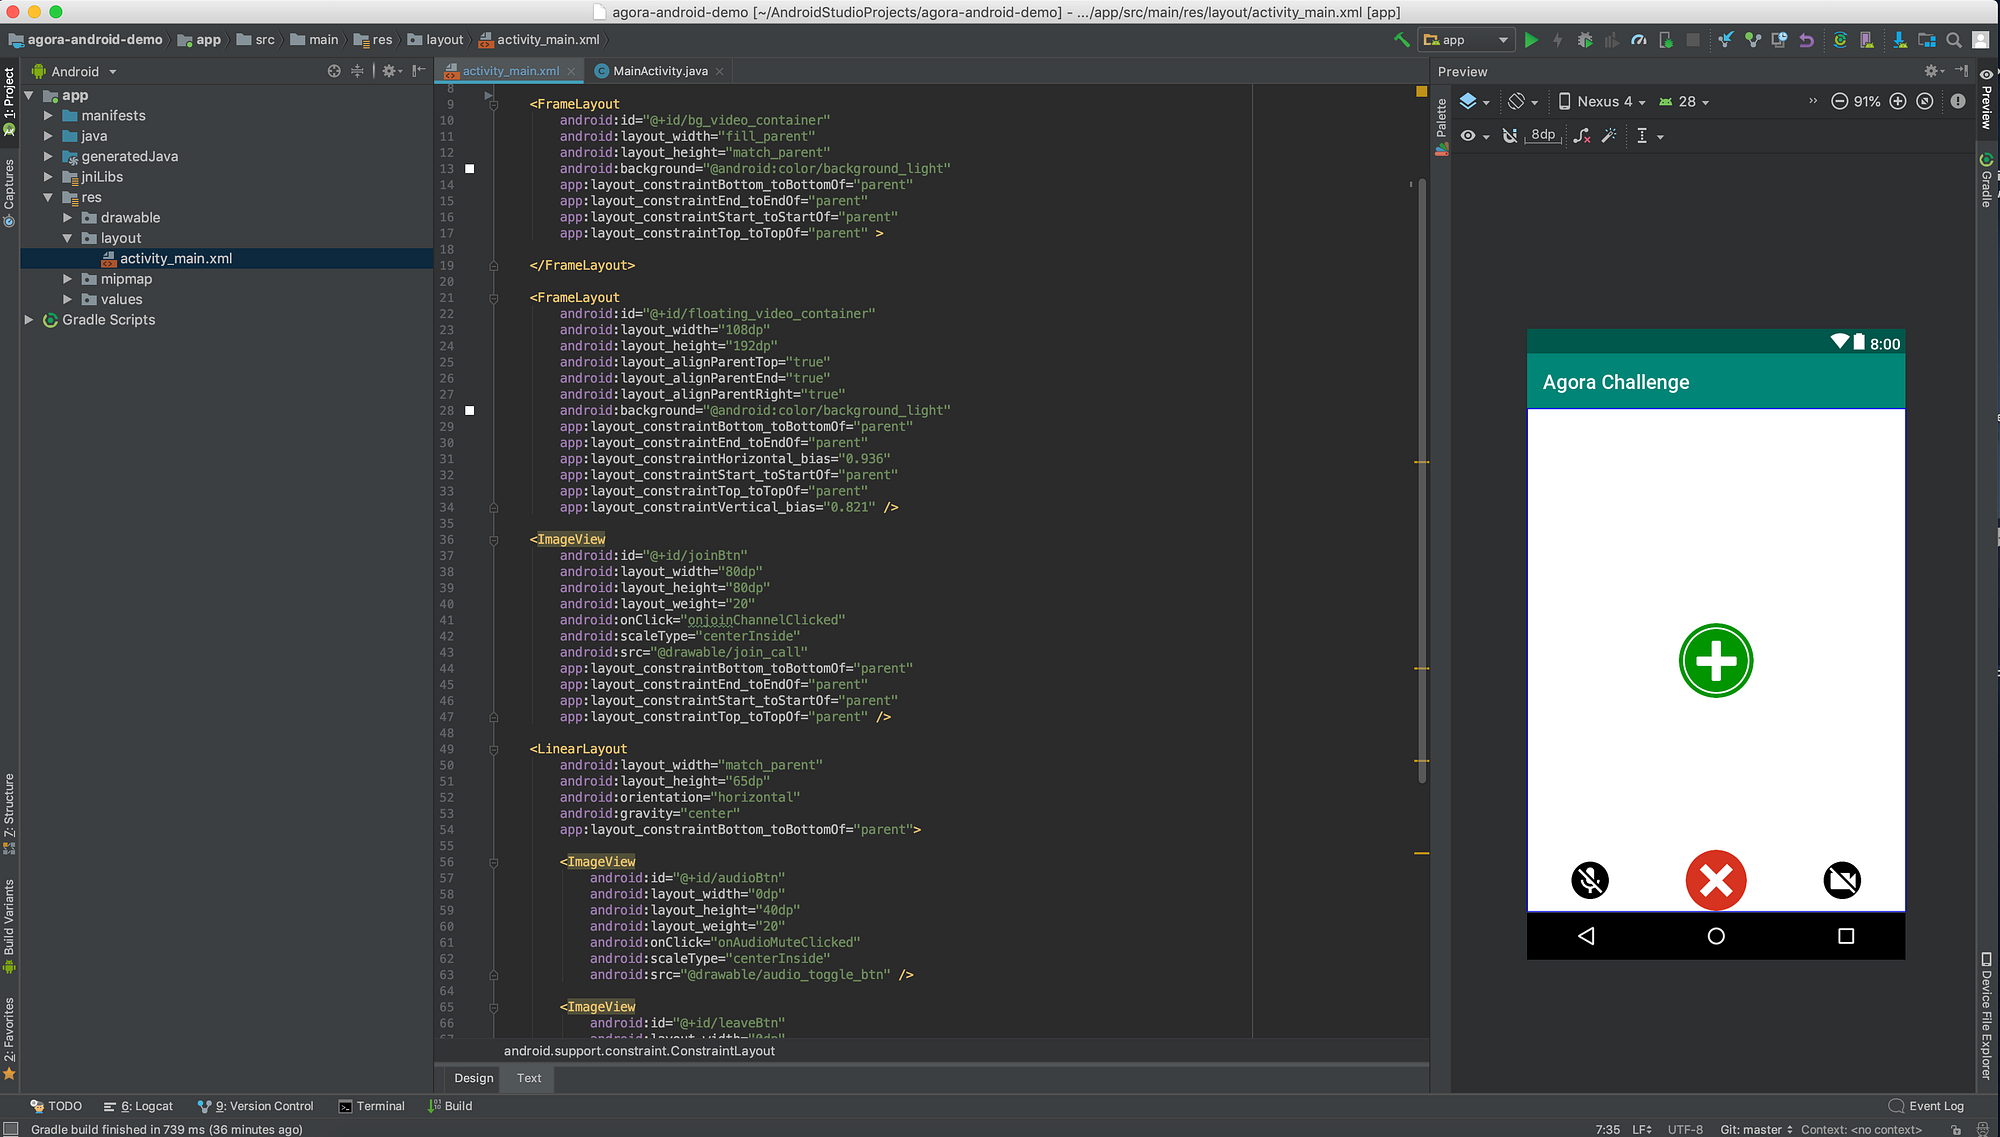
In the example, I chose to use `ImageView` instead of `Button` for the various UI elements. Either works, the important part is to note that there are functions that we link to using the `onClick` property.
## Step 5: Checking Permissions ##
I know what you must be thinking… “didn’t we already set up the Permissions?” Earlier we let the applications Manifest know which permissions our app plans to use, but we still have to explicitly request the user grant these permissions. Don’t worry this is the final step in getting the boilerplate project running and it’s painless.
First, let's declare which permissions we want to request.
```Java
// Permissions
private static final int PERMISSION_REQ_ID = 22;
private static final String[] REQUESTED_PERMISSIONS = {Manifest.permission.RECORD_AUDIO, Manifest.permission.CAMERA};
```
Next, we set up a couple of functions to help us. First we'll add a method that will request permissions for a given permission string and code.
```Java
public boolean checkSelfPermission(String permission, int requestCode) {
if (ContextCompat.checkSelfPermission(this,
permission)
!= PackageManager.PERMISSION_GRANTED) {
ActivityCompat.requestPermissions(this,
REQUESTED_PERMISSIONS,
requestCode);
return false;
}
return true;
}
```
Next, we have a callback method that will get called after the user has responded to the permissions request prompt.
```Java
@Override
public void onRequestPermissionsResult(int requestCode,
@NonNull String permissions[], @NonNull int[] grantResults) {
Log.i(LOG_TAG, "onRequestPermissionsResult " + grantResults[0] + " " + requestCode);
switch (requestCode) {
case PERMISSION_REQ_ID: {
if (grantResults[0] != PackageManager.PERMISSION_GRANTED || grantResults[1] != PackageManager.PERMISSION_GRANTED) {
Log.i(LOG_TAG, "Need permissions " + Manifest.permission.RECORD_AUDIO + "/" + Manifest.permission.CAMERA);
break;
}
// if permission granted, initialize the engine
initAgoraEngine();
break;
}
}
}
```
Last, within our Class’s `onCreate` we check if our permissions have been granted and if not the above methods will handle the requests.

## Step 6: Initializing the Agora.io SDK ##
Now that we have our view, we are ready to initialize the Agora.io SDK, set up the user profile and set the video quality settings.
In the previous step, you may have noticed there are a couple places that I call `initAgoraEngine()`. Before we can dive into the initialization we need to make sure that our Activity has access to an instance of the Agora.io `RtcEngine`.
Within our `MainActivity` Class, we need to declare a Class property to store our instance of RtcEngine.
```Java
private RtcEngine mRtcEngine;
```
Now its time to initialize! After all the boilerplate setup we are finally at the step where we can start playing with the Agora.io engine!
Go ahead and declare your `initAgoraEngine` method within your class. Within this function, we will create a new instance of the `RtcEngine` using the baseContext, the Agora `AppID` _(declared above)_, and an instance of the `RtcEngineEventHandler` _(we’ll get into this a little later)_.
```Java
private void initAgoraEngine() {
try {
mRtcEngine = RtcEngine.create(getBaseContext(), getString(R.string.agora_app_id), mRtcEventHandler);
} catch (Exception e) {
Log.e(LOG_TAG, Log.getStackTraceString(e));
throw new RuntimeException("NEED TO check rtc sdk init fatal error\n" + Log.getStackTraceString(e));
}
setupSession();
}
```
Once we have our new instance it’s time to set up our user’s session. Here we can set the Channel Profile to Communication, as this is a video chat and not a broadcast. This is also where we configure our video encoder settings.
```Java
private void setupSession() {
mRtcEngine.setChannelProfile(Constants.CHANNEL_PROFILE_COMMUNICATION);
mRtcEngine.enableVideo();
mRtcEngine.setVideoEncoderConfiguration(new VideoEncoderConfiguration(VideoEncoderConfiguration.VD_1920x1080, VideoEncoderConfiguration.FRAME_RATE.FRAME_RATE_FPS_30,
VideoEncoderConfiguration.STANDARD_BITRATE,
VideoEncoderConfiguration.ORIENTATION_MODE.ORIENTATION_MODE_FIXED_PORTRAIT));
}
```
## Step 7: Connecting the Video Streams ##
Before we can join a view call we need to be able to present the local video stream to the user via the UI elements we setup earlier _(Step 4)_.
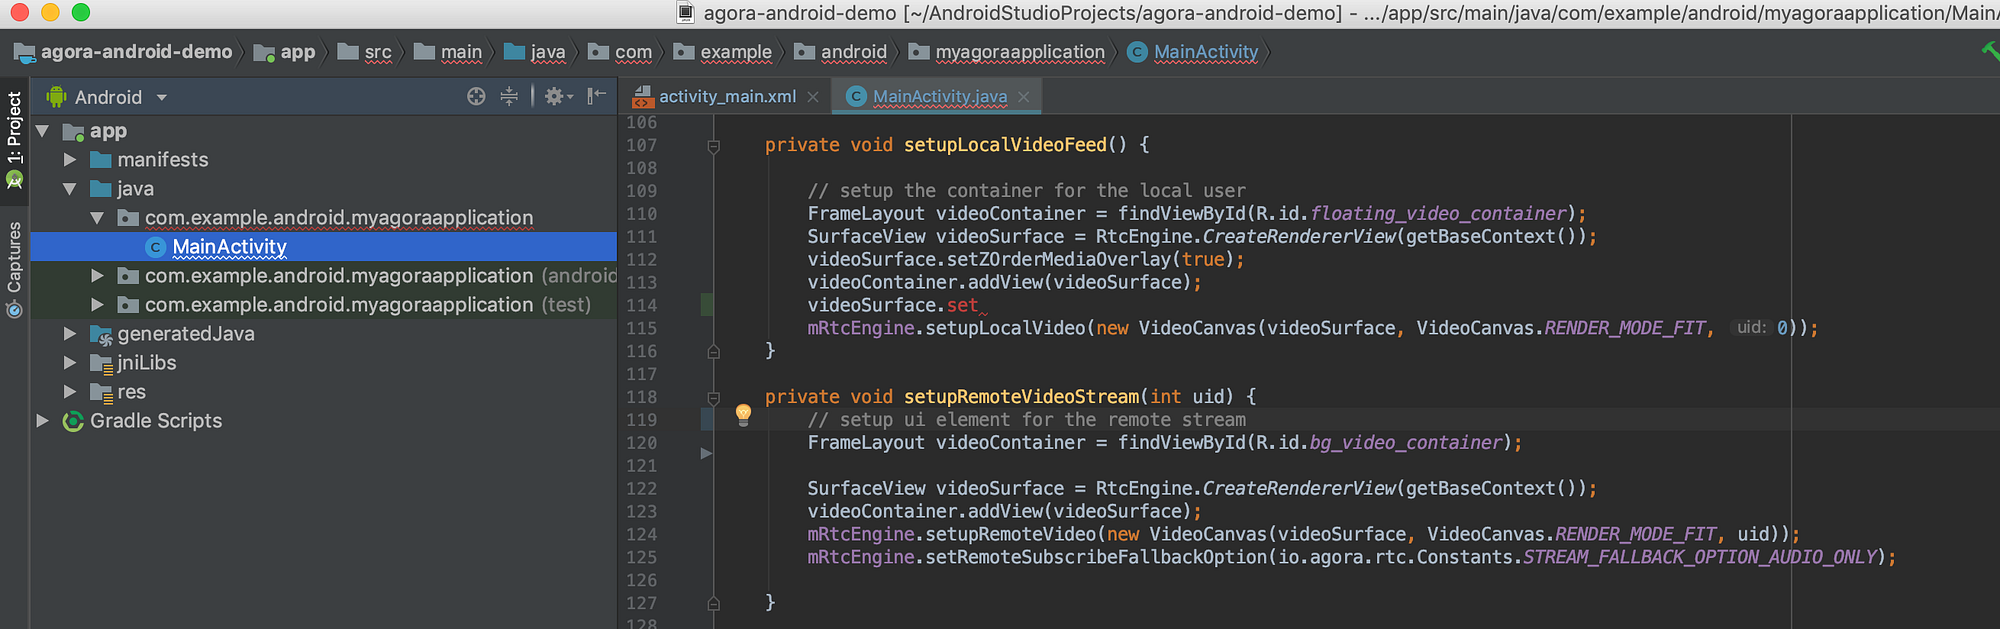
In the first line, we get a reference for the UI element will act as our parent view for our video stream. The second step is to use the `RtcEngine` to create a [`SurfaceView`](https://developer.android.com/reference/android/view/SurfaceView) that will render the stream from the front camera, we also set the new `VideoSurface` to render on top of its parent view. The next step is to add the `VideoSurface` as a subview of the UI element. Lastly, we pass the `VideoSurface` to the engine as part of a `VideoCanvas` object. We leave the `uid` parameter blank so the SDK can handle creating a dynamic id for each user.
```Java
private void setupLocalVideoFeed() {
FrameLayout videoContainer = findViewById(R.id.floating_video_container);
SurfaceView videoSurface = RtcEngine.CreateRendererView(getBaseContext());
videoSurface.setZOrderMediaOverlay(true);
videoContainer.addView(videoSurface);
mRtcEngine.setupLocalVideo(new VideoCanvas(videoSurface, VideoCanvas.RENDER_MODE_FIT, 0));
}
```
Now, that we have our local video feed setup we need to use a similar function to connect our remote video stream.
```Java
private void setupRemoteVideoStream(int uid) {
FrameLayout videoContainer = findViewById(R.id.bg_video_container);
SurfaceView videoSurface = RtcEngine.CreateRendererView(getBaseContext());
videoContainer.addView(videoSurface);
mRtcEngine.setupRemoteVideo(new VideoCanvas(videoSurface, VideoCanvas.RENDER_MODE_FIT, uid));
mRtcEngine.setRemoteSubscribeFallbackOption(io.agora.rtc.Constants.STREAM_FALLBACK_OPTION_AUDIO_ONLY);
}
```
The main difference with the remote video from the local, is the user `id` parameter that gets passed to the engine as part of the `VideoCanvas` object that gets passed to the engine. The last line sets the fall back option in case the video degrades the engine will revert to audio only.
## Step 8: Setup the SDK Event Handler ##
Earlier, I made a reference to the `RtcEngineEventHandler`, and now it’s time to declare it as a property of our `MainActivity` Class. The engine will call these methods from the `RtcEngineEventHandler`.
```Java
// Handle SDK Events
private final IRtcEngineEventHandler mRtcEventHandler = new IRtcEngineEventHandler() {
@Override
public void onFirstRemoteVideoDecoded(final int uid, int width, int height, int elapsed) {
runOnUiThread(new Runnable() {
@Override
public void run() {
setupRemoteVideoStream(uid);
}
});
}
// remote user has left channel
@Override
public void onUserOffline(int uid, int reason) {
runOnUiThread(new Runnable() {
@Override
public void run() {
onRemoteUserLeft();
}
});
}
// remote stream has been toggled
@Override
public void onUserMuteVideo(final int uid, final boolean toggle) { // Tutorial Step 10
runOnUiThread(new Runnable() {
@Override
public void run() {
onRemoteUserVideoToggle(uid, toggle);
}
});
}
};
```
Each event triggers some fairly straight forward functions, including one we wrote in the previous step. In the interest of keeping this brief, I will provide the code below but I won’t give an in-depth breakdown.
```Java
private void onRemoteUserVideoToggle(int uid, boolean toggle) {
FrameLayout videoContainer = findViewById(R.id.bg_video_container);
SurfaceView videoSurface = (SurfaceView) videoContainer.getChildAt(0);
videoSurface.setVisibility(toggle ? View.GONE : View.VISIBLE);
// add an icon to let the other user know remote video has been disabled
if(toggle){
ImageView noCamera = new ImageView(this);
noCamera.setImageResource(R.drawable.video_disabled);
videoContainer.addView(noCamera);
} else {
ImageView noCamera = (ImageView) videoContainer.getChildAt(1);
if(noCamera != null) {
videoContainer.removeView(noCamera);
}
}
}
private void onRemoteUserLeft() {
removeVideo(R.id.bg_video_container);
}
private void removeVideo(int containerID) {
FrameLayout videoContainer = findViewById(containerID);
videoContainer.removeAllViews();
}
```
## Step 9: Joining and Leaving Channels ##
I know what you’re thinking, STEP 9 ?!! Don’t sweat it the next two steps are really simple. Let’s start by joining a call…
Below you can see from the first line, Agora SDK makes it simple, the engine calls joinChannel, passing in the channel name followed by the call to set up our local video stream. _(Step 7)_
```Java
public void onjoinChannelClicked(View view) {
mRtcEngine.joinChannel(null, "test-channel", "Extra Optional Data", 0);
setupLocalVideoFeed();
findViewById(R.id.joinBtn).setVisibility(View.GONE); // set the join button hidden
findViewById(R.id.audioBtn).setVisibility(View.VISIBLE); // set the audio button hidden
findViewById(R.id.leaveBtn).setVisibility(View.VISIBLE); // set the leave button hidden
findViewById(R.id.videoBtn).setVisibility(View.VISIBLE); // set the video button hidden
}
```
Leaving the channel is even simpler, the engine calls leaveChannel. Above you’ll notice there are a few lines to remove the video stream subviews from each UI element.
```Java
public void onLeaveChannelClicked(View view) {
leaveChannel();
removeVideo(R.id.floating_video_container);
removeVideo(R.id.bg_video_container);
findViewById(R.id.joinBtn).setVisibility(View.VISIBLE); // set the join button visible
findViewById(R.id.audioBtn).setVisibility(View.GONE); // set the audio button hidden
findViewById(R.id.leaveBtn).setVisibility(View.GONE); // set the leave button hidden
findViewById(R.id.videoBtn).setVisibility(View.GONE); // set the video button hidden
}
private void leaveChannel() {
mRtcEngine.leaveChannel();
}
private void removeVideo(int containerID) {
FrameLayout videoContainer = findViewById(containerID);
videoContainer.removeAllViews();
}
```
## Step 10: Adding UI Functionality ##
The last remaining parts are related to connecting the UI elements for toggling the microphone and video stream on the local device. Let’s start with the audio toggle.
First, we get the reference to our button, and then check if it has been toggled on/off using `isSelected()`. Once we have updated the UI element state, we pass the button’s updated state to the engine.
```Java
public void onAudioMuteClicked(View view) {
ImageView btn = (ImageView) view;
if (btn.isSelected()) {
btn.setSelected(false);
btn.setImageResource(R.drawable.audio_toggle_btn);
} else {
btn.setSelected(true);
btn.setImageResource(R.drawable.audio_toggle_active_btn);
}
mRtcEngine.muteLocalAudioStream(btn.isSelected());
}
```
Moving on to the video toggle, as with the audio toggle we check/update the button’s state using `isSelected()` and then pass that to the engine. To give a better visual representation of the video being muted, we hide/show the `VideoSurface`.
```Java
public void onVideoMuteClicked(View view) {
ImageView btn = (ImageView) view;
if (btn.isSelected()) {
btn.setSelected(false);
btn.setImageResource(R.drawable.video_toggle_btn);
} else {
btn.setSelected(true);
btn.setImageResource(R.drawable.video_toggle_active_btn);
}
mRtcEngine.muteLocalVideoStream(btn.isSelected());
FrameLayout container = findViewById(R.id.floating_video_container);
container.setVisibility(btn.isSelected() ? View.GONE : View.VISIBLE);
SurfaceView videoSurface = (SurfaceView) container.getChildAt(0);
videoSurface.setZOrderMediaOverlay(!btn.isSelected());
videoSurface.setVisibility(btn.isSelected() ? View.GONE : View.VISIBLE);
}
```

I hope you enjoyed reading along and working together on creating a 1-to-1 Video Chat Android app using the [Agora.io Video SDK](https://docs.agora.io/en/Video/product_video?platform=All%20Platforms).
=======
This repo is part of a tutorial posted on Medium. For an in depth explanation of how to build your own version please read:
https://medium.com/agora-io/1-to-1-video-chat-app-on-android-using-agora-io-3c2fe6c42fb4
***Requirements:***
- Agora.io Developer Account (https://dashboard.agora.io)
- Agora Video SDK for Android - available in the Agora.io Developer Center (https://docs.agora.io/en/Agora%20Platform/downloads)