# TensorRT-YOLO
**Repository Path**: orvillex/TensorRT-YOLO
## Basic Information
- **Project Name**: TensorRT-YOLO
- **Description**: No description available
- **Primary Language**: Unknown
- **License**: GPL-3.0
- **Default Branch**: main
- **Homepage**: None
- **GVP Project**: No
## Statistics
- **Stars**: 0
- **Forks**: 0
- **Created**: 2026-04-23
- **Last Updated**: 2026-04-23
## Categories & Tags
**Categories**: Uncategorized
**Tags**: None
## README
[English](README.en.md) | 简体中文
---
🚀 TensorRT-YOLO 是一款专为 NVIDIA 设备设计的**易用灵活**、**极致高效**的**YOLO系列**推理部署工具。项目不仅集成了 TensorRT 插件以增强后处理效果,还使用了 CUDA 核函数以及 CUDA 图来加速推理。TensorRT-YOLO 提供了 C++ 和 Python 推理的支持,旨在提供📦**开箱即用**的部署体验。包括 [目标检测](examples/detect/)、[实例分割](examples/segment/)、[图像分类](examples/classify/)、[姿态识别](examples/pose/)、[旋转目标检测](examples/obb/)、[视频分析](examples/VideoPipe)等任务场景,满足开发者**多场景**的部署需求。
## 🌠 近期更新
- 🔥 **实战课程|TensorRT × Triton Inference Server 模型部署**
- **平台**: [BiliBili 课堂](https://www.bilibili.com/cheese/play/ss193350134) | [微信公众号](https://mp.weixin.qq.com/s/DVEo6RB-Wt4yDIX_3u-7Gw) 🚀 **HOT**
- **团队**: [laugh12321](https://space.bilibili.com/86034462) | [不归牛顿管的熊猫](https://space.bilibili.com/393625476)
- 🛠 **硬核专题**:
▸ **自定义插件开发**(含Plugin注册全流程)
▸ **CUDA Graph 原理与工程实践**
▸ **Triton Inference Server 部署技巧**
- 2026-03-20: 添加对 [YOLO26](https://docs.ultralytics.com/zh/models/yolo26/) 的支持,包括分类、定向边界框、姿态估计以及实例分割。🌟 NEW
- 2026-01-07: 添加对 [YOLO-Master](https://github.com/Tencent/YOLO-Master) 的支持,包括分类、定向边界框、姿态估计以及实例分割。🌟 NEW
- 2025-10-05:精度完美对齐,CUDA 完美复刻 LetterBox,绝大多数情况下像素误差为 0。Python 模块重大重构,易用性大幅提升。🌟 NEW
- 2025-06-09: C++仅引单头文件 `trtyolo.hpp`,零第三方依赖(使用模块时无需链接 CUDA 和 TensorRT),增加对带图像间距(Pitch)数据结构的支持,详见 [B站](https://www.bilibili.com/video/BV1e2N1zjE3L)。🌟 NEW
- 2025-04-19: 添加对 [YOLO-World](https://docs.ultralytics.com/zh/models/yolo-world/), [YOLOE](https://docs.ultralytics.com/zh/models/yoloe/) 的支持,包括分类、定向边界框、姿态估计以及实例分割,详见 [B站](https://www.bilibili.com/video/BV12N5bzkENV)。🌟 NEW
- 2025-03-29: 添加对 [YOLO12](https://github.com/sunsmarterjie/yolov12) 的支持,包括分类、定向边界框、姿态估计以及实例分割,详见 [issues](https://github.com/sunsmarterjie/yolov12/issues/22)。🌟 NEW
- [性能飞跃!TensorRT-YOLO 6.0 全面升级解析与实战指南](https://www.cnblogs.com/laugh12321/p/18693017) 🌟 NEW
## ✨ 主要特性
### 🎯 多样化的 YOLO 支持
- **全面兼容**:支持 YOLOv3 至 YOLO26,以及 YOLO-World、YOLO-Master 等多种变体,满足多样化需求,详见 [🖥️ 模型支持列表](https://github.com/laugh12321/trtyolo-export/blob/main/README.cn.md#%EF%B8%8F-%E6%A8%A1%E5%9E%8B%E6%94%AF%E6%8C%81%E5%88%97%E8%A1%A8)。
- **灵活切换**:提供简洁易用的接口,支持不同版本 YOLO 模型的快速切换。🌟 NEW
- **多场景应用**:提供丰富的示例代码,涵盖[Detect](examples/detect/)、[Segment](examples/segment/)、[Classify](examples/classify/)、[Pose](examples/pose/)、[OBB](examples/obb/)等多种应用场景。
### 🚀 性能优化
- **CUDA 加速**:通过 CUDA 核函数优化前处理流程,并采用 CUDA 图技术加速推理过程。
- **TensorRT 集成**:深度集成 TensorRT 插件,显著加速后处理,提升整体推理效率。
- **多 Context 推理**:支持多 Context 并行推理,最大化硬件资源利用率。🌟 NEW
- **显存管理优化**:适配多架构显存优化策略(如 Jetson 的 Zero Copy 模式),提升显存效率。🌟 NEW
### 🛠️ 易用性
- **开箱即用**:提供全面的 C++ 和 Python 推理支持,满足不同开发者需求。
- **CLI 工具**:命令行界面简洁直观,并支持自动识别模型结构,无需复杂配置。
- **Docker 支持**:提供 Docker 一键部署方案,简化环境配置与部署流程。
- **无第三方依赖**:全部功能使用标准库实现,无需额外依赖,简化部署流程。
- **部署便捷**:提供动态库编译支持,方便调用和部署。
### 🌐 兼容性
- **多平台支持**:全面兼容 Windows、Linux、ARM、x86 等多种操作系统与硬件平台。
- **TensorRT 兼容**:完美适配 TensorRT 10.x 版本,确保与最新技术生态无缝衔接。
### 🔧 灵活配置
- **预处理参数自定义**:支持多种预处理参数灵活配置,包括 **通道交换 (SwapRB)**、**归一化参数**、**边界值填充**。🌟 NEW
## 💨 快速开始
### 1. 前置依赖
- **CUDA**:推荐版本 ≥ 11.0.1
- **TensorRT**:推荐版本 ≥ 8.6.1
- **操作系统**:Linux (x86_64 或 arm)(推荐);Windows 亦可支持
> [!NOTE]
> 如果您在 Windows 下进行开发,可以参考以下配置指南:
>
> - [Windows 开发环境配置——NVIDIA 篇](https://www.cnblogs.com/laugh12321/p/17830096.html)
> - [Windows 开发环境配置——C++ 篇](https://www.cnblogs.com/laugh12321/p/17827624.html)
### 2. 编译安装
首先,克隆 TensorRT-YOLO 仓库:
```bash
git clone https://github.com/laugh12321/TensorRT-YOLO
cd TensorRT-YOLO
```
然后使用 CMake,可以按照以下步骤操作:
```bash
pip install "pybind11[global]" # 安装 pybind11,用于生成 Python 绑定
cmake -S . -B build -D TRT_PATH=/your/tensorrt/dir -D BUILD_PYTHON=ON -D CMAKE_INSTALL_PREFIX=/your/tensorrt-yolo/install/dir
cmake --build build -j$(nproc) --config Release --target install
```
执行上述指令后,`tensorrt-yolo` 库将被安装到指定的 `CMAKE_INSTALL_PREFIX` 路径中。其中,`include` 文件夹中包含头文件,`lib` 文件夹中包含 `trtyolo` 动态库和 `custom_plugins` 动态库(仅在使用 `trtexec` 构建 OBB、Segment 或 Pose 模型时需要)。如果在编译时启用了 `BUILD_PYTHON` 选项,则还会在 `trtyolo/libs` 路径下生成相应的 Python 绑定文件。
> [!NOTE]
> 在使用 C++ 动态库之前,请确保将指定的 `CMAKE_INSTALL_PREFIX` 路径添加到环境变量中,以便 CMake 的 `find_package` 能够找到 `tensorrt-yolo-config.cmake` 文件。可以通过以下命令完成此操作:
>
> ```bash
> export PATH=$PATH:/your/tensorrt-yolo/install/dir # linux
> $env:PATH = "$env:PATH;C:\your\tensorrt-yolo\install\dir;C:\your\tensorrt-yolo\install\dir\bin" # windows
> ```
如果您希望在 Python 上体验与 C++ 相同的推理速度,则编译时需开启 `BUILD_PYTHON` 选项,然后再按照以下步骤操作:
```bash
pip install --upgrade build
python -m build --wheel
pip install dist/trtyolo-6.*-py3-none-any.whl
```
### 3. 模型转换
- 使用项目配套的 [`trtyolo-export`](https://github.com/laugh12321/trtyolo-export) 工具包,将已经导出的 YOLO 系列 ONNX 模型转换为兼容 TensorRT-YOLO 推理的输出结构并构建为 TensorRT 引擎。
### 4. 推理示例
- 使用 Python 进行推理:
```python
import cv2
import supervision as sv
from trtyolo import TRTYOLO
# -------------------- 初始化模型 --------------------
# 注意:task参数需与导出时指定的任务类型一致("detect"、"segment"、"classify"、"pose"、"obb")
# profile参数开启后,会在推理时计算性能指标,调用 model.profile() 可获取
# swap_rb参数开启后,会在推理前交换通道顺序(确保模型输入时RGB)
model = TRTYOLO("yolo11n-with-plugin.engine", task="detect", profile=True, swap_rb=True)
# -------------------- 加载测试图片并推理 --------------------
image = cv2.imread("test_image.jpg")
result = model.predict(image)
print(f"==> result: {result}")
# -------------------- 可视化结果 --------------------
box_annotator = sv.BoxAnnotator()
annotated_frame = box_annotator.annotate(scene=image.copy(), detections=result)
# -------------------- 性能评估 --------------------
throughput, cpu_latency, gpu_latency = model.profile()
print(throughput)
print(cpu_latency)
print(gpu_latency)
# -------------------- 克隆模型 --------------------
# 克隆模型实例(适用于多线程场景)
cloned_model = model.clone() # 创建独立副本,避免资源竞争
# 验证克隆模型推理一致性
cloned_result = cloned_model.predict(input_img)
print(f"==> cloned_result: {cloned_result}")
```
- 使用 C++ 进行推理:
```cpp
#include
#include
#include "trtyolo.hpp"
int main() {
try {
// -------------------- 初始化配置 --------------------
trtyolo::InferOption option;
option.enableSwapRB(); // BGR->RGB转换
// 特殊模型参数设置示例
// const std::vector mean{0.485f, 0.456f, 0.406f};
// const std::vector std{0.229f, 0.224f, 0.225f};
// option.setNormalizeParams(mean, std);
// -------------------- 模型初始化 --------------------
// ClassifyModel、DetectModel、OBBModel、SegmentModel 和 PoseModel 分别对应于图像分类、检测、方向边界框、分割和姿态估计模型
auto detector = std::make_unique(
"yolo11n-with-plugin.engine", // 模型路径
option // 推理设置
);
// -------------------- 数据加载 --------------------
cv::Mat cv_image = cv::imread("test_image.jpg");
if (cv_image.empty()) {
throw std::runtime_error("无法加载测试图片");
}
// 封装图像数据(不复制像素数据)
trtyolo::Image input_image(
cv_image.data, // 像素数据指针
cv_image.cols, // 图像宽度
cv_image.rows // 图像高度
);
// -------------------- 执行推理 --------------------
trtyolo::DetectRes result = detector->predict(input_image);
std::cout << result << std::endl;
// -------------------- 结果可视化(示意) --------------------
// 实际开发需实现可视化逻辑,示例:
// cv::Mat vis_image = visualize_detections(cv_image, result);
// cv::imwrite("vis_result.jpg", vis_image);
// -------------------- 模型克隆演示 --------------------
auto cloned_detector = detector->clone(); // 创建独立实例
trtyolo::DetectRes cloned_result = cloned_detector->predict(input_image);
// 验证结果一致性
std::cout << cloned_result << std::endl;
} catch (const std::exception& e) {
std::cerr << "程序异常: " << e.what() << std::endl;
return EXIT_FAILURE;
}
return EXIT_SUCCESS;
}
```
### 5.推理流程图
以下是`predict`方法的流程图,展示了从输入图片到输出结果的完整流程:
只需将待推理的图片传递给 `predict` 方法,`predict` 内部会自动完成预处理、模型推理和后处理,并输出推理结果,这些结果可进一步应用于下游任务(如可视化、目标跟踪等)。
> 更多部署案例请参考[模型部署示例](examples) .
## 🌟 赞助与支持
开源不易,如果本项目对你有所帮助,欢迎通过赞助支持作者。你的支持是开发者持续维护的最大动力!
---
🙏 **衷心感谢以下支持者与赞助商的无私支持**:
> [!NOTE]
>
> 以下是 GitHub Actions 自动生成的赞助者列表,每日更新 ✨。
## 📄 许可证
TensorRT-YOLO采用 **GPL-3.0许可证**,这个[OSI 批准](https://opensource.org/licenses/)的开源许可证非常适合学生和爱好者,可以推动开放的协作和知识分享。请查看[LICENSE](https://github.com/laugh12321/TensorRT-YOLO/blob/master/LICENSE) 文件以了解更多细节。
感谢您选择使用 TensorRT-YOLO,我们鼓励开放的协作和知识分享,同时也希望您遵守开源许可的相关规定。
## 📞 联系方式
对于 TensorRT-YOLO 的错误报告和功能请求,请访问 [GitHub Issues](https://github.com/laugh12321/TensorRT-YOLO/issues)!
给项目点亮 ⭐ Star 可以帮助我们优先关注你的需求,加快响应速度~
## 🙏 致谢
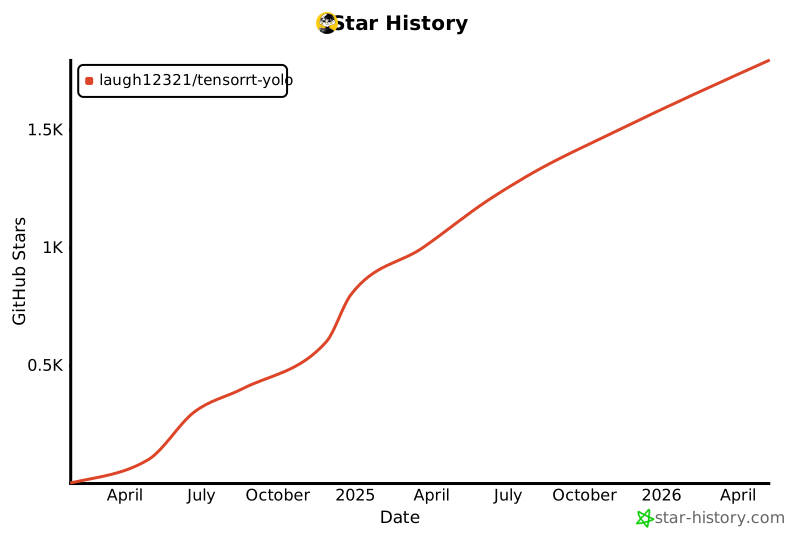
## 🌟 Star History
[](https://www.star-history.com/#laugh12321/TensorRT-YOLO&type=date&legend=top-left)