# open-ip-kvm-x
**Repository Path**: oss/open-ip-kvm-x
## Basic Information
- **Project Name**: open-ip-kvm-x
- **Description**: No description available
- **Primary Language**: Unknown
- **License**: MIT
- **Default Branch**: main
- **Homepage**: None
- **GVP Project**: No
## Statistics
- **Stars**: 0
- **Forks**: 0
- **Created**: 2023-10-17
- **Last Updated**: 2023-10-17
## Categories & Tags
**Categories**: Uncategorized
**Tags**: None
## README
# Open IP-KVM
This project provides an open-source IP-KVM solution.
Related article:
[DIY 一个运维神器 Open IP-KVM](https://zhuanlan.zhihu.com/p/578602475)
[English Version By Google Translate](https://zhuanlan-zhihu-com.translate.goog/p/578602475?_x_tr_sl=zh-CN&_x_tr_tl=en)
## What is IP-KVM
KVM Over IP (IP-KVM) is a hardware based solution for remote access to your computer or server.
The unit plugs into the Keyboard, Video and Mouse ports of a computer or server and transmits those to a connected user through a network.
### IP-KVM vs RD software(VNC/RDP/TeamViewer)
* RD software requires a working OS, and must be pre-configured. It often fails in an emergency situation
* IP-KVM is out-of-band, so it can be used to install OS, setup BIOS or fix low-level issues
## Features
[Demo Video](https://www.bilibili.com/video/BV1c841177hF/)
* Web browser as client
* 1080P 30fps video stream
* Full mouse & keyboard support
* UI Indicator
* Remote Paste: Input ASCII sequence

## System Diagram
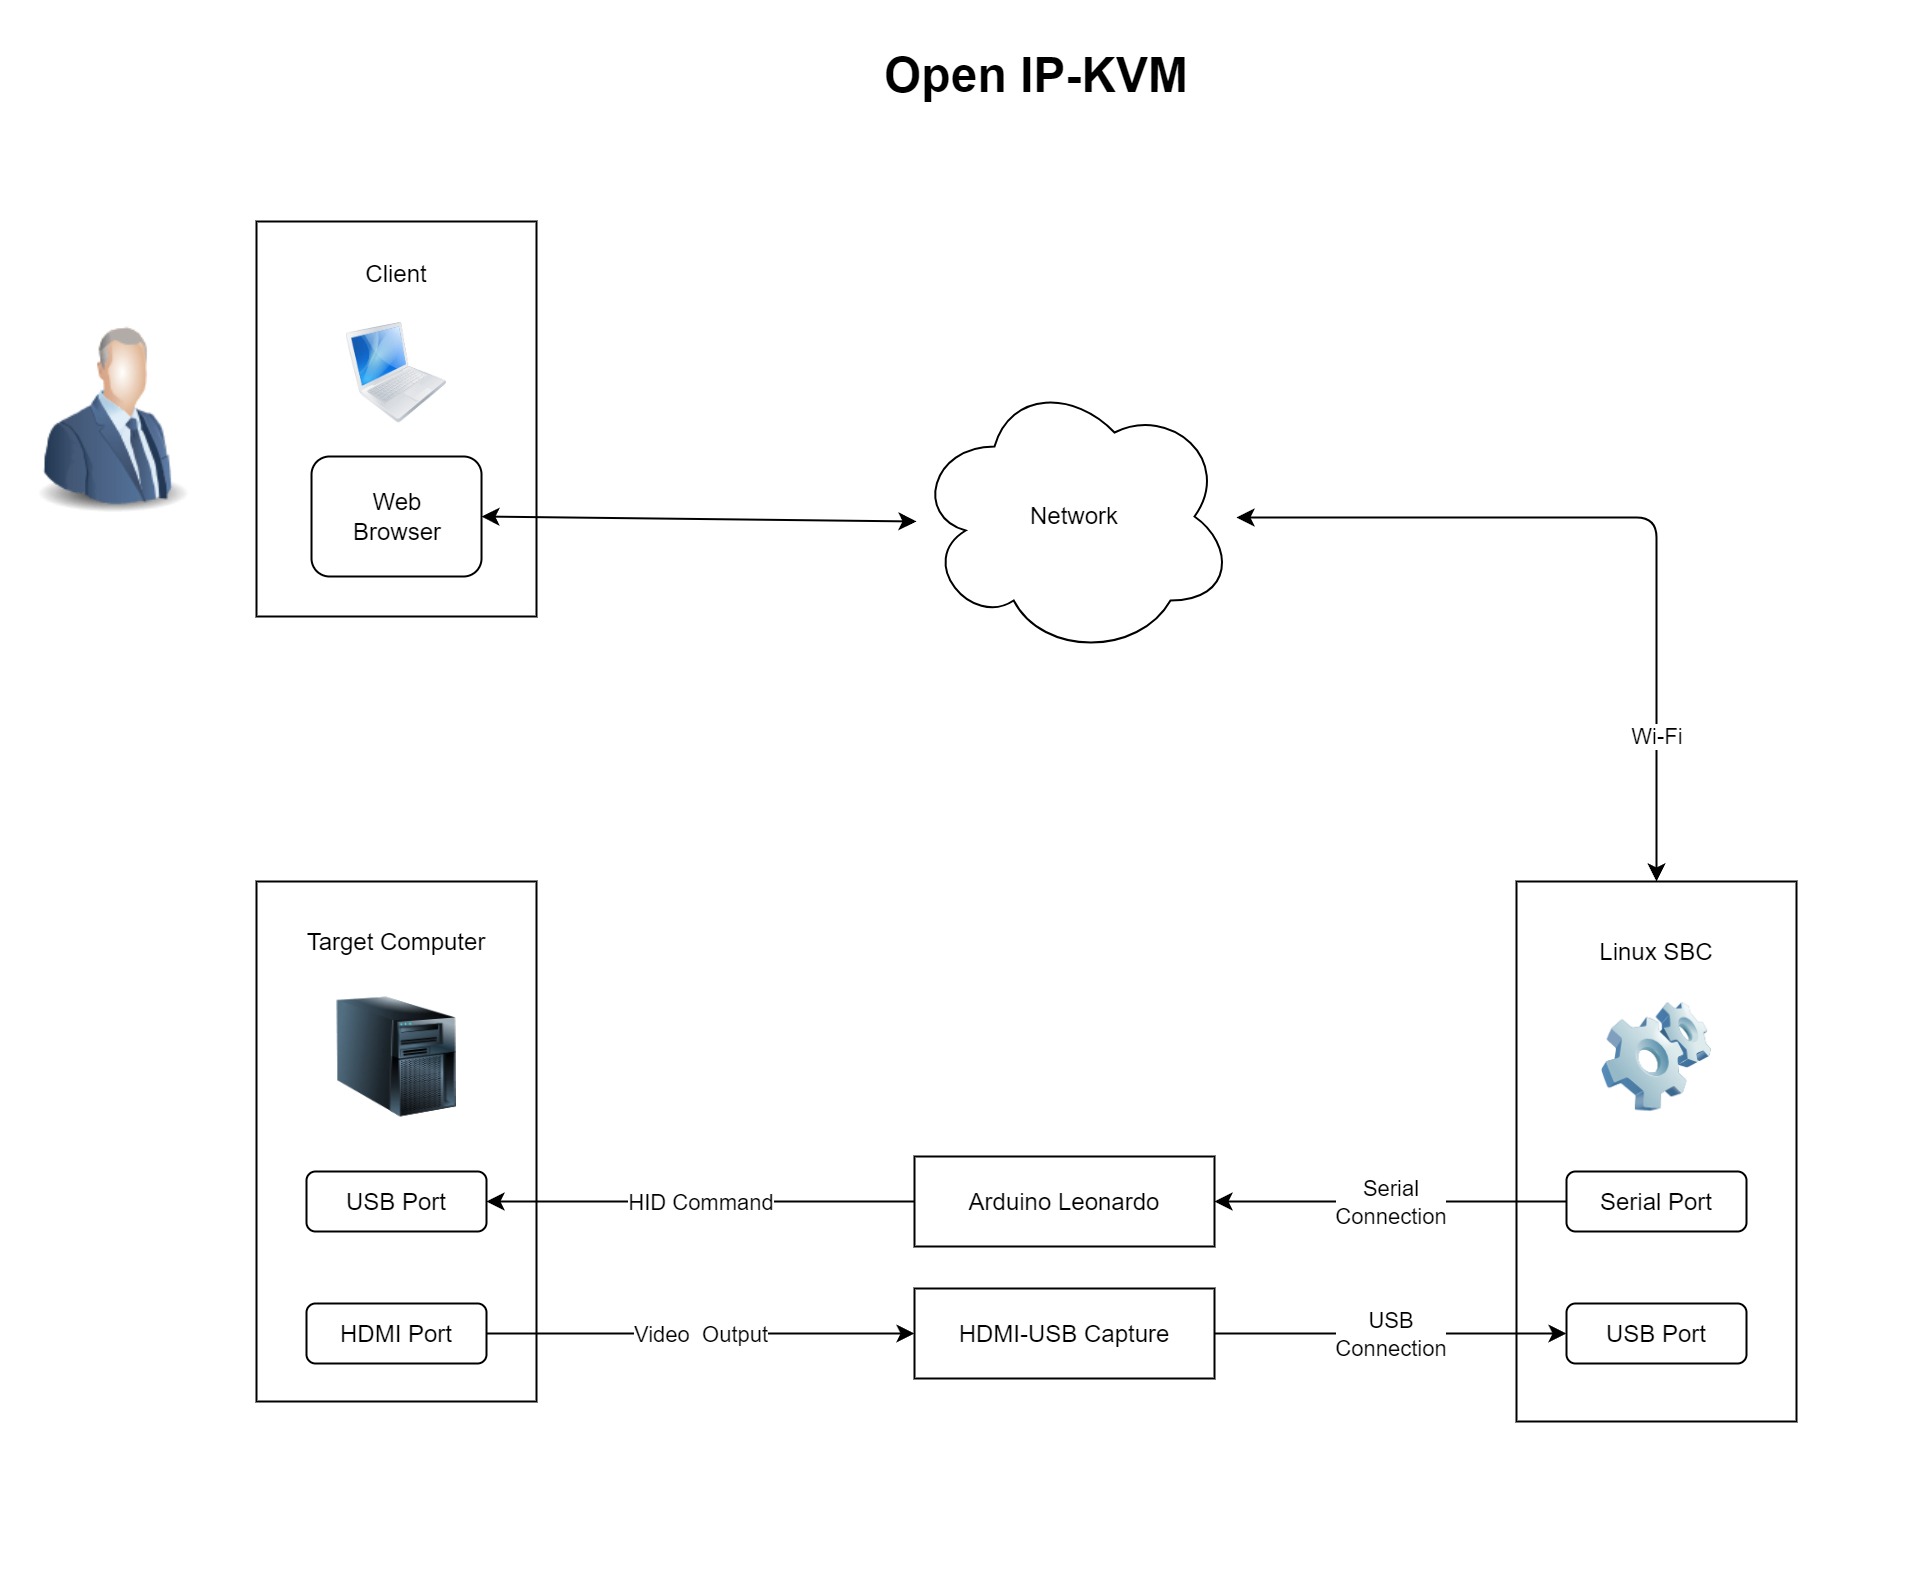
## Hardware Requirements
* HDMI-USB capture device
* Recommendation: `MS2109` based devices [link](http://en.macrosilicon.com/info.asp?base_id=2&third_id=50)
* Input: Up to 4K 30FPS
* Output: Up to 1080P 30FPS @ MJPEG
* Linux single-board computer
* Recommendation: `Phicomm N1`, [Raspberry Pi 4](https://www.raspberrypi.com/products/raspberry-pi-4-model-b/) or other models,
* Recent linux kernel
* 2+ USB ports
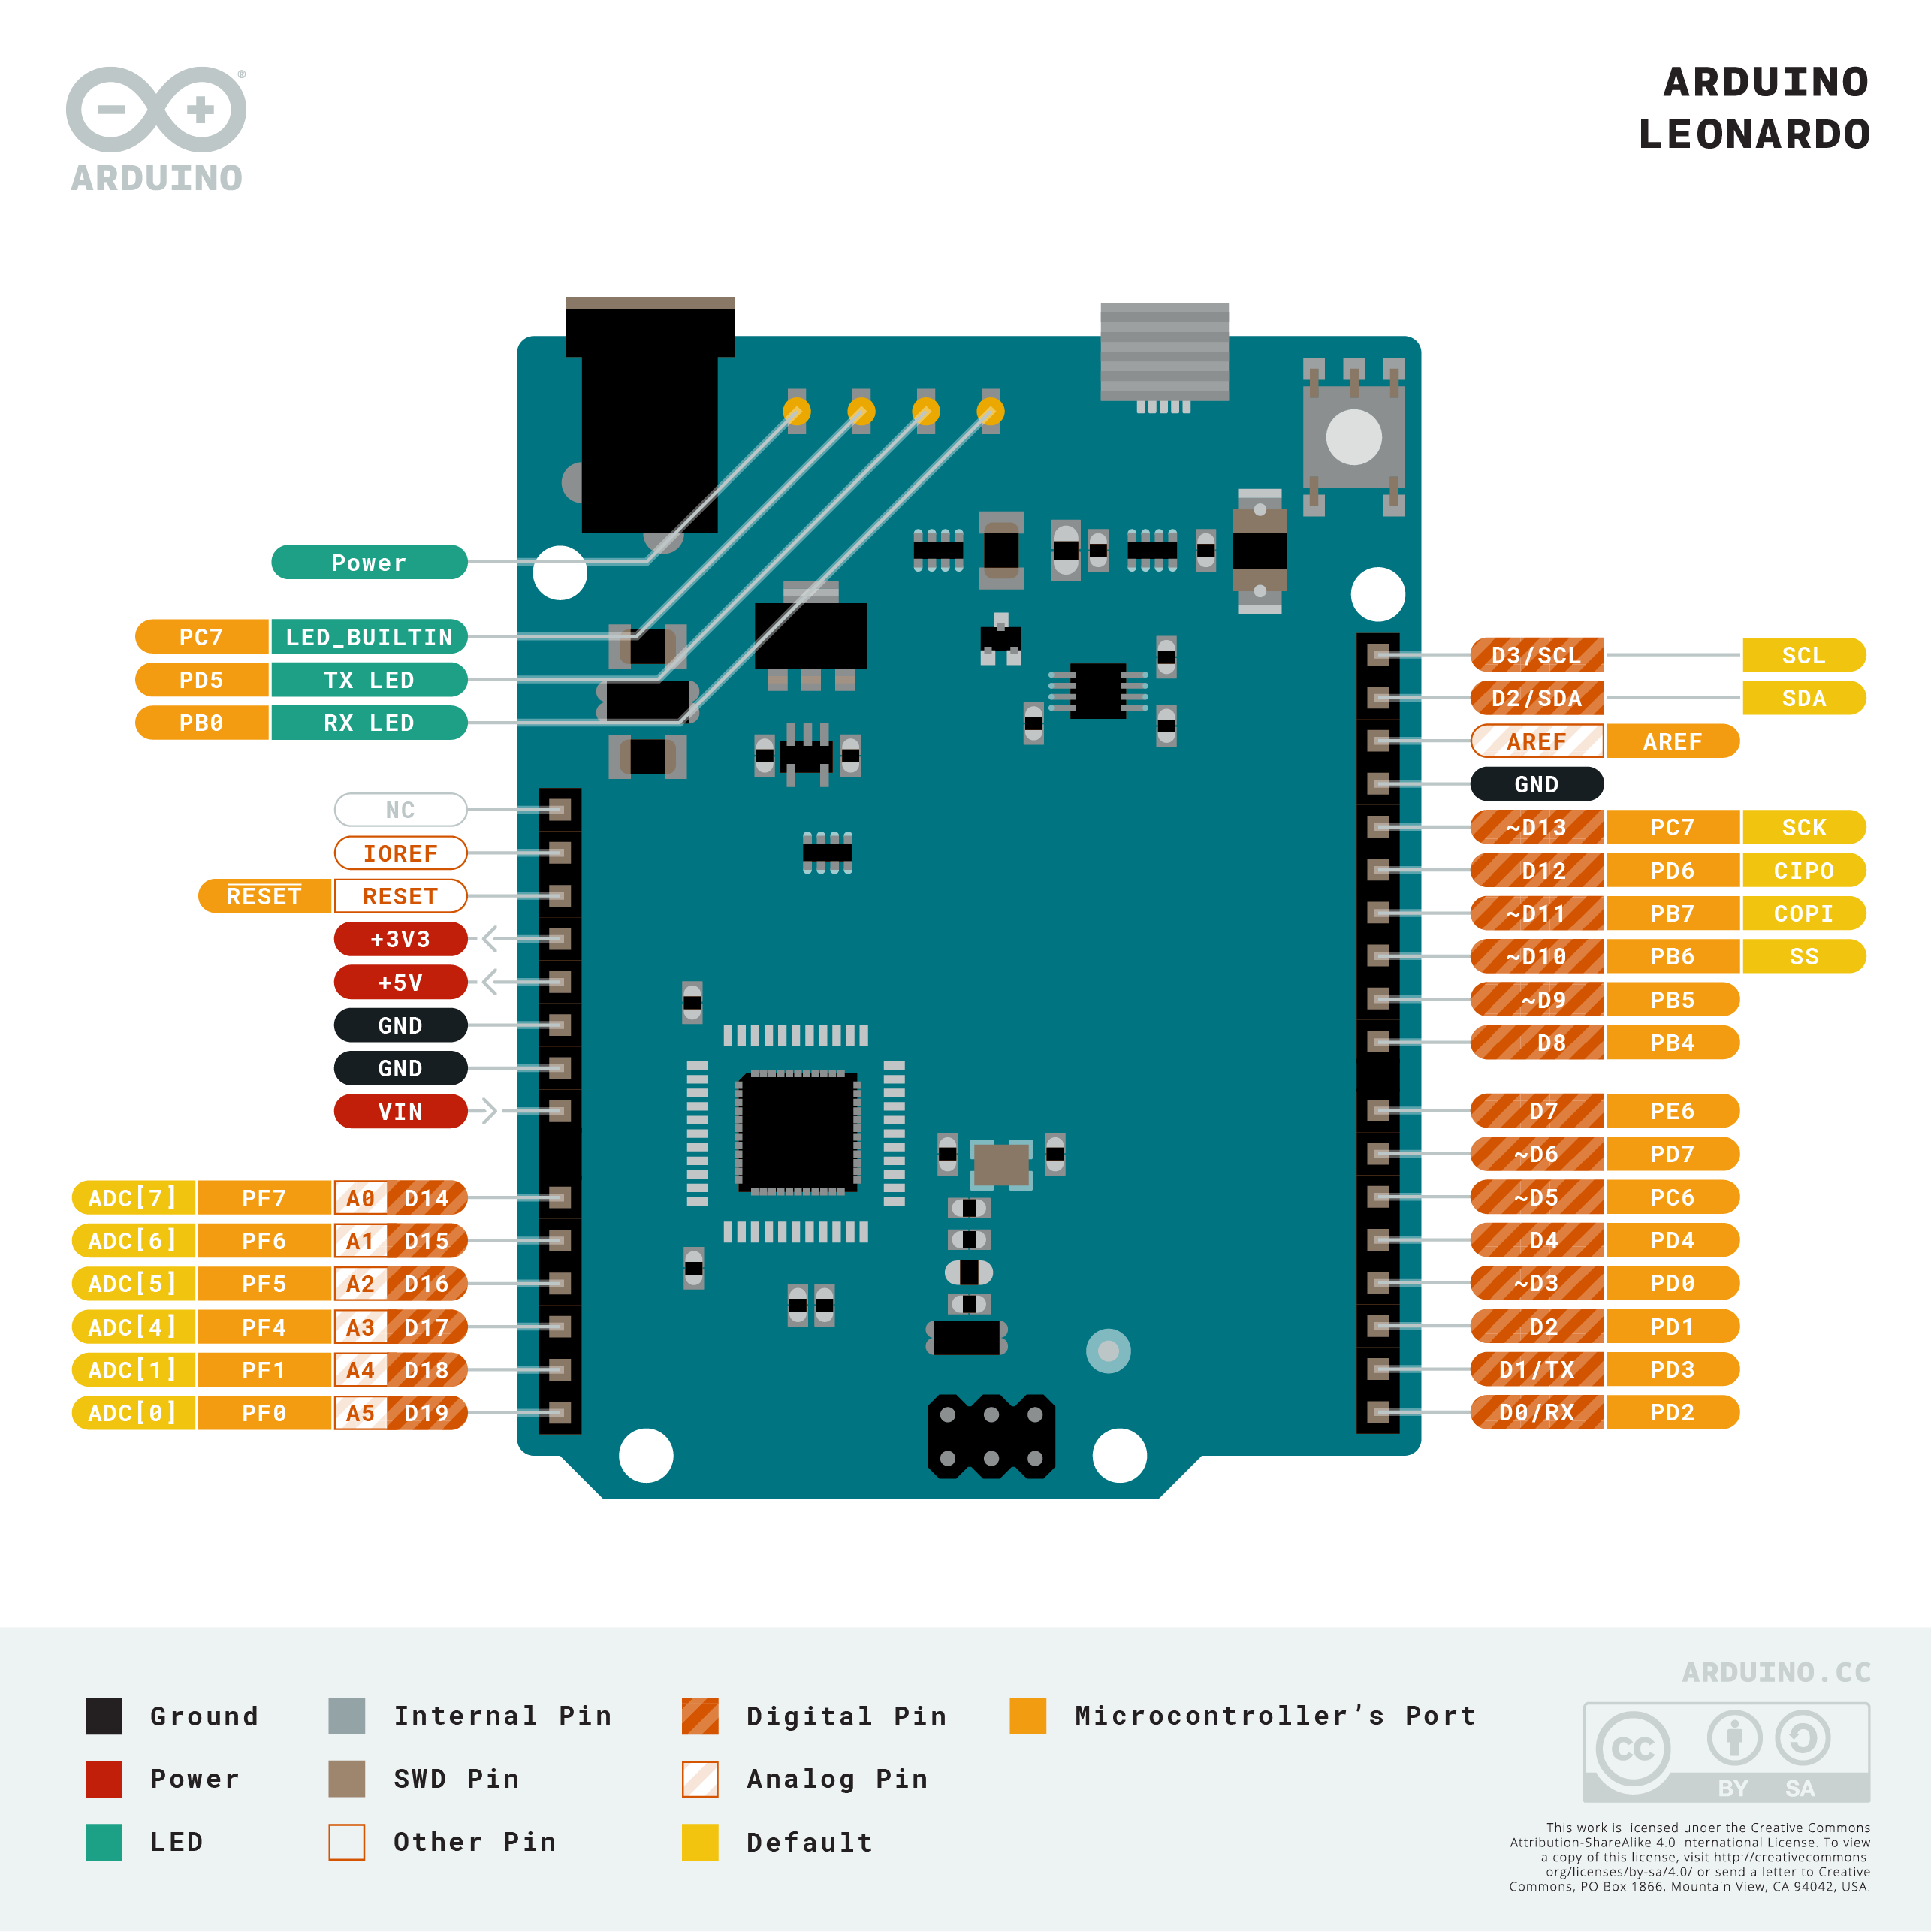
* Arduino Leonardo [link](https://docs.arduino.cc/hardware/leonardo)
* Emulate HID (mouse and keyboard)
* Optional
* USB-to-TTL Adapter
* If linux sbc has no built-in serial port
* Recommendation: `PL2303HX`
* USB Wi-Fi Adapter
* If linux sbc has no built-in Wi-Fi
## Deploy and Run
### 1. Prepare Arduino Leonardo
Upload program
1. Download and install [Arduino IDE](https://www.arduino.cc/en/software/) on your PC.
2. Connect leonardo to PC via USB
3. Download arduino code file [virt-hid-arduino.ino](https://raw.githubusercontent.com/Nihiue/open-ip-kvm/main/virt-hid-arduino/virt-hid-arduino.ino), Open it with Arduino IDE, then click `Sketch/Upload (Ctrl + U)`
4. Disconnect leonardo USB
Reference: How to connect serial port
### 2. Prepare Linux SBC
SSH to linux SBC with your pc.
Deploy App and Dependency on Linux SBC
* Build and install [MJPG-Streamer](https://github.com/jacksonliam/mjpg-streamer)
* [How to build MJPG-Streamer](https://www.acmesystems.it/video_streaming)
* Install Node.js 14.x+
* [Install NodeJS on Armbian](https://www.autoptr.top/htmls/i12bretro/0507)
* Clone repo and install its dependency
* `git clone https://github.com/Nihiue/open-ip-kvm.git`
* `cd open-ip-kvm && npm install`
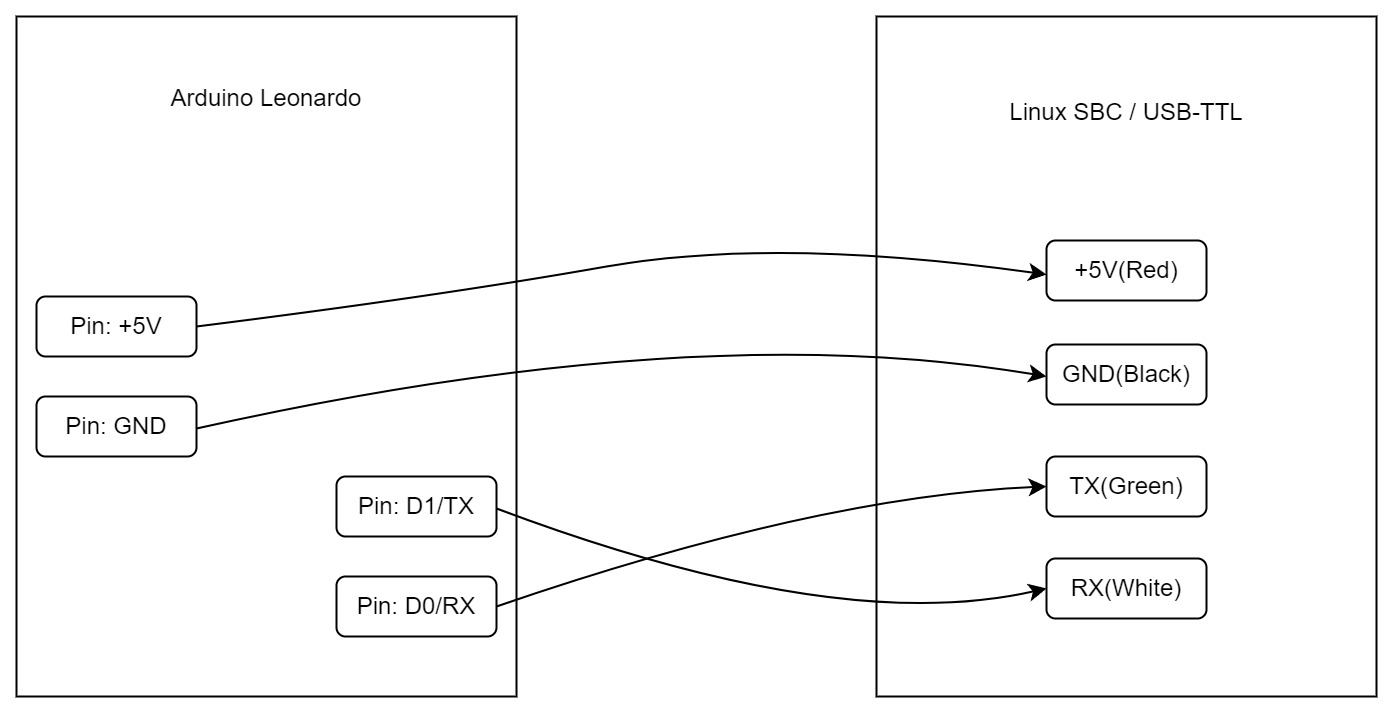
Connect IO and edit config
* Connect IO
* HDMI-USB capture device via USB
* Arduino Leonardo via native serial port or USB-TTL adapter
* Edit `open-ip-kvm/server/config.json`
* `mjpg_streamer.device`: path of HDMI-USB capture device
* `serialport`: path of serial port
### 3. Run
1. Connect HDMI output of target computer to HDMI-USB capture device
2. Connect target computer to leonardo via USB
3. Run `cd open-ip-kvm && npm run start` on linux SBC
4. Turn on target computer
5. Open `http://[IP of Linux SBC]:8000` in web browser
How to control
* Mouse
* Click anywhere to enter `pointer capture` mode
* Press `ESC` to exit
* Keyboard
* Press `Enter` to enter `key capture` mode
* press `Shift + ESC` to exit
## License
MIT
## Credits
[mjpg_streamer](https://github.com/jacksonliam/mjpg-streamer)
For production environment, use [Pi-KVM](https://pikvm.org/)