# SpringBootStudy
**Repository Path**: sfgeeq/SpringBootStudy
## Basic Information
- **Project Name**: SpringBootStudy
- **Description**: SpringBoot学习
http://blog.didispace.com/
- **Primary Language**: Java
- **License**: Not specified
- **Default Branch**: master
- **Homepage**: None
- **GVP Project**: No
## Statistics
- **Stars**: 1
- **Forks**: 0
- **Created**: 2016-11-03
- **Last Updated**: 2021-11-02
## Categories & Tags
**Categories**: Uncategorized
**Tags**: None
## README
#Spring Boot 学习
> 参考学习地址
[http://blog.didispace.com/spring-boot-learning-1/](http://blog.didispace.com/spring-boot-learning-1/)
## 杂说: ##
Spring boot 和Spring cloud的关系就是:旺旺雪饼(Spring boot)和旺旺大礼包(Spring cloud)的关系差不多,Spring boot可以单独是一个项目,经SpringCloud组织N多个SpringBoot也是一个项目
----------
## 第一章Spring学习
[代码地址](http://git.oschina.net/sfgeeq/SpringBootStudy/tree/master/Chapter1?dir=1&filepath=Chapter1&oid=4eeebf76d7aa5198698b38f97f39a6925a71e561&sha=9643e796e5ac8222c021f0aa331da92e5a66d73d )
----------
## 第二章 Spring Boot开发Web应用
在Spring Boot中使用Thymeleaf,只需要引入下面依赖,并在默认的模板路径src/main/resources/templates下编写模板文件即可完成。
org.springframework.boot
spring-boot-starter
更多Thymeleaf的页面语法,还请访问Thymeleaf的官方文档查询使用。
Thymeleaf的默认参数配置
如有需要修改默认配置的时候,只需复制下面要修改的属性到application.properties中,并修改成需要的值,如修改模板文件的扩展名,修改默认的模板路径等。
# Enable template caching.使模板缓存
spring.thymeleaf.cache=true
# Check that the templates location exists.检查模板位置是否存在。
spring.thymeleaf.check-template-location=true
# Content-Type value. 内容类型的值
spring.thymeleaf.content-type=text/html
# Enable MVC Thymeleaf view resolution.
spring.thymeleaf.enabled=true
# Template encoding.
spring.thymeleaf.encoding=UTF-8
# Comma-separated list of view names that should be exc
### chapter 3-1-1构建一个RESTful API以及单元测试
在test的测试类中需要引用下面的包
import static org.hamcrest.Matchers.equalTo;
import static org.springframework.test.web.servlet.request.MockMvcRequestBuilders.*;
import static org.springframework.test.web.servlet.result.MockMvcResultMatchers.content;
import static org.springframework.test.web.servlet.result.MockMvcResultMatchers.status;
不然像post的测试类将无法被引用
### chapter 3-1-5 Swagger2构建强大的RESTful API文档
由于Spring Boot能够快速开发、便捷部署等特性,相信有很大一部分Spring Boot的用户会用来构建RESTful API。而我们构建RESTful API的目的通常都是由于多终端的原因,这些终端会共用很多底层业务逻辑,因此我们会抽象出这样一层来同时服务于多个移动端或者Web前端。
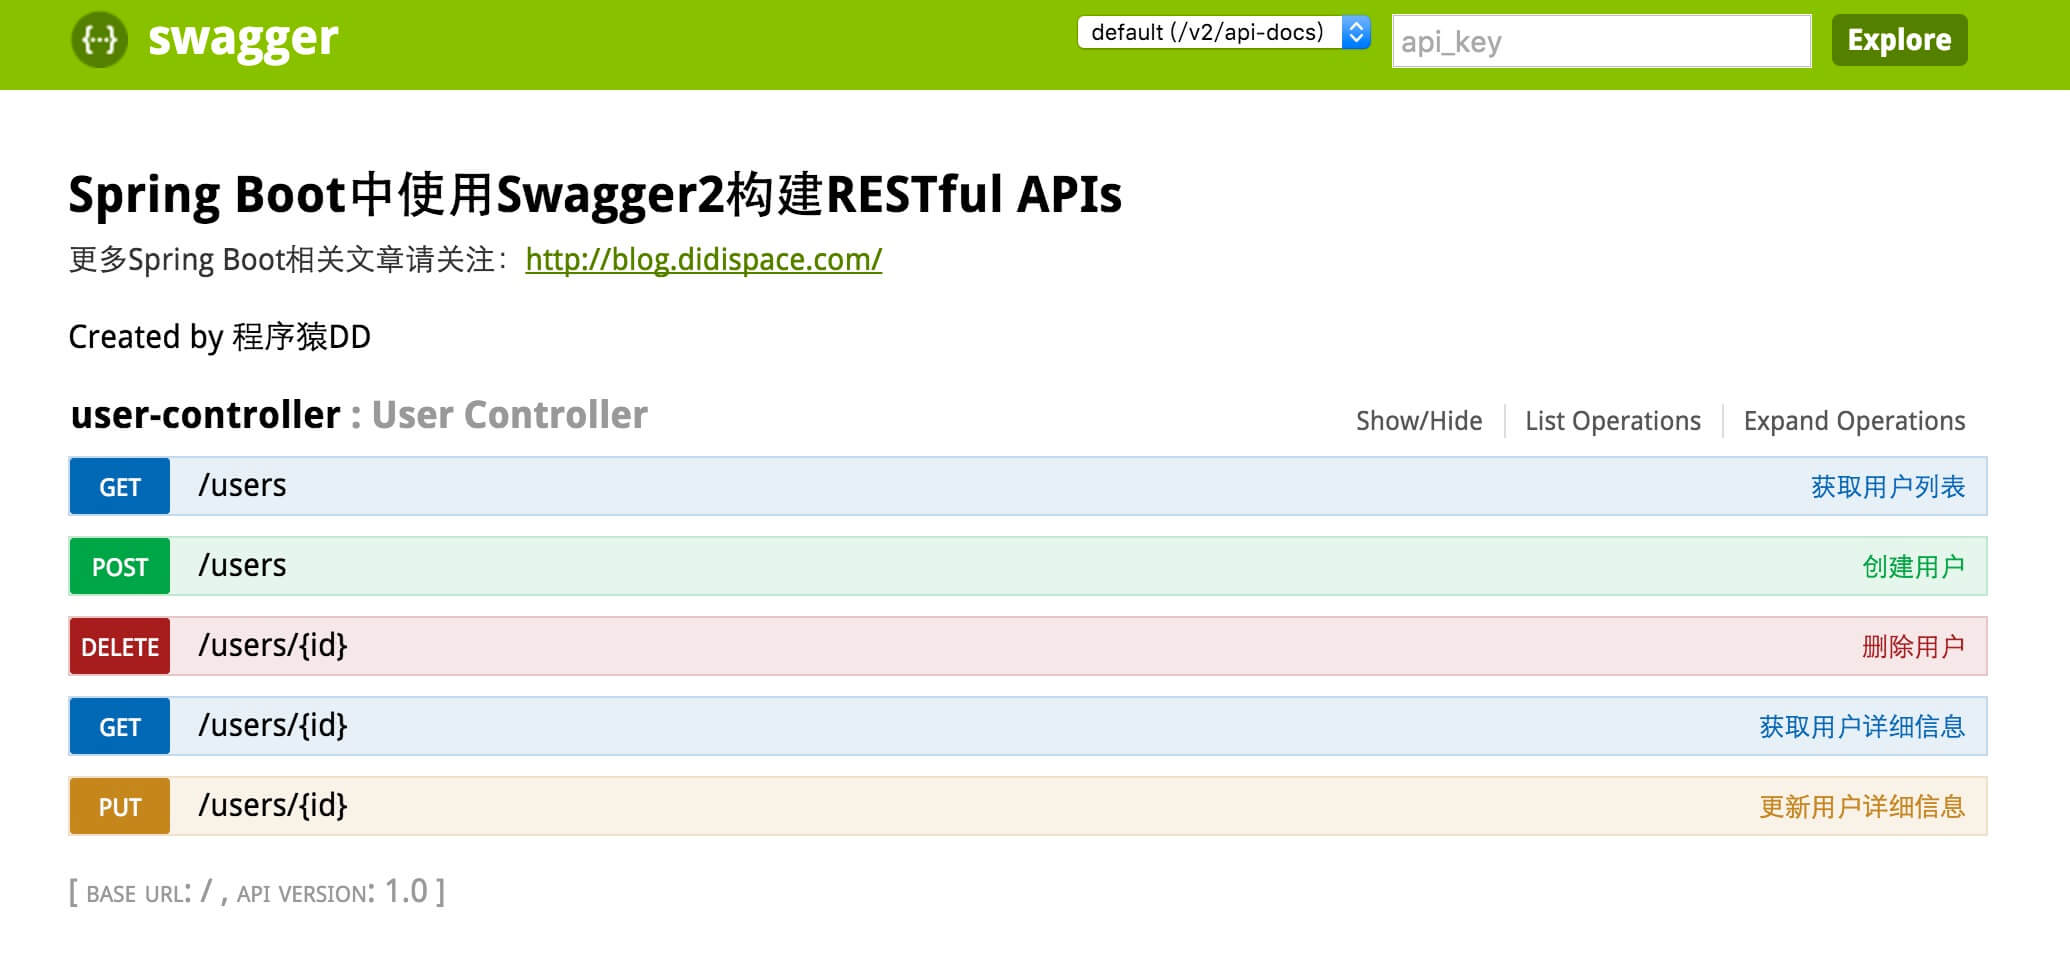
#### 添加Swagger2的依赖
[文档地址](http://blog.didispace.com/springbootswagger2/ "文档地址")
pom.xml
io.springfox
springfox-swagger2
2.2.2
io.springfox
springfox-swagger-ui
2.2.2
在与Application.java同级创建Swagger2的配置类 Swagger2
@Configuration
@EnableSwagger2
public class Swagger2 {
@Bean
public Docket createRestApi() {
return new Docket(DocumentationType.SWAGGER_2)
.apiInfo(apiInfo())
.select()
.apis(RequestHandlerSelectors.basePackage("com.didispace.web"))
.paths(PathSelectors.any())
.build();
}
private ApiInfo apiInfo() {
return new ApiInfoBuilder()
.title("Spring Boot中使用Swagger2构建RESTful APIs")
.description("更多Spring Boot相关文章请关注:http://blog.didispace.com/")
.termsOfServiceUrl("http://blog.didispace.com/")
.contact("程序猿DD")
.version("1.0")
.build();
}
}
如上代码所示,通过@Configuration注解,让Spring来加载该类配置。再通过@EnableSwagger2注解来启用Swagger2。
再通过createRestApi函数创建Docket的Bean之后,apiInfo()用来创建该Api的基本信息(这些基本信息会展现在文档页面中)。select()函数返回一个ApiSelectorBuilder实例用来控制哪些接口暴露给Swagger来展现,本例采用指定扫描的包路径来定义,Swagger会扫描该包下所有Controller定义的API,并产生文档内容(除了被@ApiIgnore指定的请求)。
#####添加文档内容
> 在完成了上述配置后,其实已经可以生产文档内容,但是这样的文档主要针对请求本身,而描述主要来源于函数等命名产生,对用户并不友好,我们通常需要自己增加一些说明来丰富文档内容。如下所示,我们通过@ApiOperation注解来给API增加说明、通过@ApiImplicitParams、@ApiImplicitParam注解来给参数增加说明。
总结:
1. Swagger2.java类中,RequestHandlerSelectors.basePackage("com.sfgeeq.web") //要扫描的API(Controller)基础包 如果不加这个,将会扫描所有的controller
2. @ApiIgnore 该方法不在API中被显示
### chapter 3-1-6 Spring Boot中Web应用的统一异常处理
[http://blog.didispace.com/springbootexception/](http://blog.didispace.com/springbootexception/)
> 我们在做Web应用的时候,请求处理过程中发生错误是非常常见的情况。Spring Boot提供了一个默认的映射:/error,当处理中抛出异常之后,会转到该请求中处理,并且该请求有一个全局的错误页面用来展示异常内容。
### chapter3-2-2:使用Spring-data-jpa简化数据访问层(推荐)
> spring.jpa.properties.hibernate.hbm2ddl.auto是hibernate的配置属性,其主要作用是:自动创建、更新、验证数据库表结构。该参数的几种配置如下:
> create:每次加载hibernate时都会删除上一次的生成的表,然后根据你的model类再重新来生成新表,哪怕两次没有任何改变也要这样执行,这就是导致数据库表数据丢失的一个重要原因。
> create-drop:每次加载hibernate时根据model类生成表,但是sessionFactory一关闭,表就自动删除。
> update:最常用的属性,第一次加载hibernate时根据model类会自动建立起表的结构(前提是先建立好数据库),以后加载hibernate时根据model类自动更新表结构,即使表结构改变了但表中的行仍然存在不会删除以前的行。要注意的是当部署到服务器后,表结构是不会被马上建立起来的,是要等应用第一次运行起来后才会。
> validate:每次加载hibernate时,验证创建数据库表结构,只会和数据库中的表进行比较,不会创建新表,但是会插入新值!!!