# Selenium
**Repository Path**: simon_zhang/Selenium
## Basic Information
- **Project Name**: Selenium
- **Description**: 基于Selenium的Web自动化测试框架完美版
- **Primary Language**: Java
- **License**: Not specified
- **Default Branch**: master
- **Homepage**: None
- **GVP Project**: No
## Statistics
- **Stars**: 0
- **Forks**: 93
- **Created**: 2021-11-01
- **Last Updated**: 2021-11-01
## Categories & Tags
**Categories**: Uncategorized
**Tags**: None
## README
# 欢迎查阅Selenium(Web自动化测试框架体系)
------------------------------------------------------------------------------------------------------------------------------------------------------------------------------------------
### Selenium
)
Selenium是一个用于Web应用程序的自动化测试工具,直接运行在浏览器中,就像真正的用户在操作一样
• 支持的浏览器包括IE、Mozilla Firefox、Google Chrome等
• 支持多种语言,如Java、C#、Python、Ruby、PHP等
• 跨平台,如Windows、Linux、iOS、Andriod等
• 开源免费
---
### 框架介绍
Java + Selenium + Maven + TestNG + JDBC + Xml+ Git + +Ant + Jenkins
• 使用Java作为项目编程语言
• 使用Selenium作为Web项目底层服务驱动框架
• 使用Maven作为项目类型,方便管理架包
• 使用TestNG作为项目运行框架,方便执行测试用例,生成测试报告
• 使用JDBC作为数据库管理工具,方便连接数据库,执行SQL
• 使用Xml作为用例管理工具,方便编写测试用例,维护测试脚本
• 使用Git作为仓库管理工具,方便管理项目代码
• 使用Ant作为Java的build打包工具,方便项目代码打包
• 使用Jenkins作为自动化持续集成平台,方便自动编译,自动打包,自动运行测试脚本,邮件发送测试报告
---
### 主要功能
1. 实现了基于Selenium,WebDriver等常用操作方法的二次封装,包括(滑动,点击,输入,元素定位)等,使用起来更简便
2. 实现了基于Windows操作系统的cmd常用DOS命令的快速调用
3. 实现了基于Windows操作系统等键盘按键功能的调用,可模拟实际的键盘操作
4. 实现了基于Selenium的断言功能,检查点失败自动截图保存,可在测试报告中查看,一个检查点失败不影响后续用例执行
5. 实现了基于Xml文件内容的基本解析,包括(Unit,Case,Step)等,基本内容符合测试用例编写步骤,编写测试用例脚本更简单
6. 实现的基于Oracle,MySql等常用数据库SQL操作,包含(Insert into,Delete,Update,Query)和执行"存储过程"操作等
7. 实现了基于Oracle,MySql等常用数据库数据检查功能,获取数据库字段值,保存到本地缓存,然后进行比对效验,需使用正则表达式
8. 实现了快速获取界面信息数据到本地缓存功能,获取当前界面上的数据,保存到本地缓存,可用作测试用例参数使用,需使用正则表达式
9. 实现了常用API接口请求操作,包含(POST,GET)等,可直接在测试脚本中调用,只需传递对应参数即可,满足多种测试需求
10. 实现了基于ExtentReports,TestNG生成的测试报告二次美化功能,界面更美观,内容清晰
---
### 环境配置
1. [JDK1.7以上](http://www.Oracle.com/technetwork/Java/javase/downloads/index.html)
2. [Eclipse](http://www.eclipse.org/downloads)/[IDEA](https://www.jetbrains.com/idea/)
3. [Selenium](https://www.seleniumhq.org/download)
4. [Mozilla Firefox](http://ftp.mozilla.org/pub/firefox/releases)
5. [Google Chrome](https://www.slimjet.com/chrome/google-chrome-old-version.php)
6. [Geckodriver](https://github.com/mozilla/geckodriver/releases)
7. [ChromeDriver](http://chromedriver.storage.googleapis.com/index.html)
8. [Maven](http://maven.apache.org/download.cgi)
9. [Git](https://git-scm.com/)
10. [Ant](https://ant.apache.org)
11. [Jenkins](https://jenkins.io)
- 部分网站需要FQ,具体安装参考:https://blog.csdn.net/huilan_same/article/details/52615123
- 建议Selenium版本对应Firefox丨Chrome(2.53.0丨47.0.2丨65.0.3325.146)
- Python环境下需要下载Geckodriver和ChromeDriver,且版本需对应,具体安装参考:https://blog.csdn.net/huilan_same/article/details/51896672
---
### 注意事项
- 工程项目编码需要设置成UTF-8,否则会出现中文乱码情况
---
### 一、创建测试对象类,例如【SearchProcess.java】
package TestCases;
import org.testng.annotations.AfterTest;
import org.testng.annotations.BeforeTest;
import org.testng.annotations.Test;
import com.jmoney.luckeylink.base.TestUnit;
import com.jmoney.luckeylink.service.RunUnitService;
import com.jmoney.luckeylink.service.WebXmlParseService;
public class SearchProcess {
private static RunUnitService runService;
@BeforeTest
private void stup() throws Exception{
TestUnit testunit = WebXmlParseService.parse("谷歌浏览器","SearchProcess.xml");
runService = new RunUnitService(testunit);
System.out.println("-----------------------------【百度-搜索自动化测试系统流程】--------------------------------");
}
@Test
public void case1() throws Exception{
runService.runCase("case1");
runService.TestReportRemarks("验证在谷歌浏览器中,输入百度网站域名后,可以正常访问");
}
@Test
public void case2() throws Exception{
runService.runCase("case2");
runService.TestReportRemarks("验证在百度主界面,搜索栏中输入自动化测试系统,点击回车按钮后,可以正常搜索出对应包含自动化测试系统的信息");
}
@AfterTest
public void TearDown(){
runService.closeBrowser();
}
}
---
### 二、创建测试脚本用例,例如【SearchProcess.xml】
到之间的内容为测试脚本集合,相当与测试用例集合,搭配测试类使用(SearchProcess.java)
到之间的内容为单个测试脚本,相当与单个测试用例,id对应测试用例中的序号,name对应测试用例中的标题,注意这里的id需要和测试类(WeChatLogin.java)中的一致
到之间的内容为测试脚本步骤,相当与测试用例操作步骤,action=要执行的操作,locator=元素的坐标属性及值,value=需要传递的参数,desc=该步骤的备注,会打印到控制台,expect=预期结果,message=测试执行失败的提示信息,会展示到测试报告中,caseid=测试用例失败截图的名称,一般和Caseid一致,表示是该用例的截图
- 具体脚本编方法请参考: https://pan.baidu.com/s/1fdMMGrr9XY6lJdXCv-1AYw
---
### 三、浏览器服务配置
/**
*
火狐浏览器配置
*
* @throws Exception
*/
public static void AppointFirefoxDriver() throws Exception {
File file = new File(ConfigUtil.getProperty("webdriver.profile", Constants.CONFIG_COMMON));
FirefoxProfile profile = new FirefoxProfile(file);
driver = new FirefoxDriver(profile);
driver .manage().window().maximize();//全屏
}
/**
*
谷歌浏览器配置
*
* @throws Exception
*/
public static void ChromeDriver(){
System.setProperty("webdriver.chrome.driver", ConfigUtil.getProperty("webdriver.chrome.driver", Constants.CONFIG_COMMON));
driver = new ChromeDriver();
driver .manage().window().maximize();//全屏
}
# 火狐浏览器
webdriver.firefox.bin=C:\\Program Files\\Mozilla Firefox\\firefox.exe
# 火狐浏览器配置文件
webdriver.profile=C:\\Users\\King-liu\\AppData\\Roaming\\Mozilla\\Firefox\\Profiles\\f7ps027y.default
# 谷歌浏览器驱动
webdriver.chrome.driver=C:\\Users\\King-liu\\AppData\\Local\\Google\\Chrome\\Application\\chromedriver.exe
- 测试执行时需要在common.properties文件中,指定浏览器和浏览器配置文件,当前为火狐浏览器安装路径,和火狐浏览器配置文件路径
---
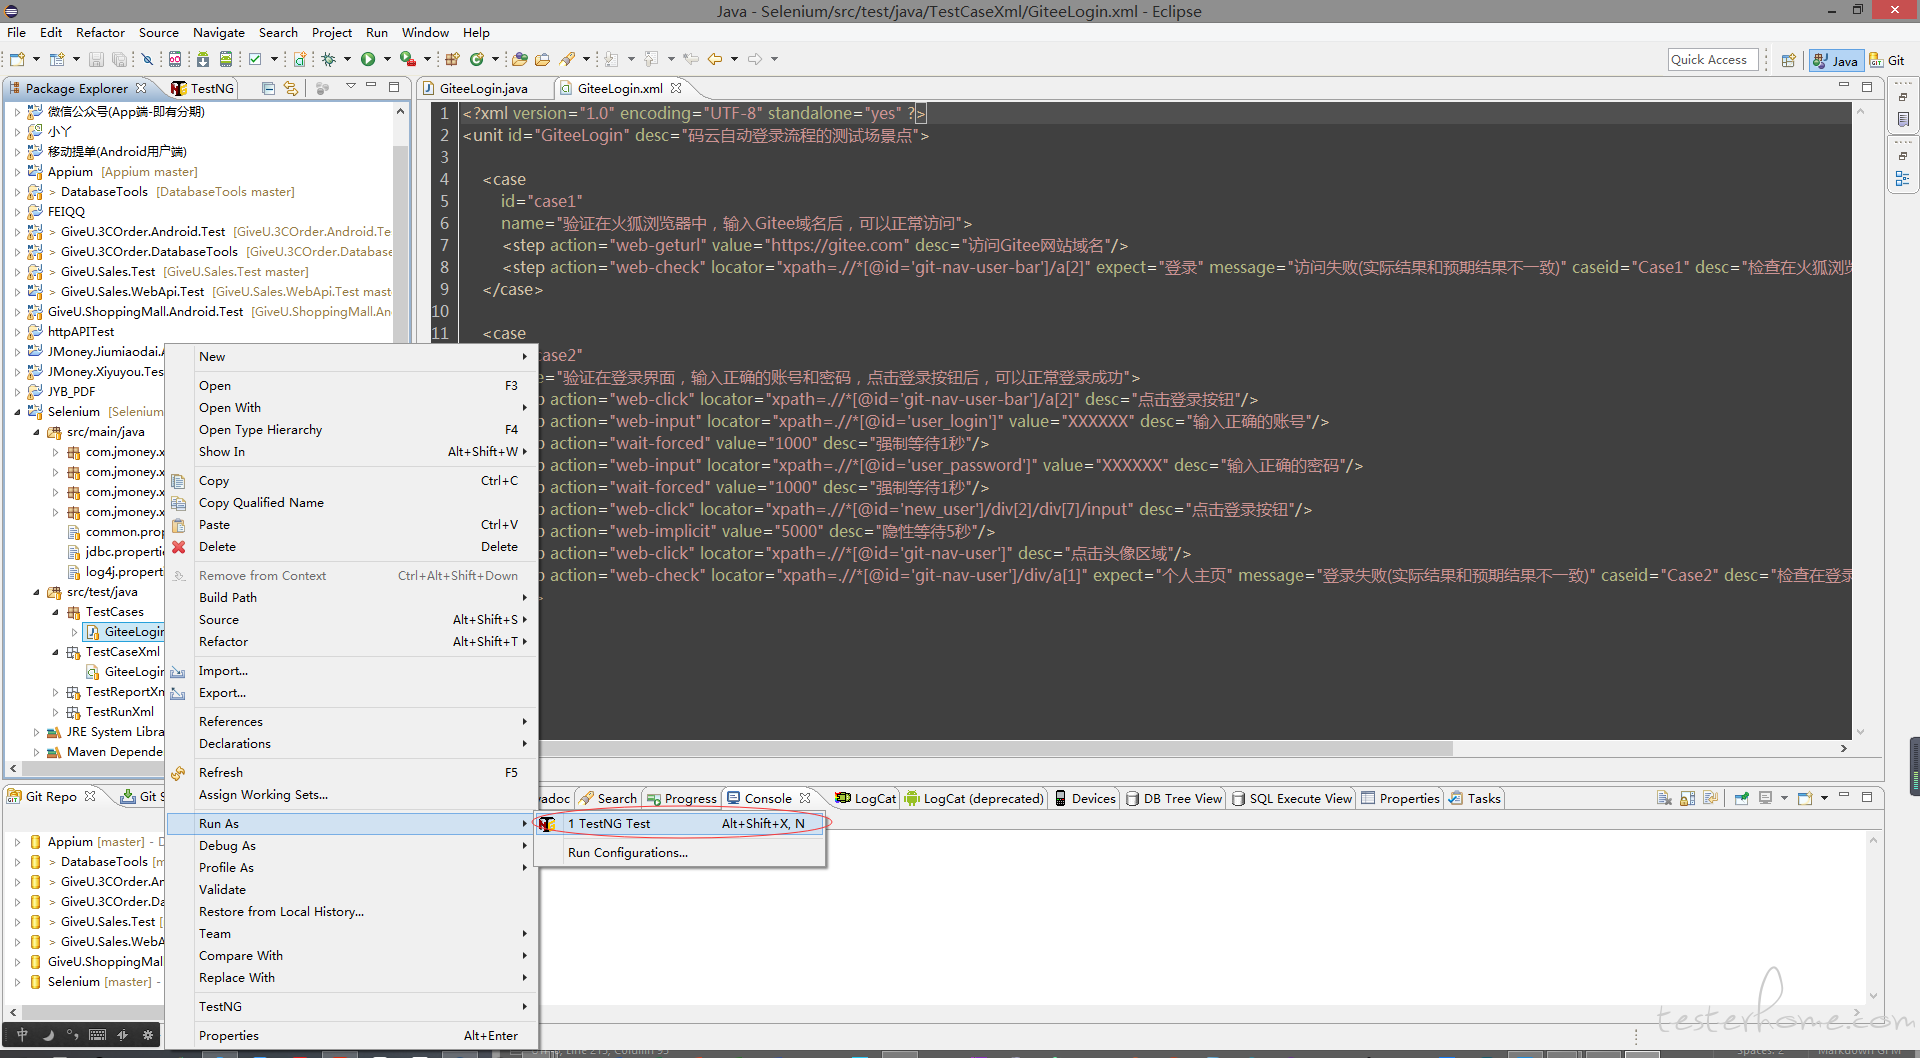
### 四、执行用例
- 编写完对应测试用例类【GiteeLogin.java】,和测试脚本【GiteeLogin.xml】后,在IDE集成开发环境下选择GiteeLogin.java右键使用TestNG运行即可
---
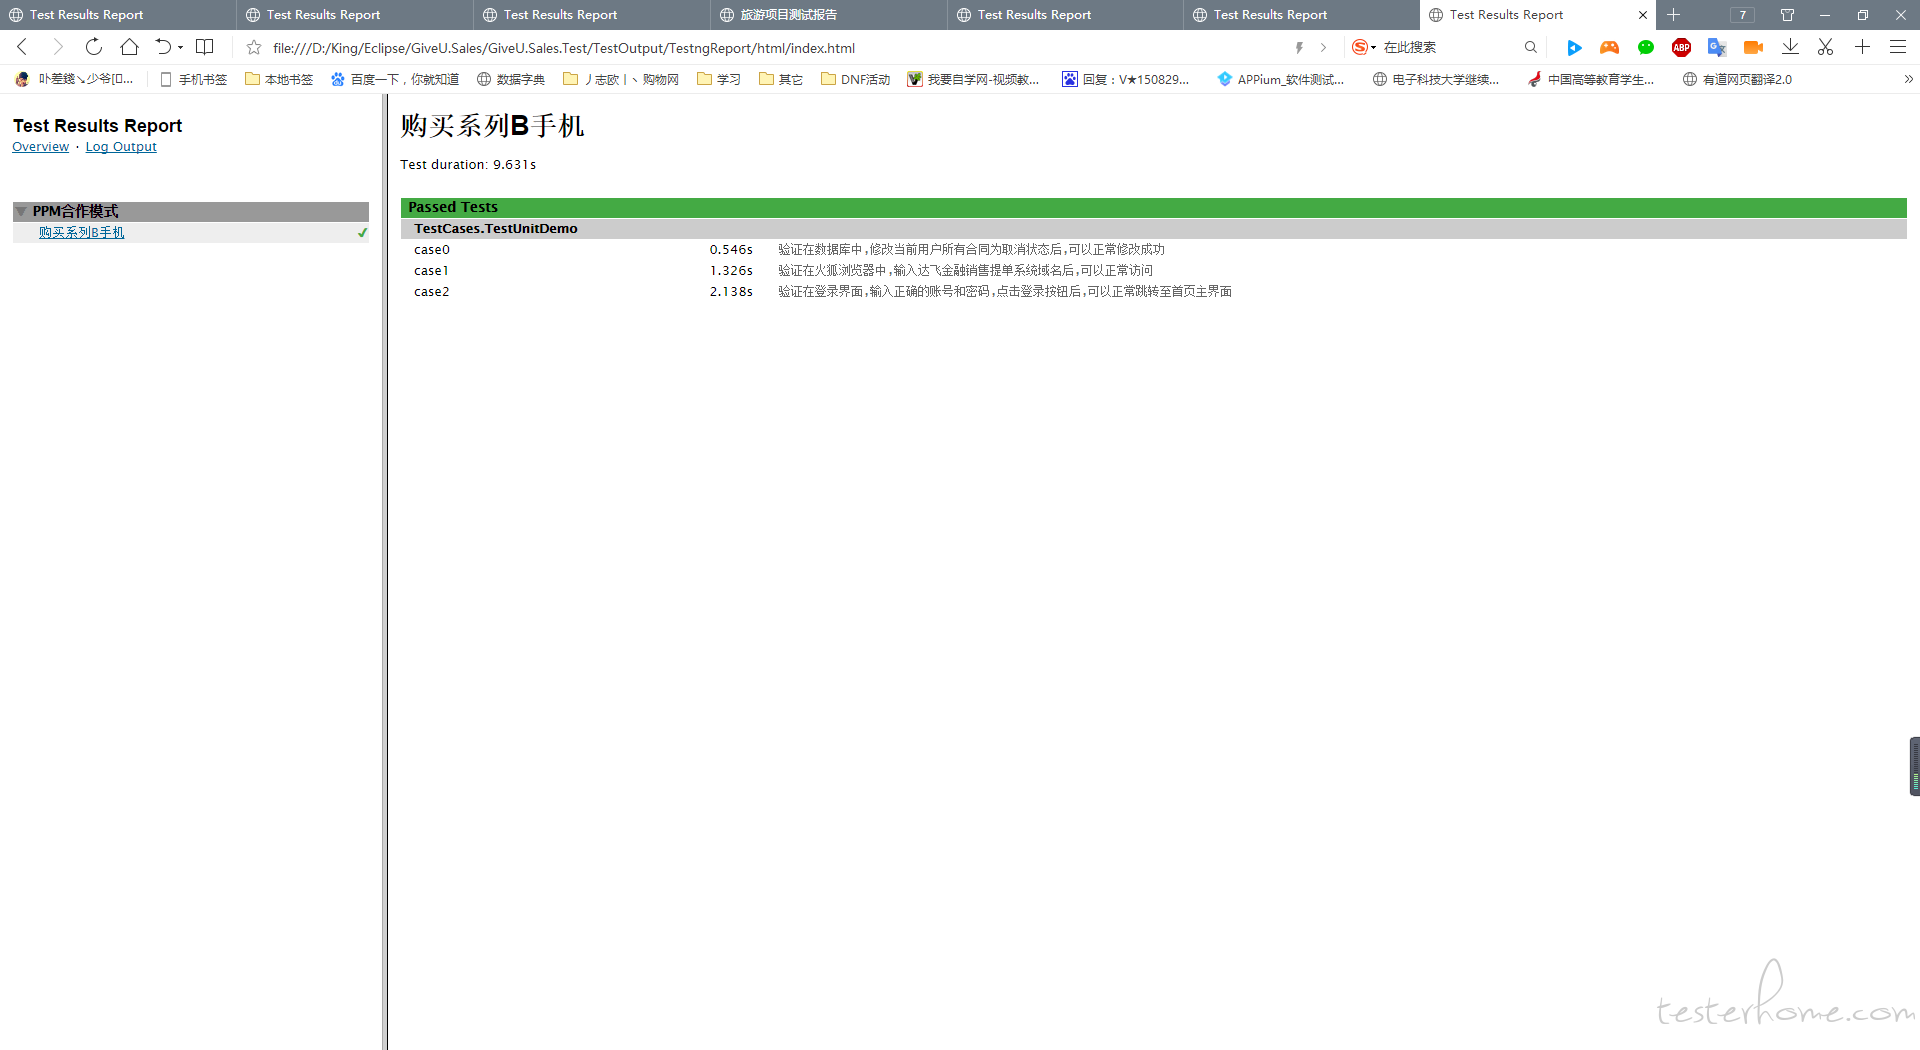
### 五、测试报告
- 测试报告分为两种,一种是TestNG自带的TestngReport测试报告,另外一种则是调用ExtentReports生成的报告,第二种更加美观
#### [TestngReport](https://testerhome.com/uploads/photo/2018/b274b788-861c-4660-9702-47737d61f76b.png!large)
------------------------------------------------------------------------------------------------------
---
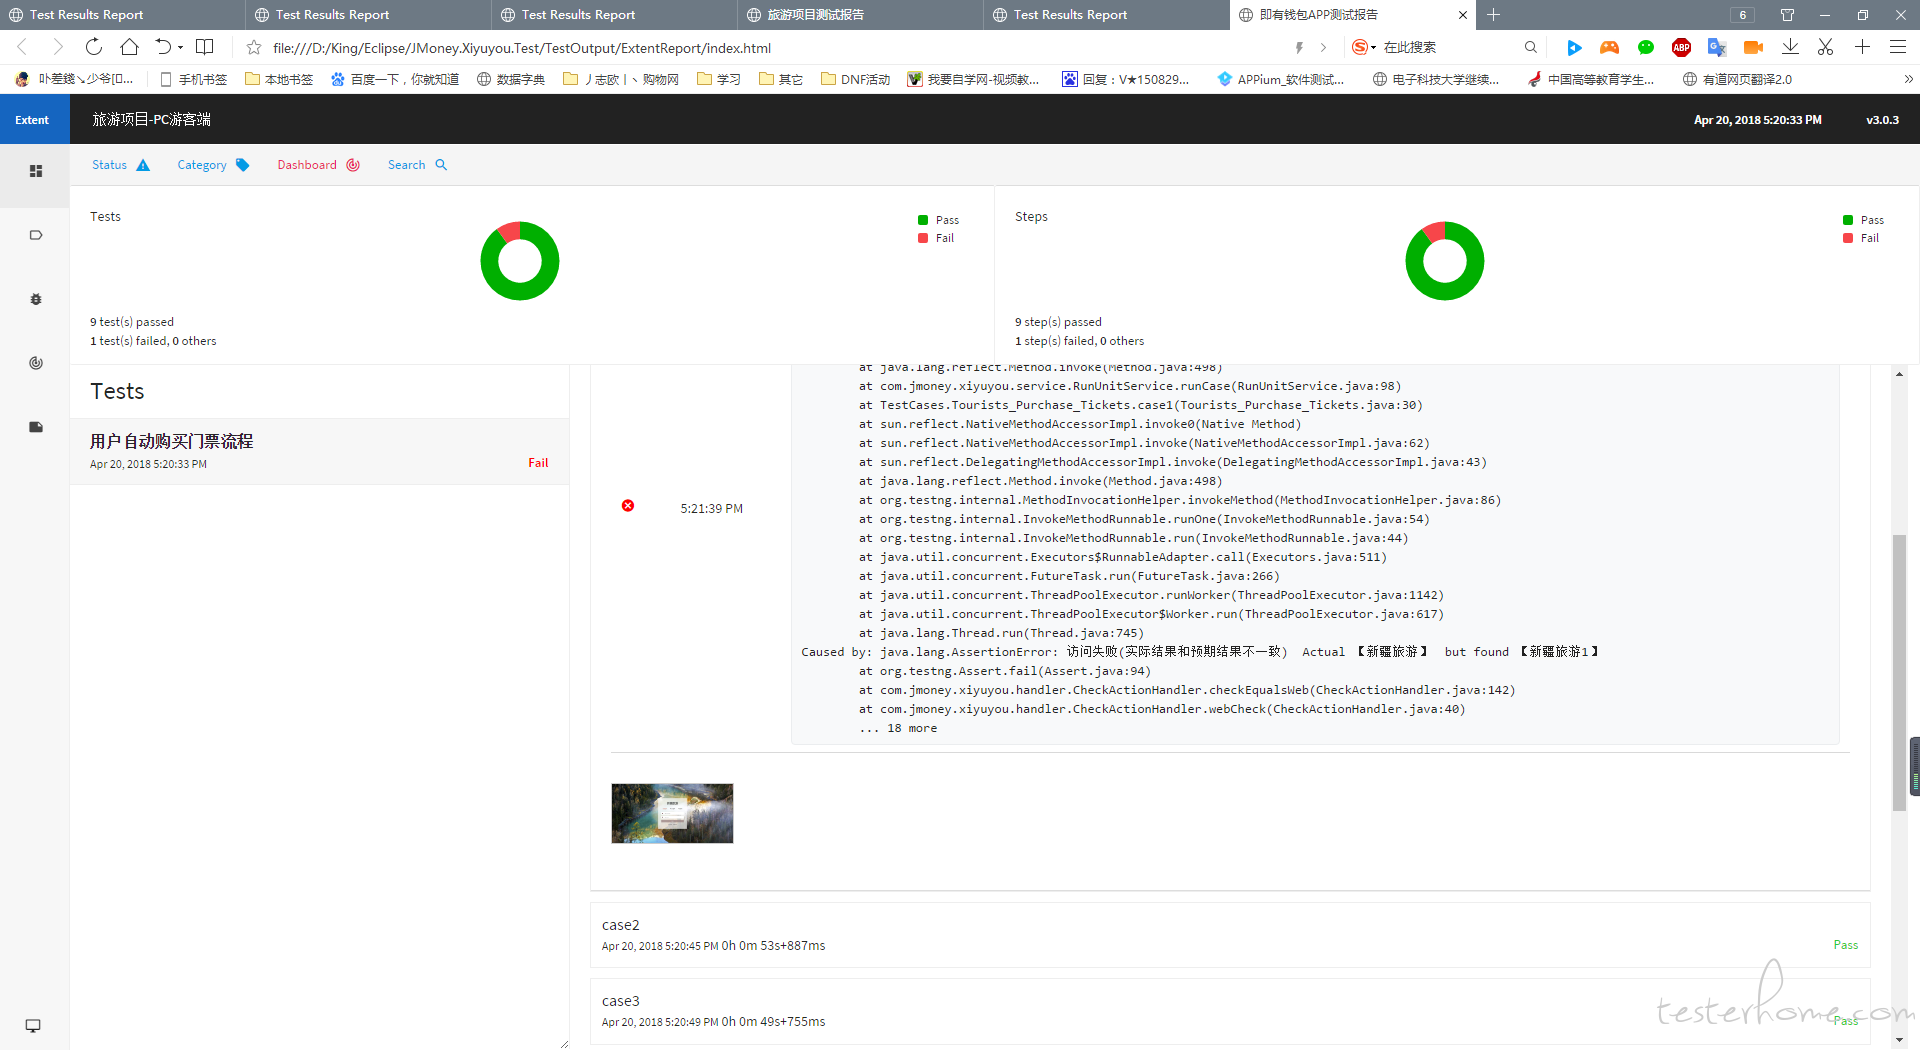
#### [ExtentReports](https://testerhome.com/uploads/photo/2018/e3903a1f-0cf5-43f8-9cb5-42206c50f678.png!large)
- 第二种测试报告,需要翻墙才能正常显示,否则页面显示乱码,因为是国外的东西
- 或者在C:\Windows\System32\drivers\etc host文件末尾添加151.139.237.11 cdn.rawgit.com
---
### 六、Jnekins持续集成:
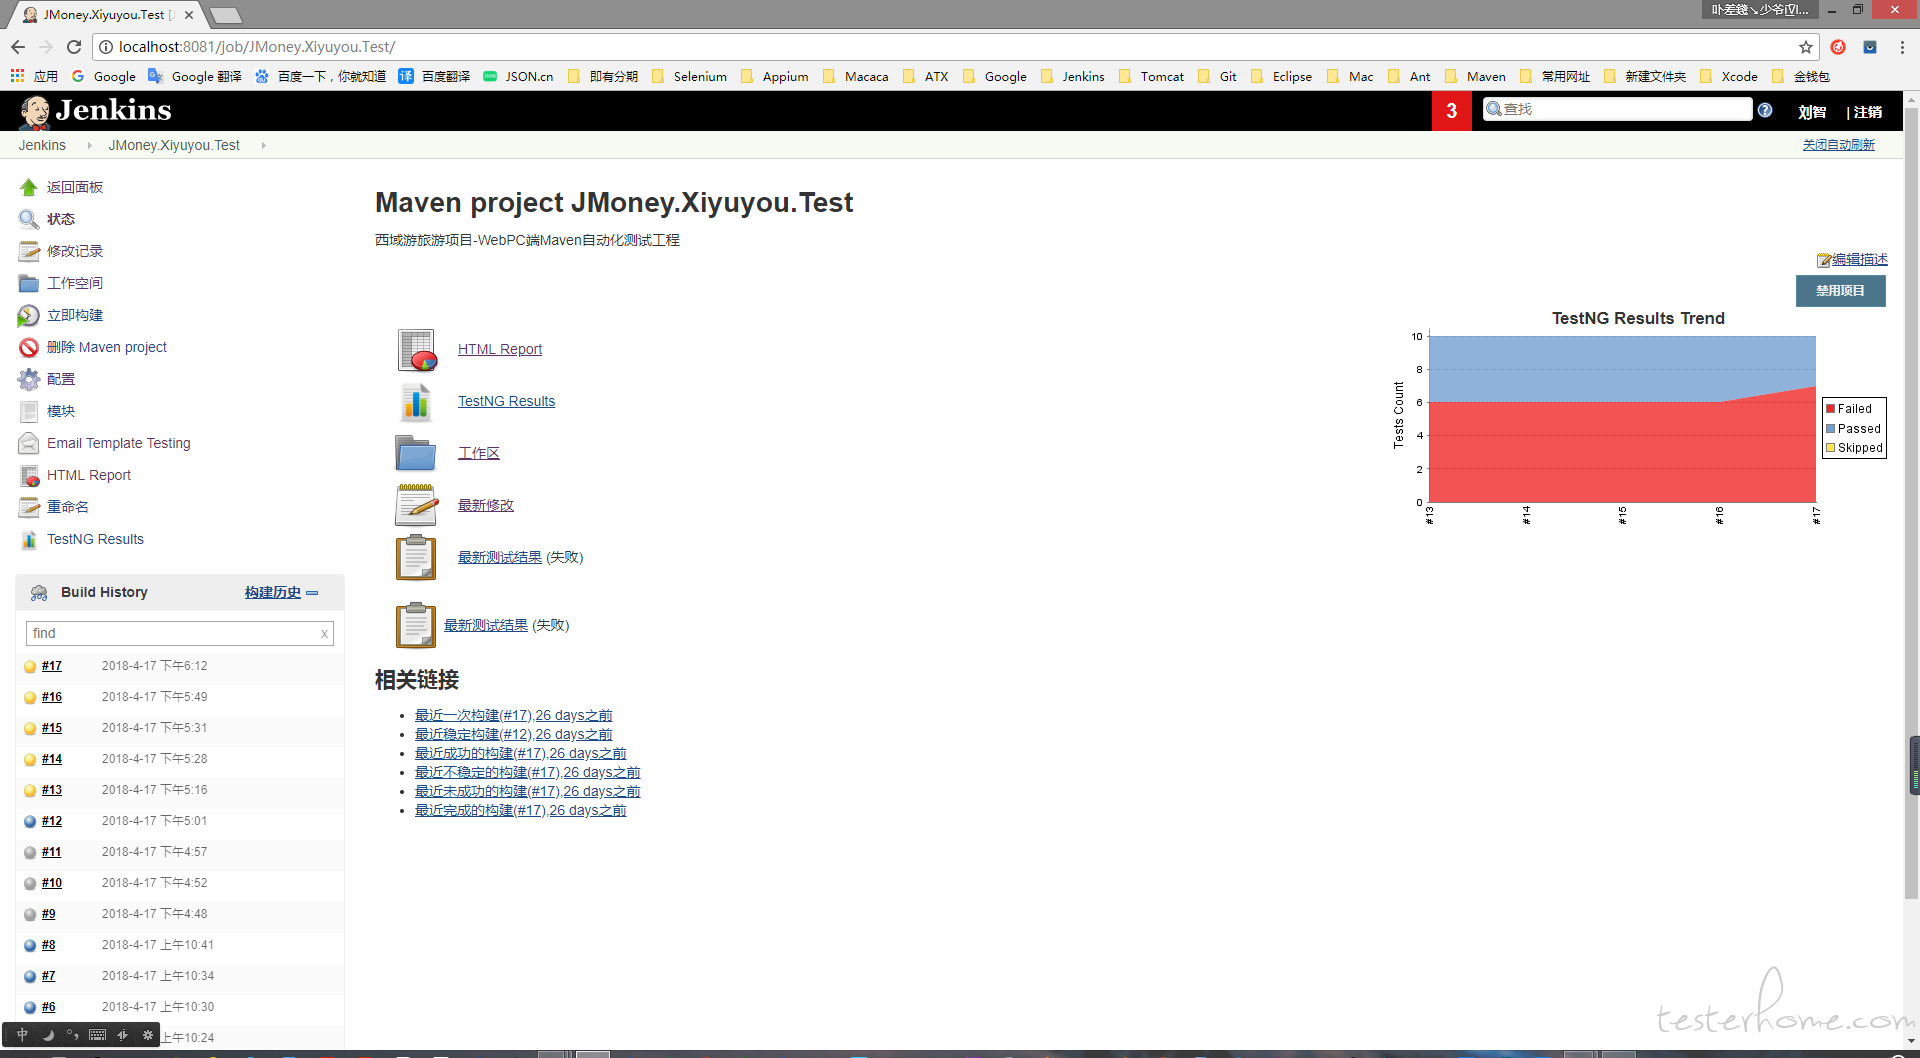
- 搭建Jenkins环境,具体请参考: https://blog.csdn.net/wuxuehong0306/article/details/50016547
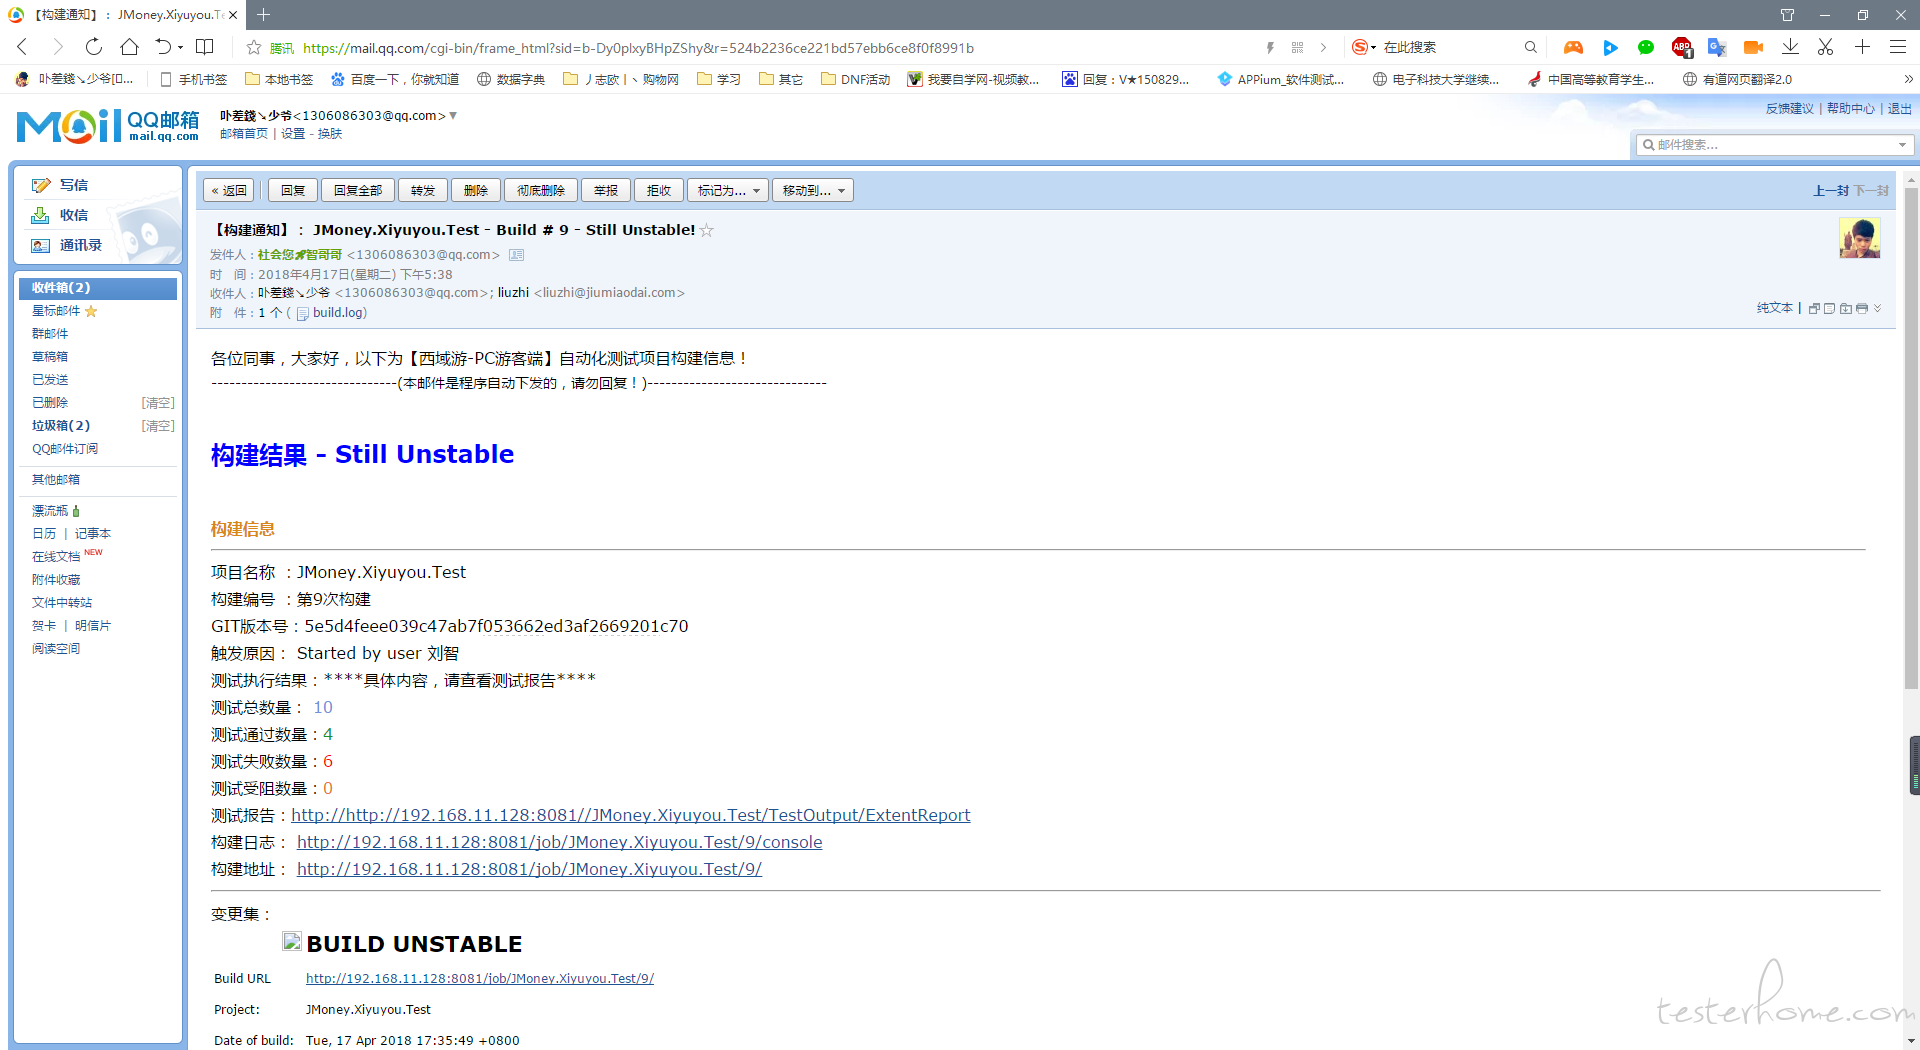
- 配置Jenkins自动化持续集成项目,即可实现远程服务器自动(构建,编译,打包)运行脚本,发送邮件测试报告等
---
### 七、感谢
#### 如果您觉得这个框架对您有用,您可以捐赠下我,让我有理由继续下去,非常感谢。

**非常感谢您花费时间阅读,祝您在这里记录、阅读、分享愉快!**
**欢迎留言评论,有问题也可以联系我或者加群交流....**
作者:[@刘智King](http://shang.qq.com/email/stop/email_stop.html?qq=1306086303&sig=a1c657365db7e82805ea4b2351081fc3ebcde159f8ae49b1&tttt=1)
QQ:1306086303
Email:hagyao520@163.com
> QQ官方交流群 126325132

