# crm
**Repository Path**: srckeeper/crm
## Basic Information
- **Project Name**: crm
- **Description**: No description available
- **Primary Language**: Unknown
- **License**: Not specified
- **Default Branch**: master
- **Homepage**: None
- **GVP Project**: No
## Statistics
- **Stars**: 0
- **Forks**: 0
- **Created**: 2024-02-06
- **Last Updated**: 2024-02-06
## Categories & Tags
**Categories**: Uncategorized
**Tags**: None
## README
node v14.21.3
npm v6.14.18
# 安装 NRM
https://juejin.cn/post/6931597891182002183
# node-sass 失败
https://juejin.cn/post/6946530710324772878
# 安装 NVM
https://zhuanlan.zhihu.com/p/659325866
# PM
## 项目管理介绍
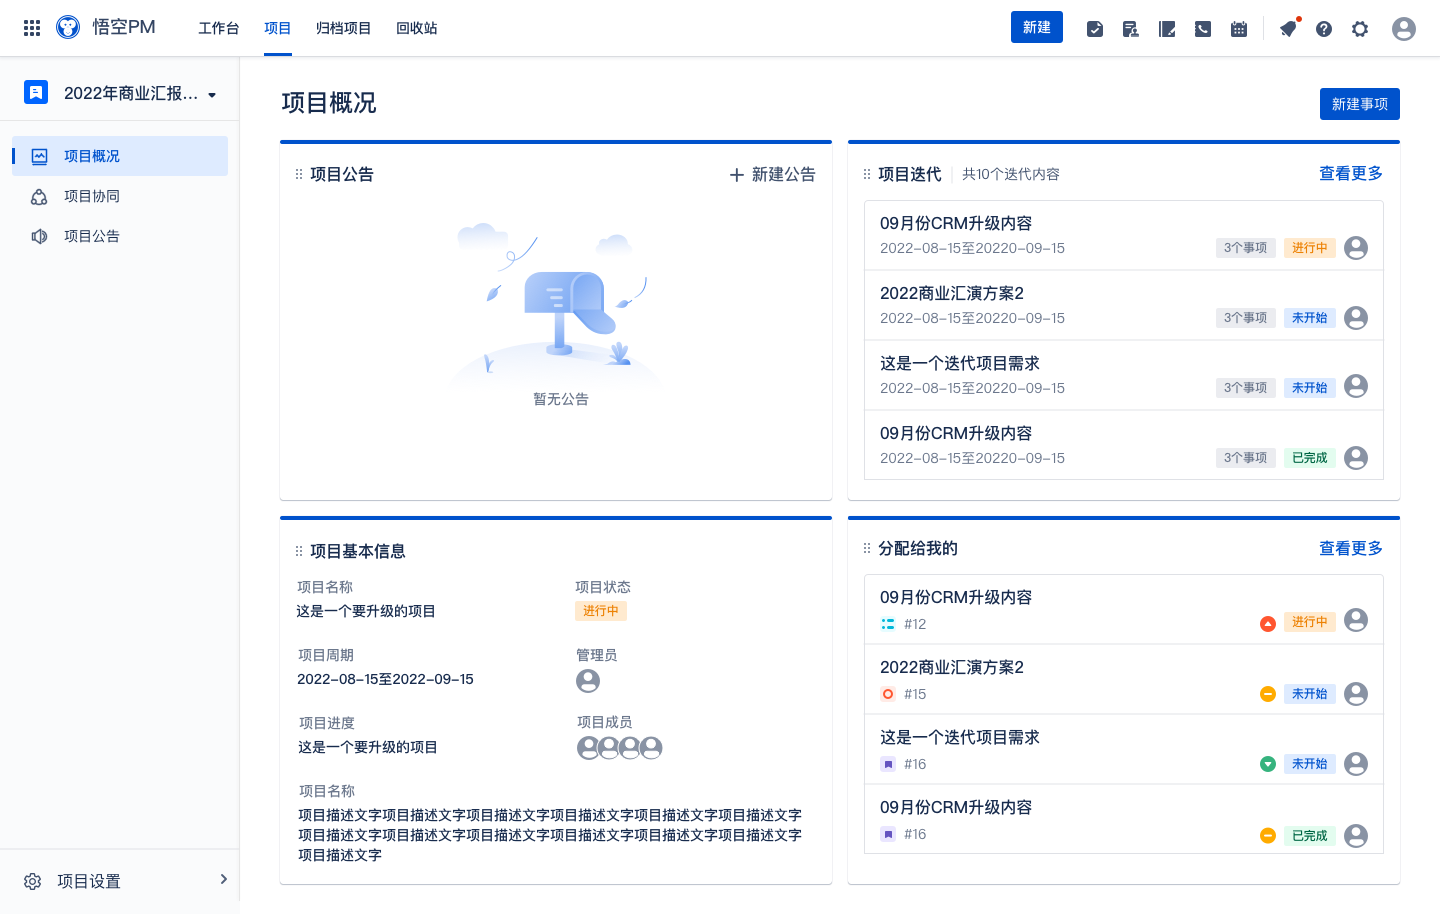
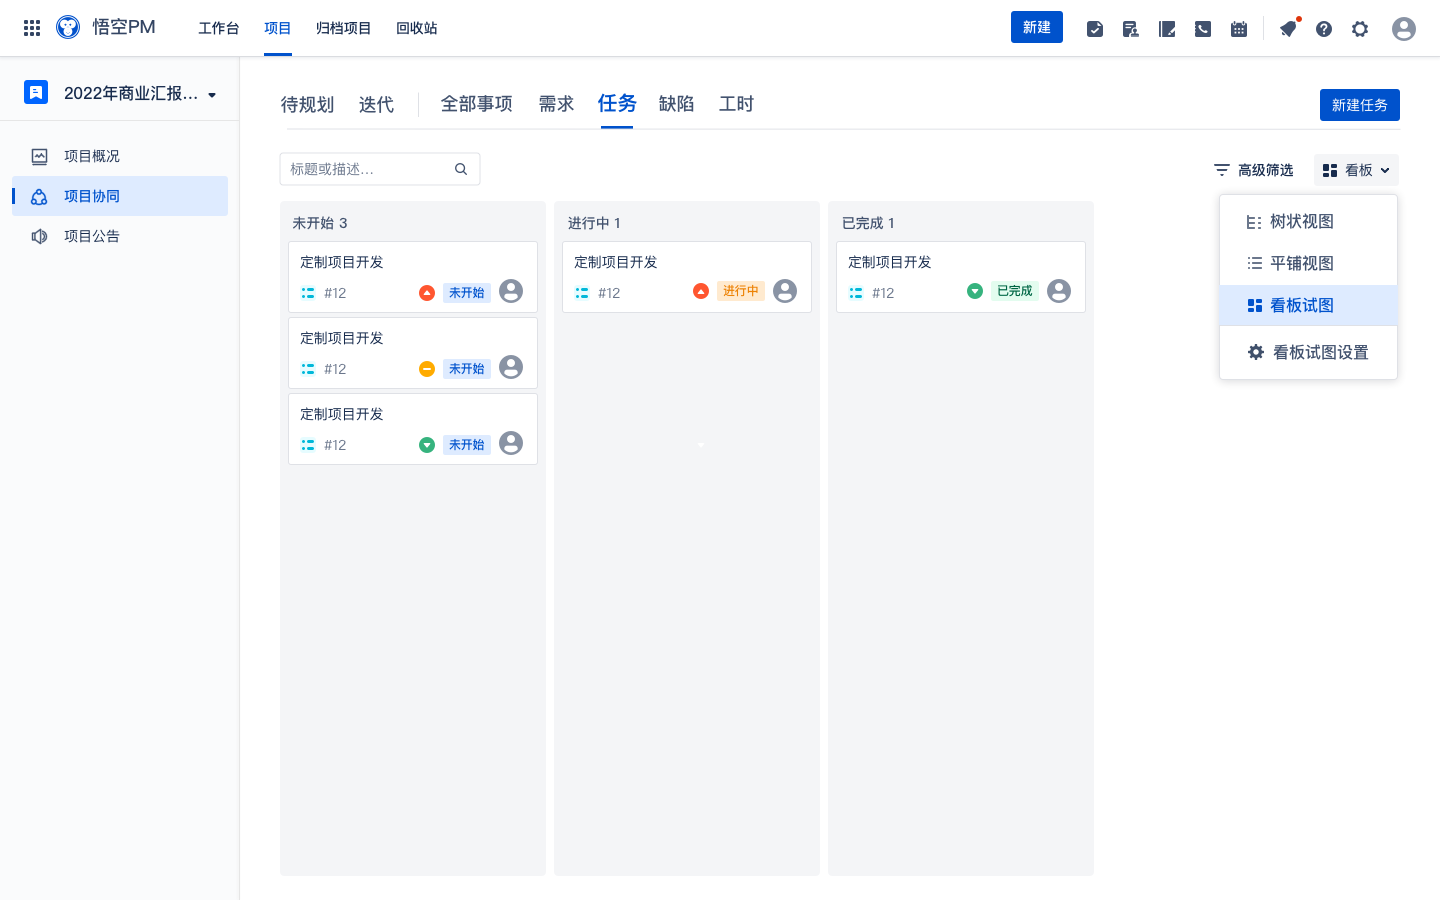
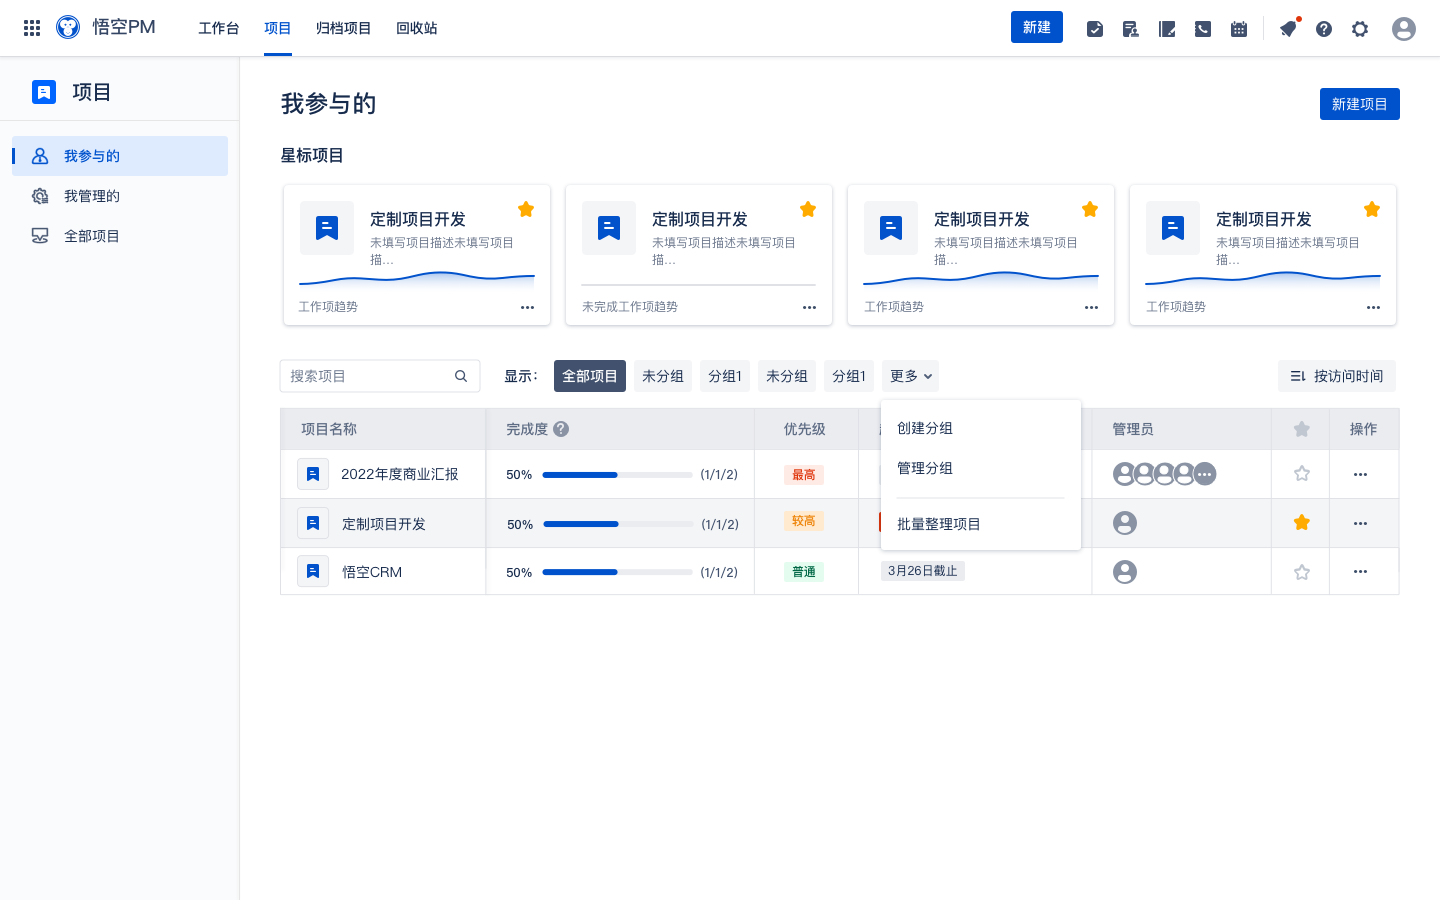
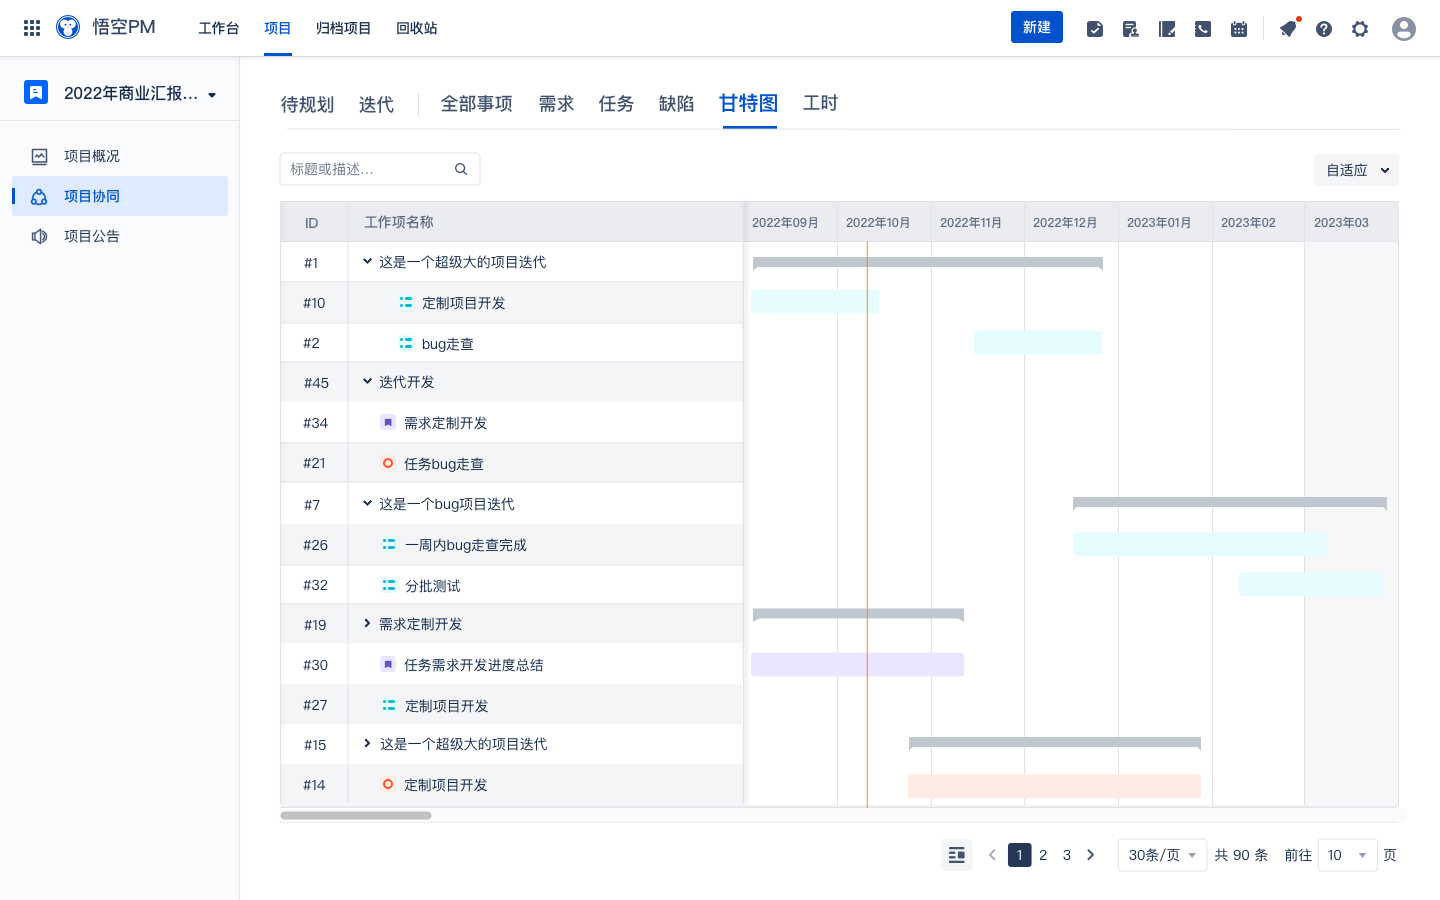
项目管理正式开源,借助CRM项目管理可以帮助你的团队进行项目的管控,你可以快速分配员工任务、通过甘特图随时了解进度等,提升企业管理能力。
# 项目管理目录结构
``` lua
wk_pm
├── work -- 项目管理模块
├── DB -- sql文件
├── common -- 基础模块
├── ux -- 前端源码
```
# 核心功能模块
**建立标准化项目流程**
**项目附件数据完整记录**
**支持多人、跨部门的协作**
**多维度视图展示,轻松掌控项目推进进度**
**精细化项目权限,确保项目数据安全**
**与其他模块信息互通,信息展示更全面**
**多维数据统计,让项目管理有据可循**
# 后端:
|名称 | 版本 | 说明 |
|---------------------|---------------------------|---- |
| spring-cloud-alibaba| 2021.0.4 | 核心框架 |
| spring-boot | 2.6.11 | spring版本 |
| mybatis-plus | 3.5.2 | ORM框架 |
| nacos | 2.1.0 | 注册中心以及配置管理 |
| seata | 1.2.0 | 分布式事务 |
| jetcache | 2.7.1 | 分布式缓存框架 |
| feign | 3.1.4 | 服务调用 |
# 前端:
| 技术 | 说明 | 版本 |
| --- | --- | --- |
| [Vue](https://vuejs.org) | 框架 | 2.5.17 |
| [Vue-router](https://router.vuejs.org) | 路由框架 | 3.0.1 |
| [Vuex](https://vuex.vuejs.org) | 全局状态管理框架 | 3.0.1 |
| [Element](https://element.eleme.io) | UI框架 | 2.12.0 |
| [Axios](https://github.com/axios/axios) | HTTP框架 | 0.18.0 |
# 使用说明
### 一、前置环境
- Jdk1.8
- Maven3.5^
- Mysql5.7^
- Redis(版本不限)
- Nacos(1.4^)
### 安装说明
#### 一、依赖环境安装
###### 1. 安装jdk
```
yum -y install java-1.8.0-openjdk-devel;
```
###### 2. 安装redis
```
yum -y install epel-release;
yum -y install redis;
chkconfig redis on;
#-- 修改redis密码为123456
yum -y install vim;
vim /etc/redis.conf;
#-- 在文件最下面追加一行
requirepass 123456
#-- 或者输入 / 搜索 # requirepass foobared
#-- 将前面的#删除,将foobared改为123456
#-- 修改完成之后 :wq 保存并退出,重启redis
service redis restart;
```
###### 3.安装nacos [官方文档](https://nacos.io/zh-cn/docs/v2/quickstart/quick-start.html)
```
# 保存到/opt目录下
wget https://github.com/alibaba/nacos/releases/download/2.0.3/nacos-server-2.0.3.zip -P /opt
yum install unzip
unzip /opt/nacos-server-2.0.3.zip -d /opt/nacos
cd /opt/nacos/bin
sh startup.sh -m standalone
```
###### 4.安装mysql
```
wget https://repo.mysql.com//mysql80-community-release-el7-3.noarch.rpm
yum -y install mysql80-community-release-el7-3.noarch.rpm
yum -y install mysql-community-server --nogpgcheck
sudo systemctl start mysqld.service;
sudo systemctl enable mysqld.service;
--查看安装的mysql默认密码
grep "password" /var/log/mysqld.log
--进入mysql 例:mysql -u root -p"GXOO%eiI/7o>"
mysql - u root -p"此处为上一步的默认密码"
--修改mysql密码,如下图所示
set global validate_password_policy=LOW;
ALTER USER 'root'@'localhost' IDENTIFIED BY 'password';
--退出mysql
exit
--修改mysql配置
vim /etc/my.cnf;
--输入 i 进入编辑模式,修改sql_mode设置,将下面sql_mode配置复制,到 [mysqld]下使用 shift+insert 粘贴
sql_mode=STRICT_TRANS_TABLES,NO_ZERO_IN_DATE,NO_ZERO_DATE,ERROR_FOR_DIVISION_BY_ZERO,NO_ENGINE_SUBSTITUTION
--修改完毕,按esc按键,然后 :wq 保存并退出,重启mysql
service mysqld restart;
```
#### 二、项目配置与启动
###### 1.导入DB目录下数据库
###### 2.在项目根目录执行mvn install
###### 2.修改配置信息
###### 3.在work模块下resource目录配置数据库帐号信息以及redis帐号信息`
###### 注册之后点击默认企业

###### 点击无代码管理

##### 将App ID,accessKey,secretKey复制到 work\src\main\resources\application-dev.yml,分别对应appId,clientId,clientSecret 如下图所示

###### 5. 项目打包部署
```
--项目打包
mkdir /opt/package
mvn clean -Dmaven.test.skip=true package
cp work/target/work.zip /opt/package
cd /opt/package
unzip work.zip -d work
cd work
sh 72crm.sh start
```
###### 6. 前端项目项目运行、打包
```
- 下载node并安装(LTS):https://nodejs.org/;
- 该项目为前后端分离项目,本地访问需搭建后台环境,请参考[后端项目](https://gitee.com/wukongcrm/crm_pro);
- 访问线上接口无需搭建后台环境,只需将config/index.js文件中的dev下的proxyTable中的target改为线上地址即可;
- 执行 npm install,下载相关依赖;
- 执行 npm run dev,运行项目;
- 执行成功,即可访问http://localhost:8090,查看;
打包:
- 需将config/prod.env.js文件中的BASE_API,调整为自己需要的
- 执行 npm run build
- 打包完成
```
### 三、其他说明
#### 1.接口文档
```
接口文档地址:http://localhost:46923/doc.html
```
#### 2.docker镜像
```
敬请期待
```
### 四、项目管理功能模块预览