# ModStartCMS
**Repository Path**: what1119/ModStartCMS
## Basic Information
- **Project Name**: ModStartCMS
- **Description**: 基于Laravel的模块化CMS,模块市场丰富,系统极速开发不二之选
- **Primary Language**: PHP
- **License**: Apache-2.0
- **Default Branch**: master
- **Homepage**: https://modstart.com
- **GVP Project**: No
## Statistics
- **Stars**: 0
- **Forks**: 144
- **Created**: 2021-11-19
- **Last Updated**: 2024-06-23
## Categories & Tags
**Categories**: Uncategorized
**Tags**: None
## README

一个模块式的快速开发框架


# ModStartCMS 基于Laravel的快速开发框架
## 🔥 当前版本
最新版本  ,基础功能已完善,后续功能正在加紧迭代开发中,欢迎交流
## 💡 系统简介
`ModStart` 是一个基于 `Laravel` 模块化的后台系统框架,很少的代码即可快速构建出一个功能完善的后台系统。其中模块市场包含了丰富则模块,开箱即用,让开发者能够从冗长的代码中提效,对后端开发者非常友好。
- [官方网站](https://modstart.com)
- [Demo / 在线演示](https://cms.demo.tecmz.com)
- [模块市场](https://modstart.com/store)
- [源码地址 / 码云](https://gitee.com/modstart/ModStartCMS)
- [源码地址 / GitHub](https://github.com/modstart/ModStartCMS)
**技术栈**
- [Laravel](https://laravel.com/)
- [jQuery](http://jquery.com)
- [Vue](https://vuejs.org/)
- [Element UI](https://element.eleme.io/)
- [LayUI](https://www.layui.com/)
## 💥 系统特性
- 简洁优雅、灵活可扩展
- 后台RBAC权限管理
- Ajax页面无刷新
- 组件按需加载静态资源
- 内置丰富的表格常用功能
- 内置文件上传,无需繁琐的开发
- 模块市场,只需在管理页面点击鼠标即可完成模块的安装、更新和卸载等操作
## 🎨 系统演示
### 前台演示地址
[http://cms.demo.tecmz.com/](http://cms.demo.tecmz.com/)
用户密码自行注册
### 后台演示地址
[http://cms.demo.tecmz.com/admin](http://cms.demo.tecmz.com/admin)
账号 | 密码| 操作权限
---|---|---
demo | 123456| 演示账号只可以查看不能操作
## 🌐 开发文档
[https://modstart.com/doc](https://modstart.com/doc)
> 系统文档不断完善中
## 🔧 系统安装
### 环境要求
- `PHP` : `5.6` 或 `7.0`
- `MySQL` >= `5.0`
- `PHP Extension`:`Fileinfo`
- `Apache/Nginx`
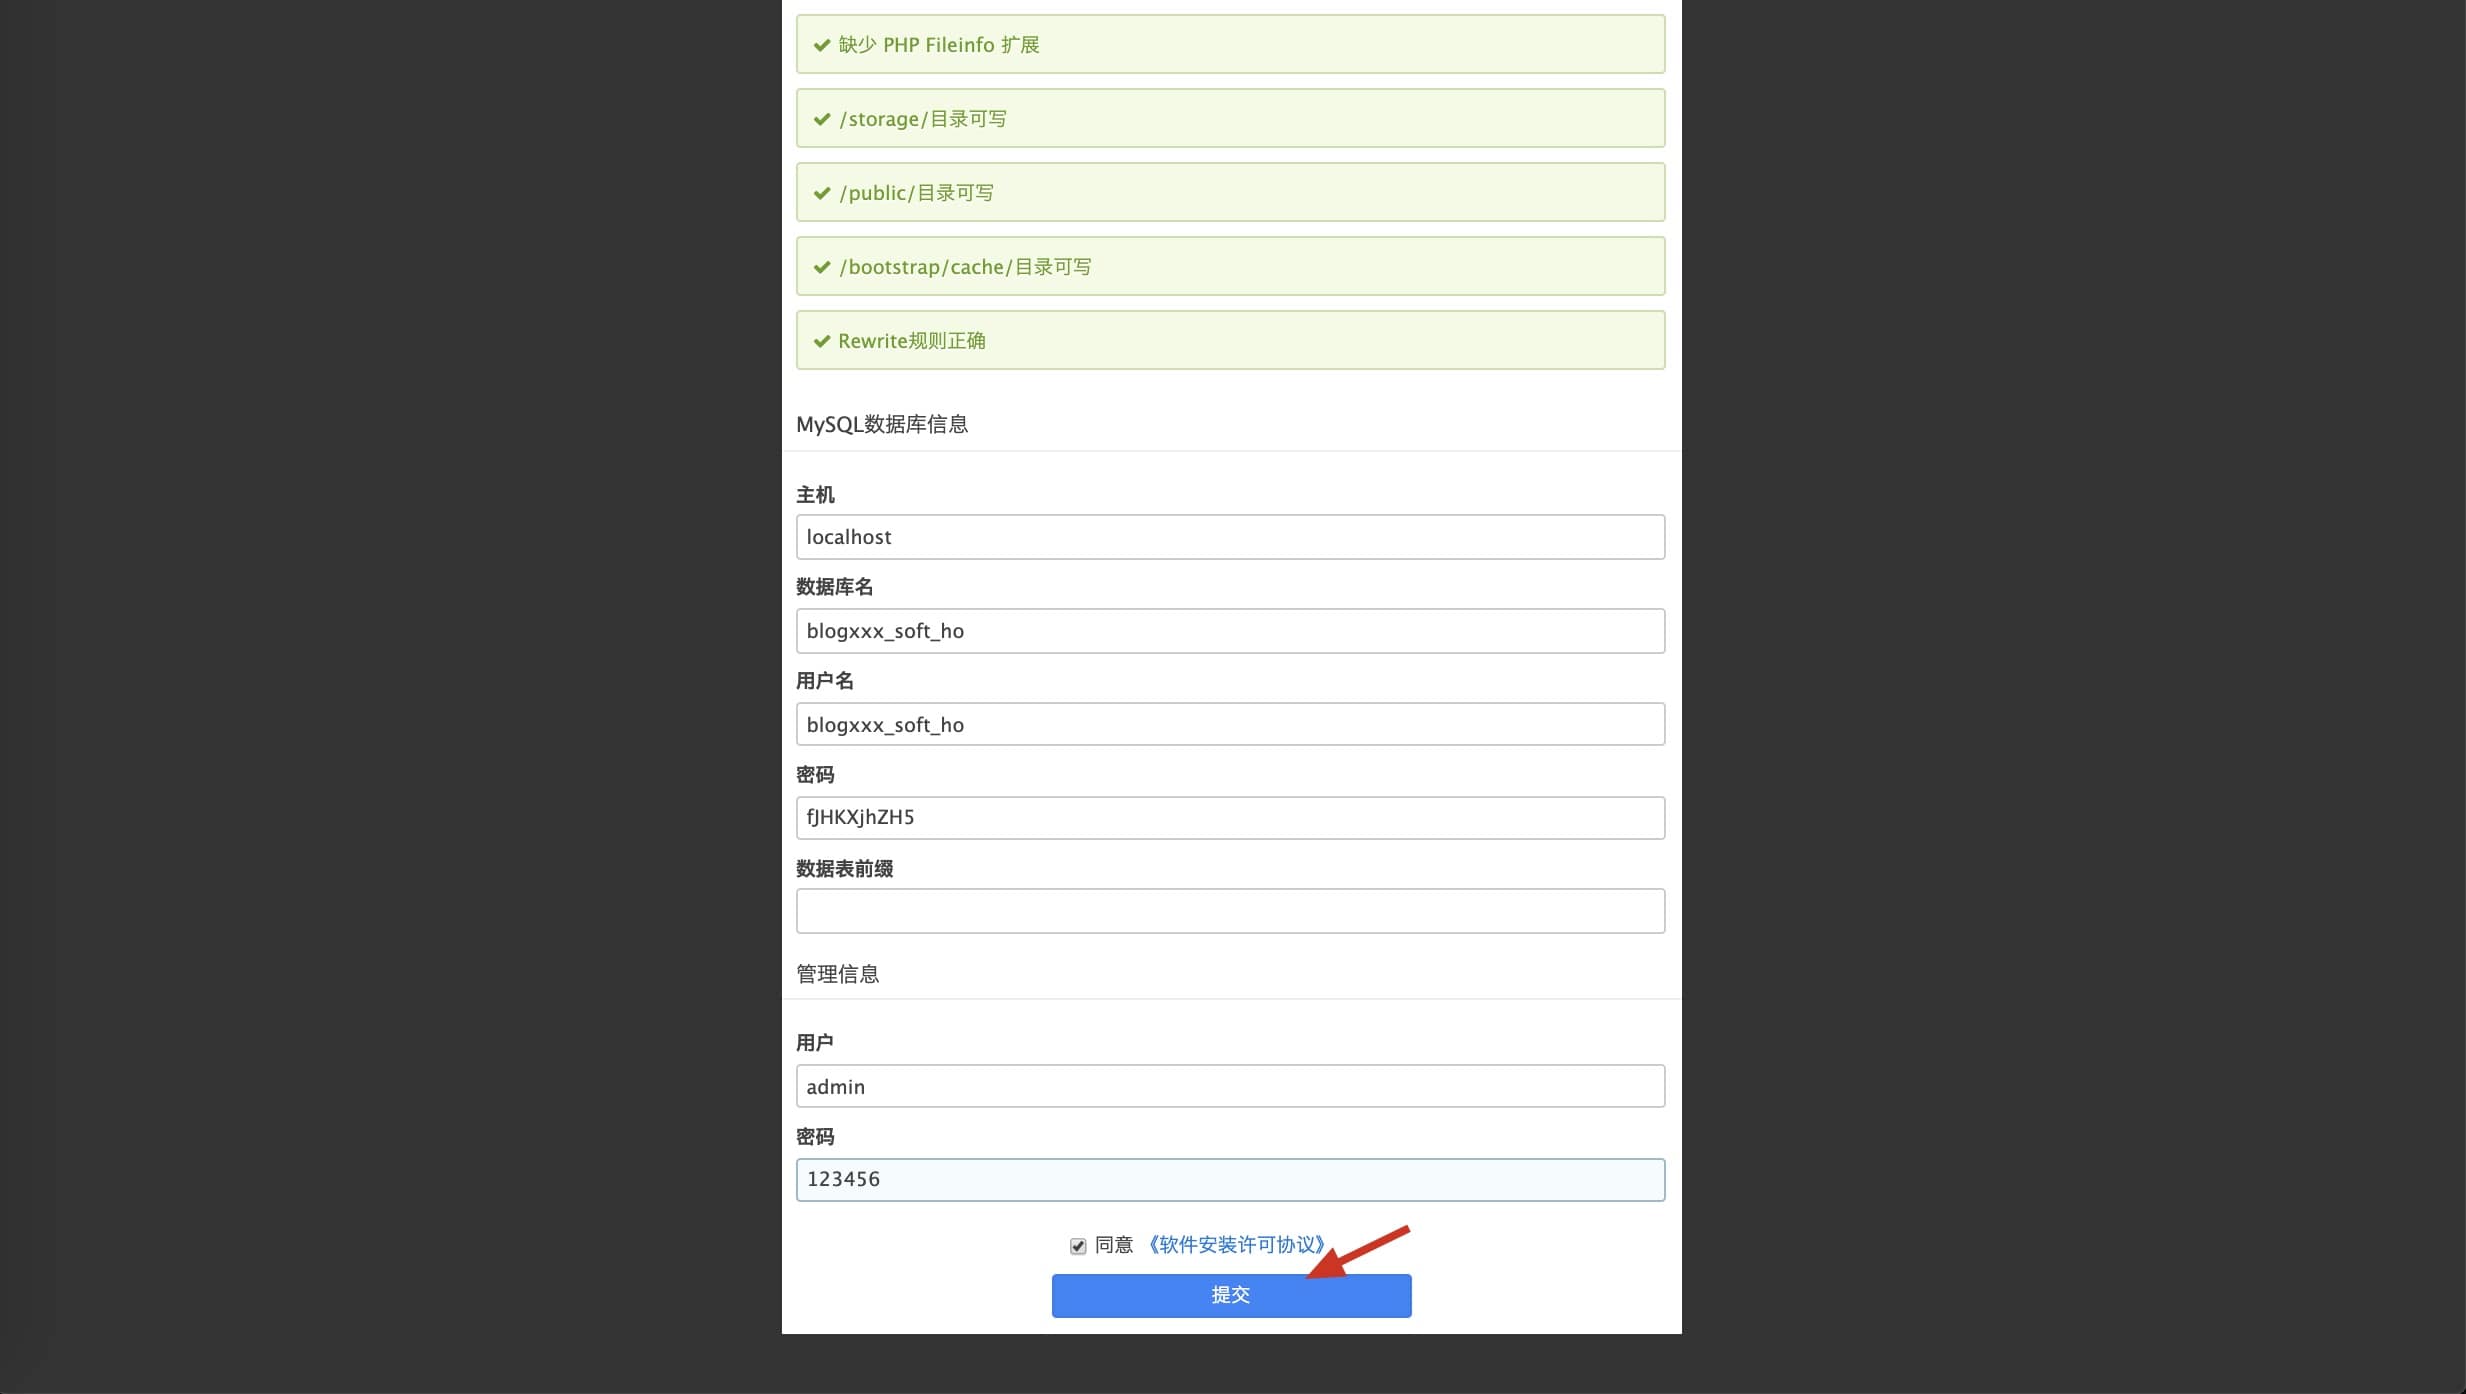
### 安装步骤
1. 配置 apache/nginx 服务器,请将网站的根目录配置到 <网站目录>/public
2. 访问 `http://www.xxx.com/install.php`
3. 使用安装引导向导进行安装
,基础功能已完善,后续功能正在加紧迭代开发中,欢迎交流
## 💡 系统简介
`ModStart` 是一个基于 `Laravel` 模块化的后台系统框架,很少的代码即可快速构建出一个功能完善的后台系统。其中模块市场包含了丰富则模块,开箱即用,让开发者能够从冗长的代码中提效,对后端开发者非常友好。
- [官方网站](https://modstart.com)
- [Demo / 在线演示](https://cms.demo.tecmz.com)
- [模块市场](https://modstart.com/store)
- [源码地址 / 码云](https://gitee.com/modstart/ModStartCMS)
- [源码地址 / GitHub](https://github.com/modstart/ModStartCMS)
**技术栈**
- [Laravel](https://laravel.com/)
- [jQuery](http://jquery.com)
- [Vue](https://vuejs.org/)
- [Element UI](https://element.eleme.io/)
- [LayUI](https://www.layui.com/)
## 💥 系统特性
- 简洁优雅、灵活可扩展
- 后台RBAC权限管理
- Ajax页面无刷新
- 组件按需加载静态资源
- 内置丰富的表格常用功能
- 内置文件上传,无需繁琐的开发
- 模块市场,只需在管理页面点击鼠标即可完成模块的安装、更新和卸载等操作
## 🎨 系统演示
### 前台演示地址
[http://cms.demo.tecmz.com/](http://cms.demo.tecmz.com/)
用户密码自行注册
### 后台演示地址
[http://cms.demo.tecmz.com/admin](http://cms.demo.tecmz.com/admin)
账号 | 密码| 操作权限
---|---|---
demo | 123456| 演示账号只可以查看不能操作
## 🌐 开发文档
[https://modstart.com/doc](https://modstart.com/doc)
> 系统文档不断完善中
## 🔧 系统安装
### 环境要求
- `PHP` : `5.6` 或 `7.0`
- `MySQL` >= `5.0`
- `PHP Extension`:`Fileinfo`
- `Apache/Nginx`
### 安装步骤
1. 配置 apache/nginx 服务器,请将网站的根目录配置到 <网站目录>/public
2. 访问 `http://www.xxx.com/install.php`
3. 使用安装引导向导进行安装
**Nginx参考配置**
```
server {
listen 80;
server_name xx.com;x
charset utf-8;
index index.php index.html;
root /var/www/html/xxx.com/public;
autoindex off;
location ^~ /.git {
deny all;
}
location / {
try_files $uri $uri/ /index.php?$query_string;
}
location ~ \.php$ {
fastcgi_pass 127.0.0.1:9000;
fastcgi_index index.php;
fastcgi_param PHP_VALUE "open_basedir=/var/www/html/xxx.com/:/tmp/:/var/tmp/";
fastcgi_param SCRIPT_FILENAME $document_root$fastcgi_script_name;
include fastcgi_params;
}
location ~ \.(gif|jpg|jpeg|png|bmp|ico|css|js)$ {
expires max;
}
location ~* \.(eot|ttf|woff|woff2)$ {
add_header Access-Control-Allow-Origin '*';
}
}
```
**Apache参考配置**
```
ServerName xxx.com
DocumentRoot d:/wwwroot/xxx.com/public
```
### 集成环境
- 宝塔一键安装教程:[https://modstart.com/doc/install/baota.html](https://modstart.com/doc/install/baota.html)
- PHPStudy一键安装教程:[https://modstart.com/doc/install/phpstudy.html](https://modstart.com/doc/install/phpstudy.html)
- Docker一键安装教程:[https://modstart.com/doc/install/docker.html](https://modstart.com/doc/install/docker.html)
### 环境预检
为方便系统环境快速配置,我们提供了服务器端安装环境预检程序。使用方式如下:
1. 通过连接下载文件 https://modstart.com/env_check.zip ,解压出 `env_check.php` 文件。
2. 将 `env_check.php` 文件上传到服务器空间,配置通过访问 `http://www.xxx.com/env_check.php` 来查看安装环境是否配置成功,如果环境预检成功,可以看到如下提示。

### 升级指南
参照 [https://modstart.com/doc/install/upgrade.html](https://modstart.com/doc/install/upgrade.html)
### 版本策略
ModStart 的版本发行将会参考主流 web 框架的发行策略,尽量降低版本升级带来的影响,最大程度的考虑兼容性问题,小版本的升级将尽量不改动任何功能接口;同时我们也将会提供更新日志,详细说明新版本的改动以及可能造成的影响。
对于小版本的发行,开发者可以放心的升级,基本不用担心代码兼容性问题。只有像从 v2.0.0 到 v3.0.0 这样的大版本升级才可能会有兼容性问题,小版本则基本是完全兼容的(小版本升级也可能会有不兼容的情况,但几率很小)。
## 🔨 快速开发
在日常开发中,最常见的即是增删改查代码,使用ModStart开发此类功能,会变得非常简单。
下面将会给大家介绍 `ModStart` 的使用方法,以及一个增删改查页面的基本构成。通过学习下面的内容将可以帮助大家快速理解这个系统的基本使用方法。
### 创建数据表
在Laravel的迁移目录创建数据库迁移文件
```php
class CreateNews extends Migration
{
public function up()
{
Schema::create('news', function (Blueprint $table) {
$table->increments('id');
$table->timestamps();
$table->string('title', 200)->nullable()->comment('');
$table->string('cover', 200)->nullable()->comment('');
$table->string('summary', 200)->nullable()->comment('');
$table->text('content')->nullable()->comment('');
});
}
}
public function down()
{
}
}
```
### 创建控制器
增加路由控制器代码,同时按照
```php
class NewsController extends Controller
{
use HasAdminQuickCRUD;
protected function crud(AdminCRUDBuilder $builder)
{
$builder
->init('news')
->field(function ($builder) {
$builder->id('id','ID');
$builder->text('title', '名称');
$builder->image('cover', '封面');
$builder->textarea('summary', '摘要');
$builder->richHtml('content', '内容');
$builder->display('created_at', '创建时间');
$builder->display('updated_at', '更新时间');
})
->gridFilter(function (GridFilter $filter) {
$filter->eq('id', 'ID');
$filter->like('title', '标题');
})
->title('新闻管理');
}
}
```
### 增加路由和导航
在 `routes.php` 增加路由信息
```php
$router->match(['get', 'post'], 'news/news', 'NewsController@index');
$router->match(['get', 'post'], 'news/news/add', 'NewsController@add');
$router->match(['get', 'post'], 'news/news/edit', 'NewsController@edit');
$router->match(['get', 'post'], 'news/news/delete', 'NewsController@delete');
$router->match(['get', 'post'], 'news/news/show', 'NewsController@show');
```
在 `ModuleServiceProvider.php` 中注册菜单信息
```php
AdminMenu::register(function () {
return [
[
'title' => '新闻管理',
'icon' => 'list',
'sort' => 150,
'url' => '\App\Admin\Controller\NewsController@index',
]
];
});
```
### 开发完成
这样一个简单的增删改查页面就开发完成了
## 🌭 开发前必读
### 开发前的配置
开发环境请打开 debug 模式(即在 `.env` 文件中设置 `APP_DEBUG=true` )
## ✨ 使用交流
### 加入我们
如果您对这个项目感兴趣,非常欢迎加入项目开发团队,参与这个项目的功能维护与开发。
欢迎任何形式的贡献(包括但不限于以下):
- 贡献代码
- 完善文档
- 撰写教程
- 完善注释
- ...
### 微信交流群

### QQ交流群
**QQ交流群:467107293**